Understanding Inventory Adjustment
What is Inventory Adjustment?
This is how users relay changes to items quantities, locations and statuses to ensure accurate, real time visibility across the system.
There are typically three commonly used Adjustment Types within Canary7.
Adjustment: Changing the quantity of inventory. Inventory can be be added or subtracted.
Status Change: Allows users to change the status of Inventory. For example, inventory status can be changed from Available to Held, order to prevent this stock being allocated. A commonly used Status Change seen within Canary7 is inventory being changed from Available to Quality Control in order to delineate which stock is required for Quality Control purposes and therefore cannot be allocated.
Transfer: Used moving items from one location to a different location.
User to Location Transfer: Allows the transfer of Inventory that is currently sitting with a User back to an Inventory Location.
Accessing Inventory Adjustment
Within the Navigation menu, click on the search bar, type ''Inventory Adjustment'' and click on "Inventory Adjustment". Inventory Adjustment is also in Inventory > Inventory Adjustment.
The most optimal way to utilise inventory adjustment is directly from Inventory Enquiry. This allows users the ability to preform Multi-Adjustments by selecting multiple items, clicking the ellipsis menu and selecting Multi-Adjustment as demonstrated below:
Completing a Multi-Adjustment
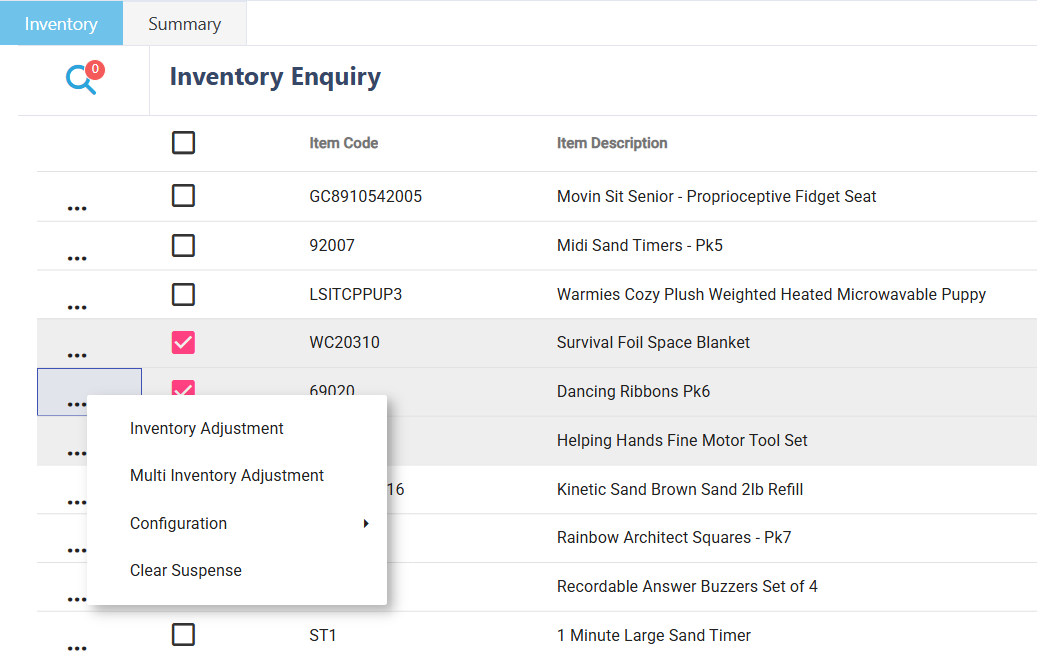
You will then have the ability to adjust the quantity, status or location of each item that has been selected, depending on the desired adjustment type.
Completing an Single Inventory Adjustment
Selecting the Inventory Adjustment Type
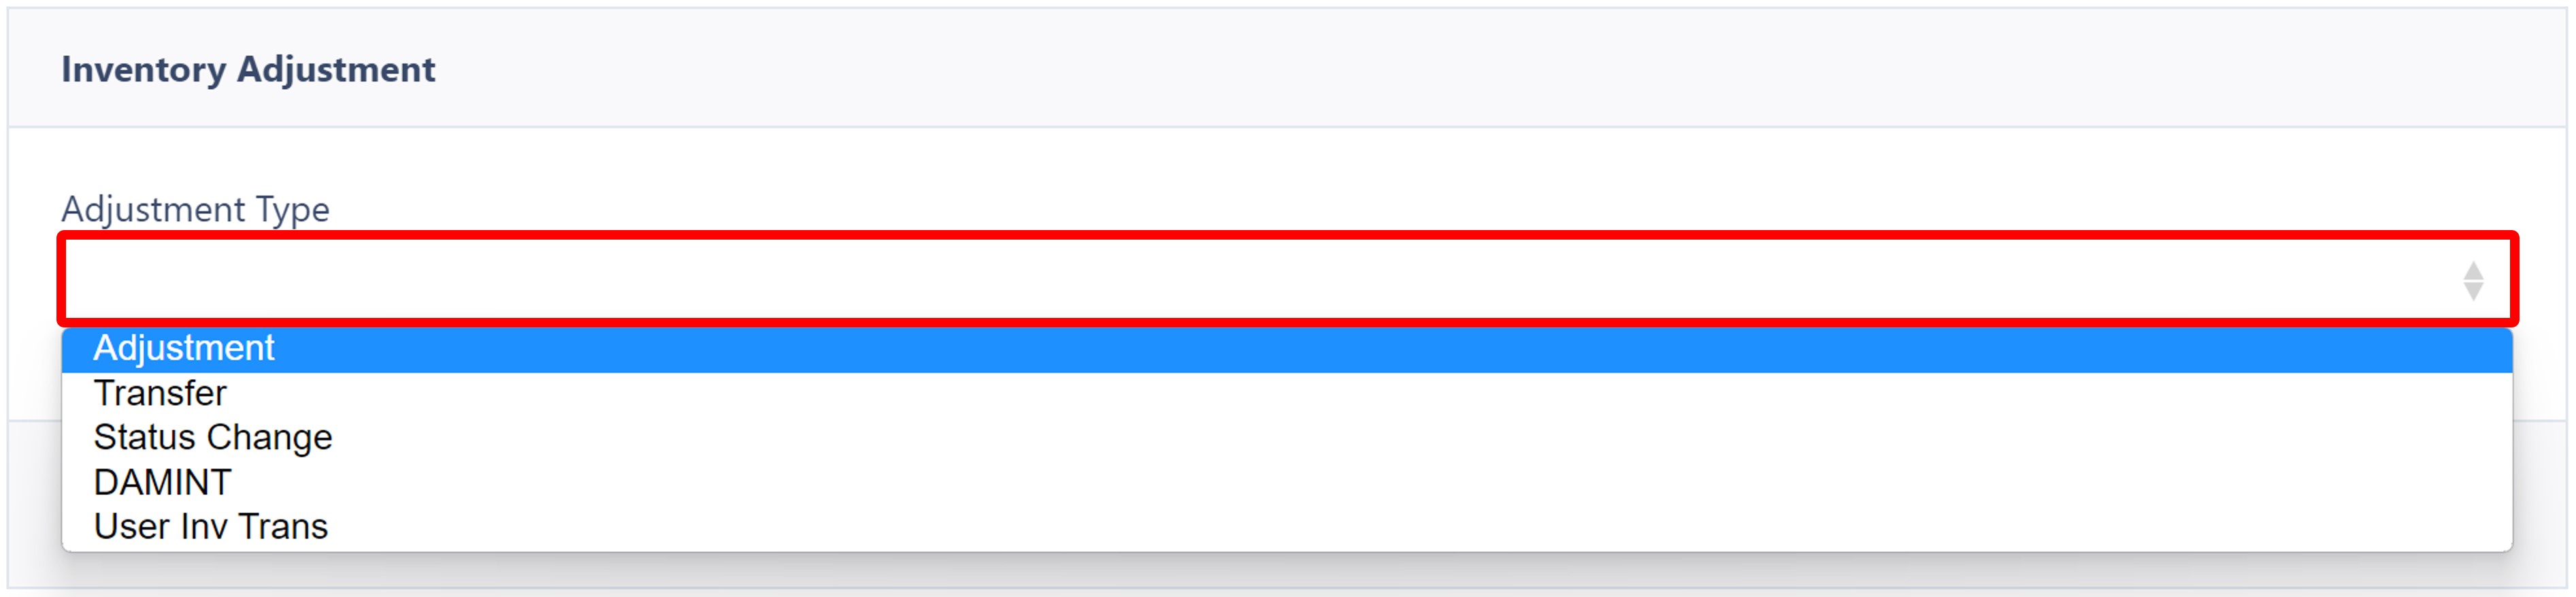
When you initially click on Inventory Adjustment, select an adjustment type, and it is a guide for creating an adjustment type
Depending on the Adjustment Type, each will have an Adjustment Class that will change the data entry fields.
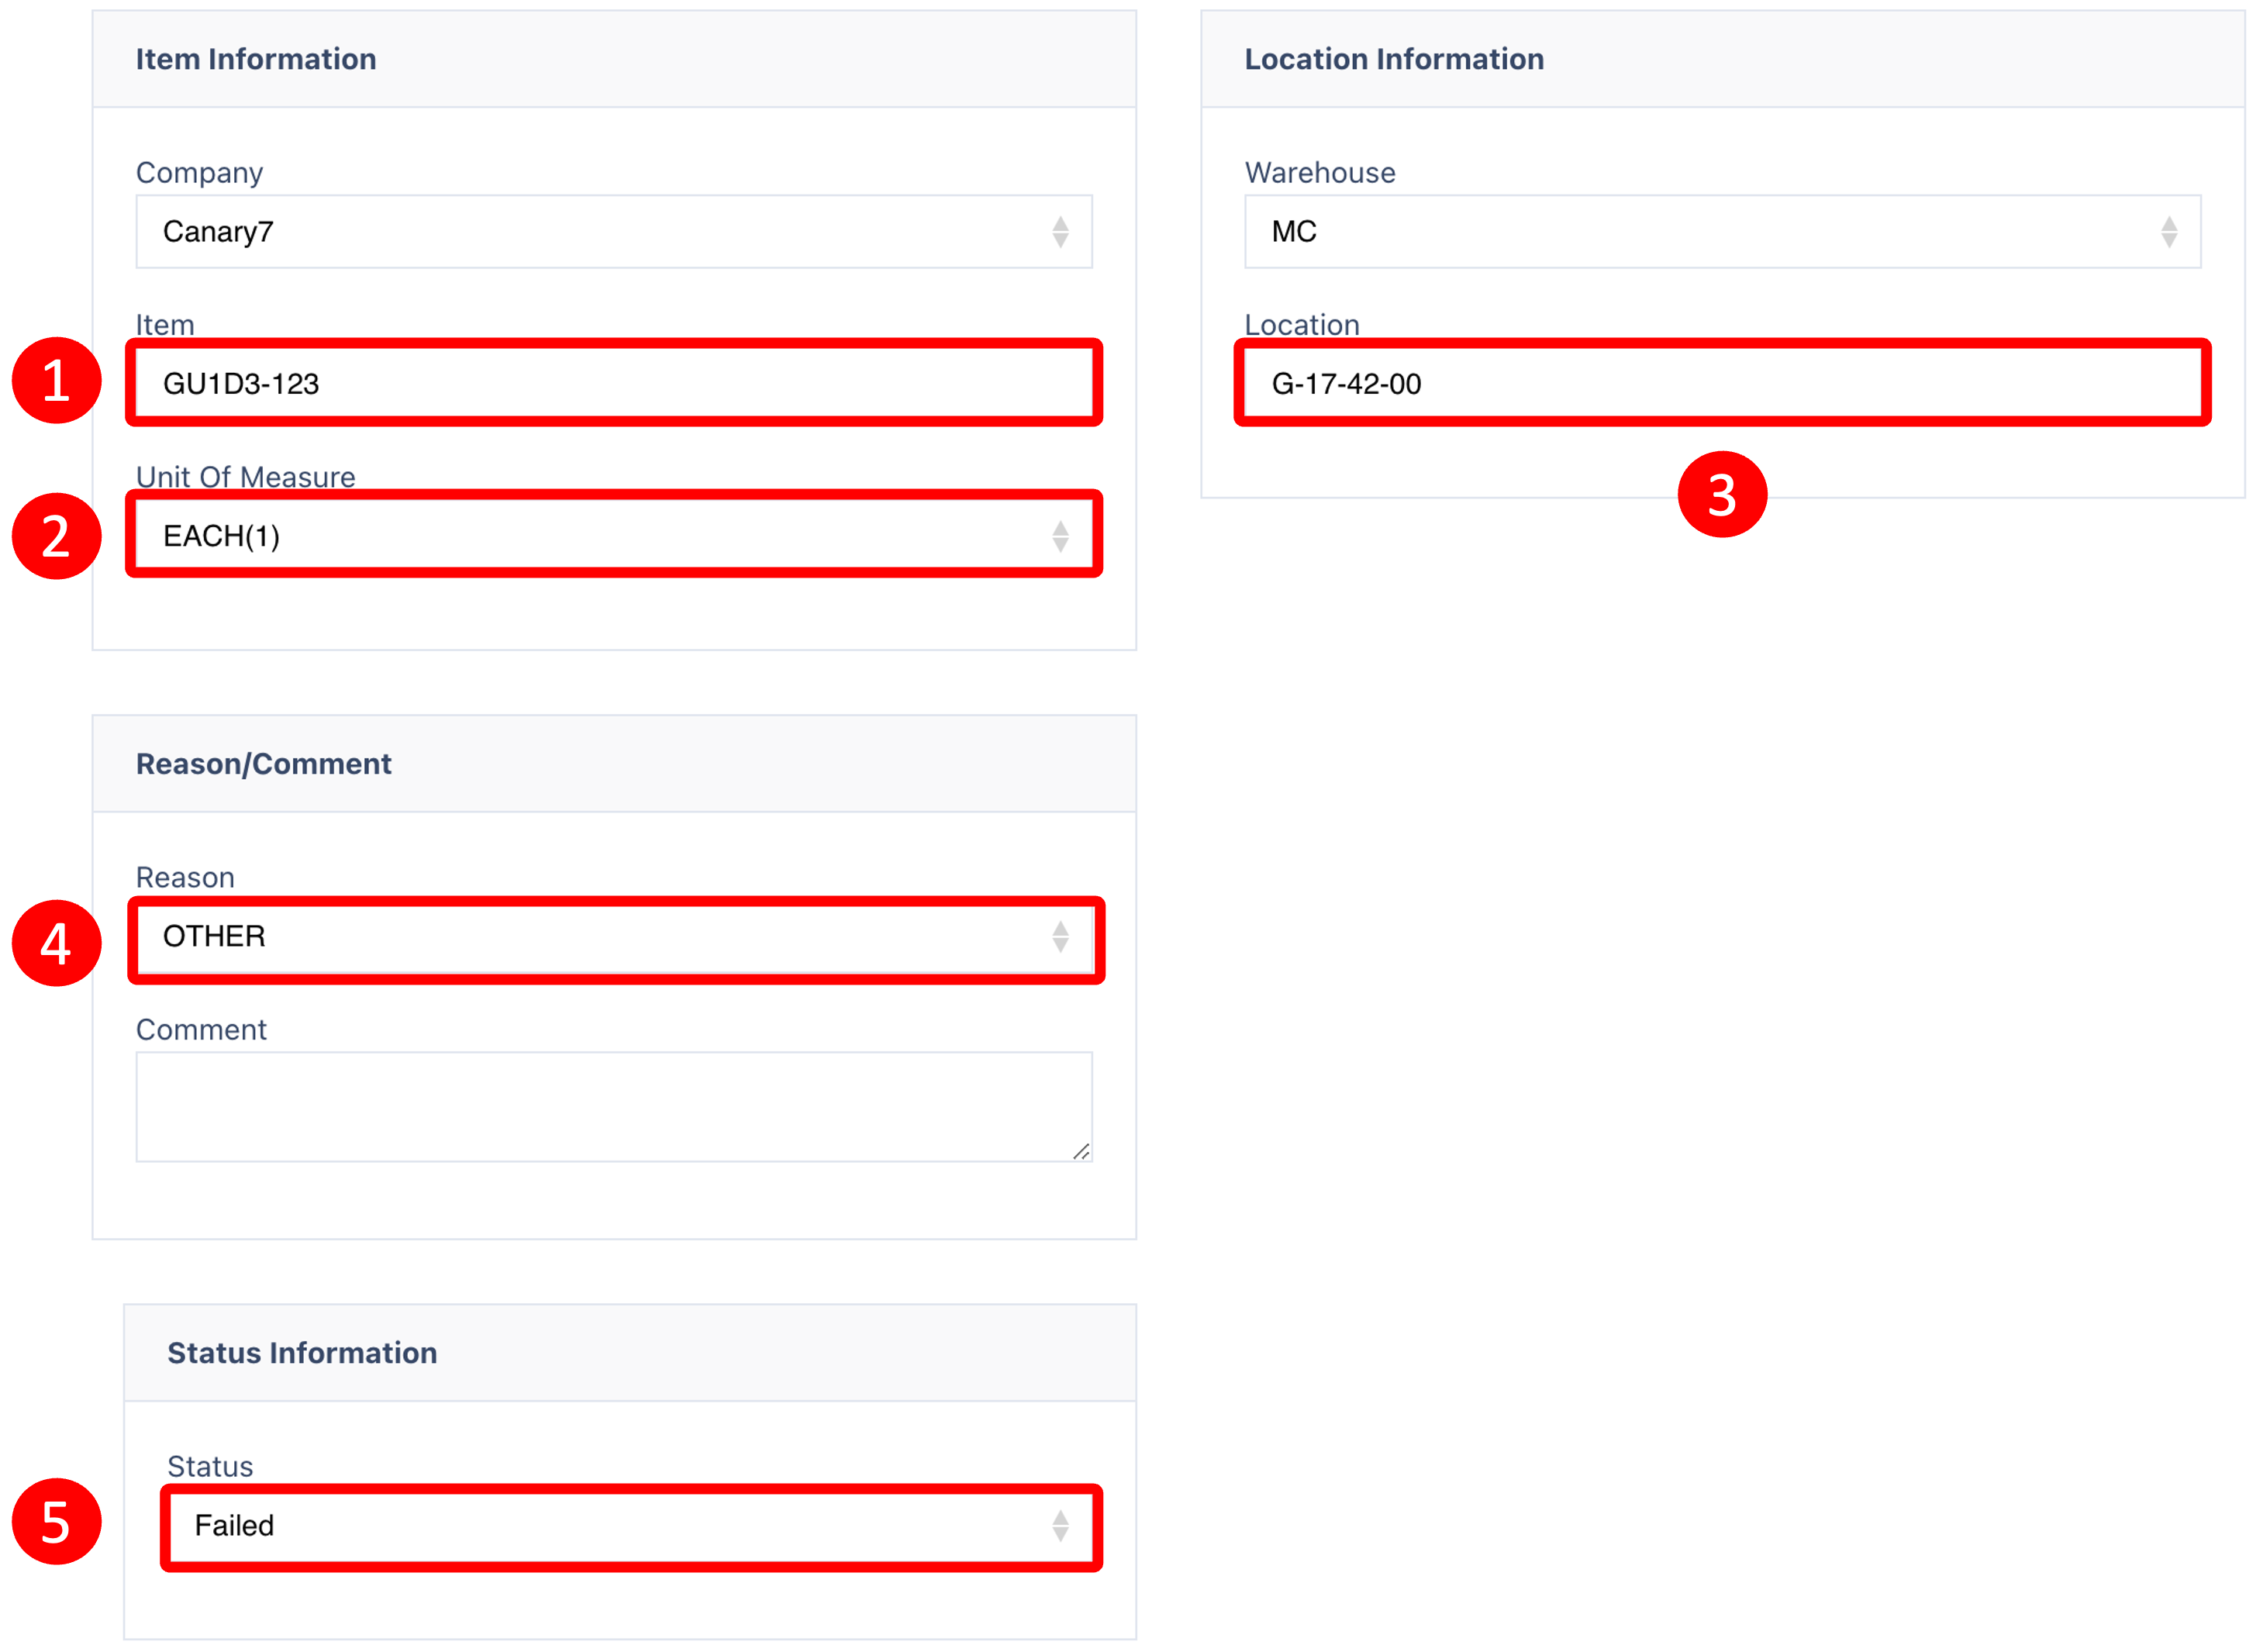
Adjustment Class
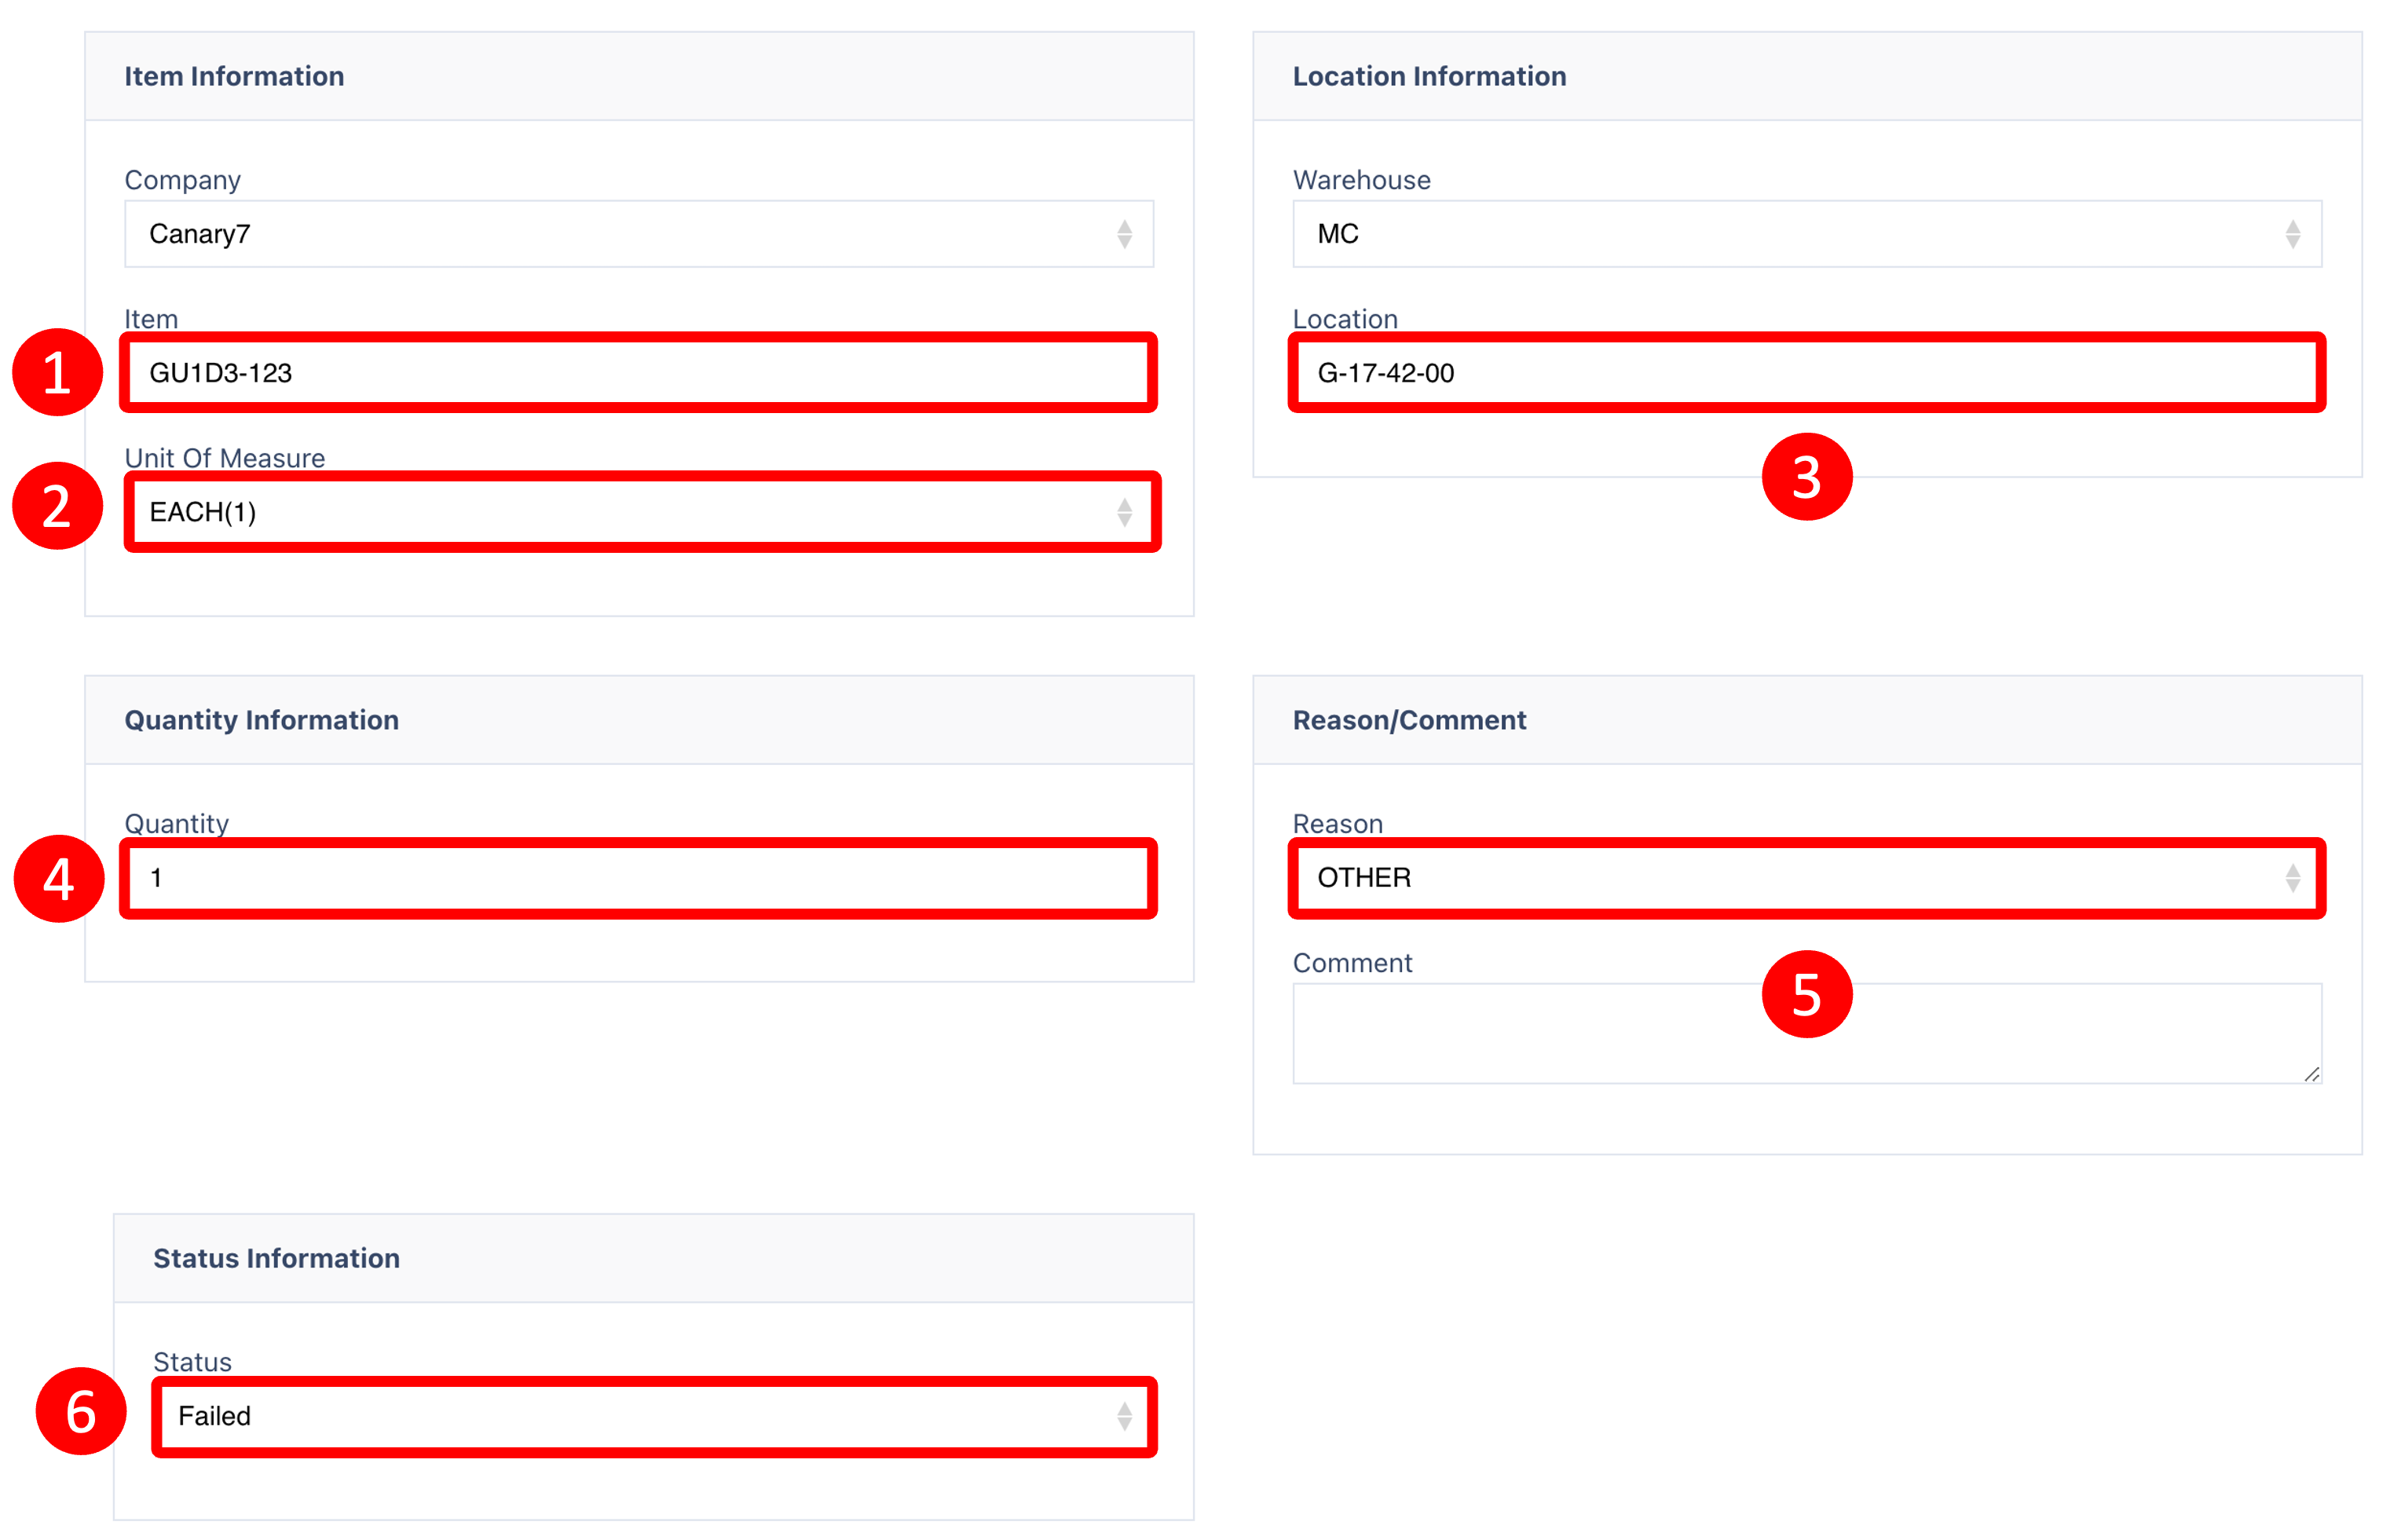
Enter or select the following:
- Item Code
- Unit of Measure
- Location
- Quantity
- Reason
- Status
Once you have selected and entered the required fields, click on the submit button.png) to add.
to add.
Transfer Class
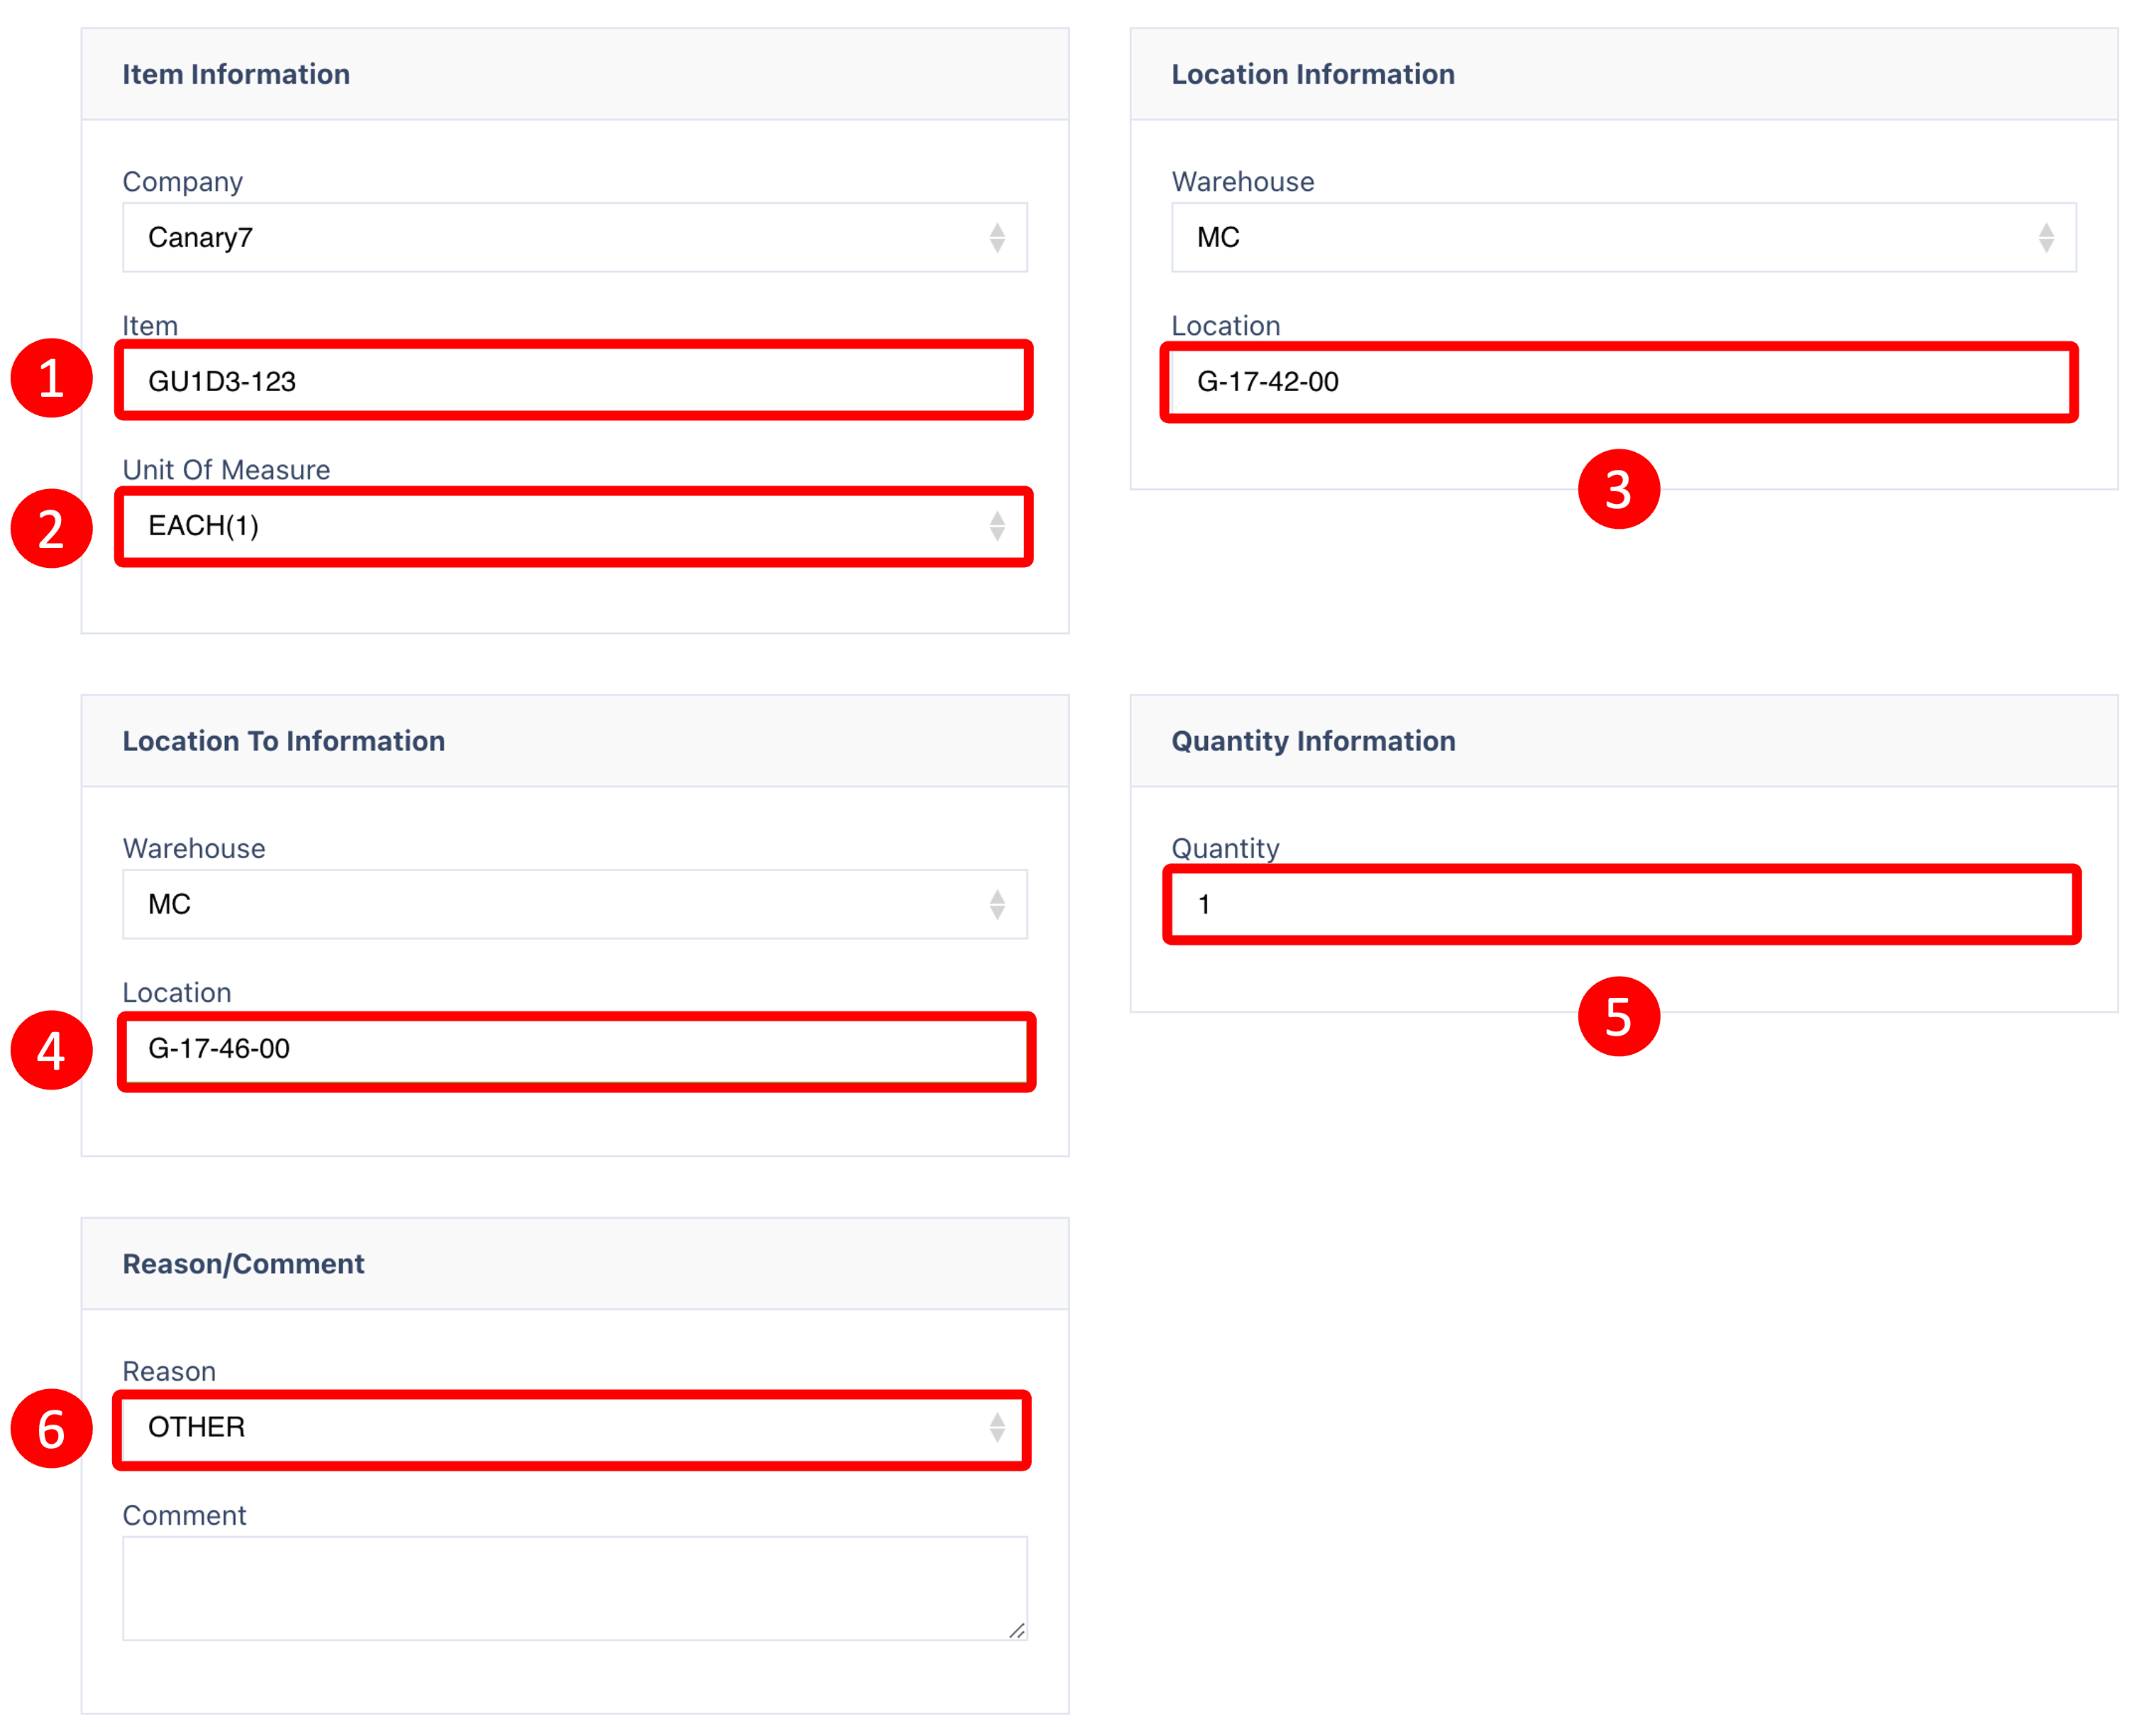
Enter or Select the following:
- Item Code
- Unit of Measure
- Location
- Location To (the new location that the product is transferring to)
- Quantity
- Reason
Once you have selected and entered the required fields, click on the submit button to add.
Status Change Class
Enter or Select the following:
- Item Code
- Unit of Measure
- Location
- Reason
- Status
Once you have selected and entered the required fields, click on the submit button to add.
User to Location Transfer Class
This is a lesser used Inventory Adjustment, in which an quantity of an item is with a user and needs to be adjusted into an inventory location.
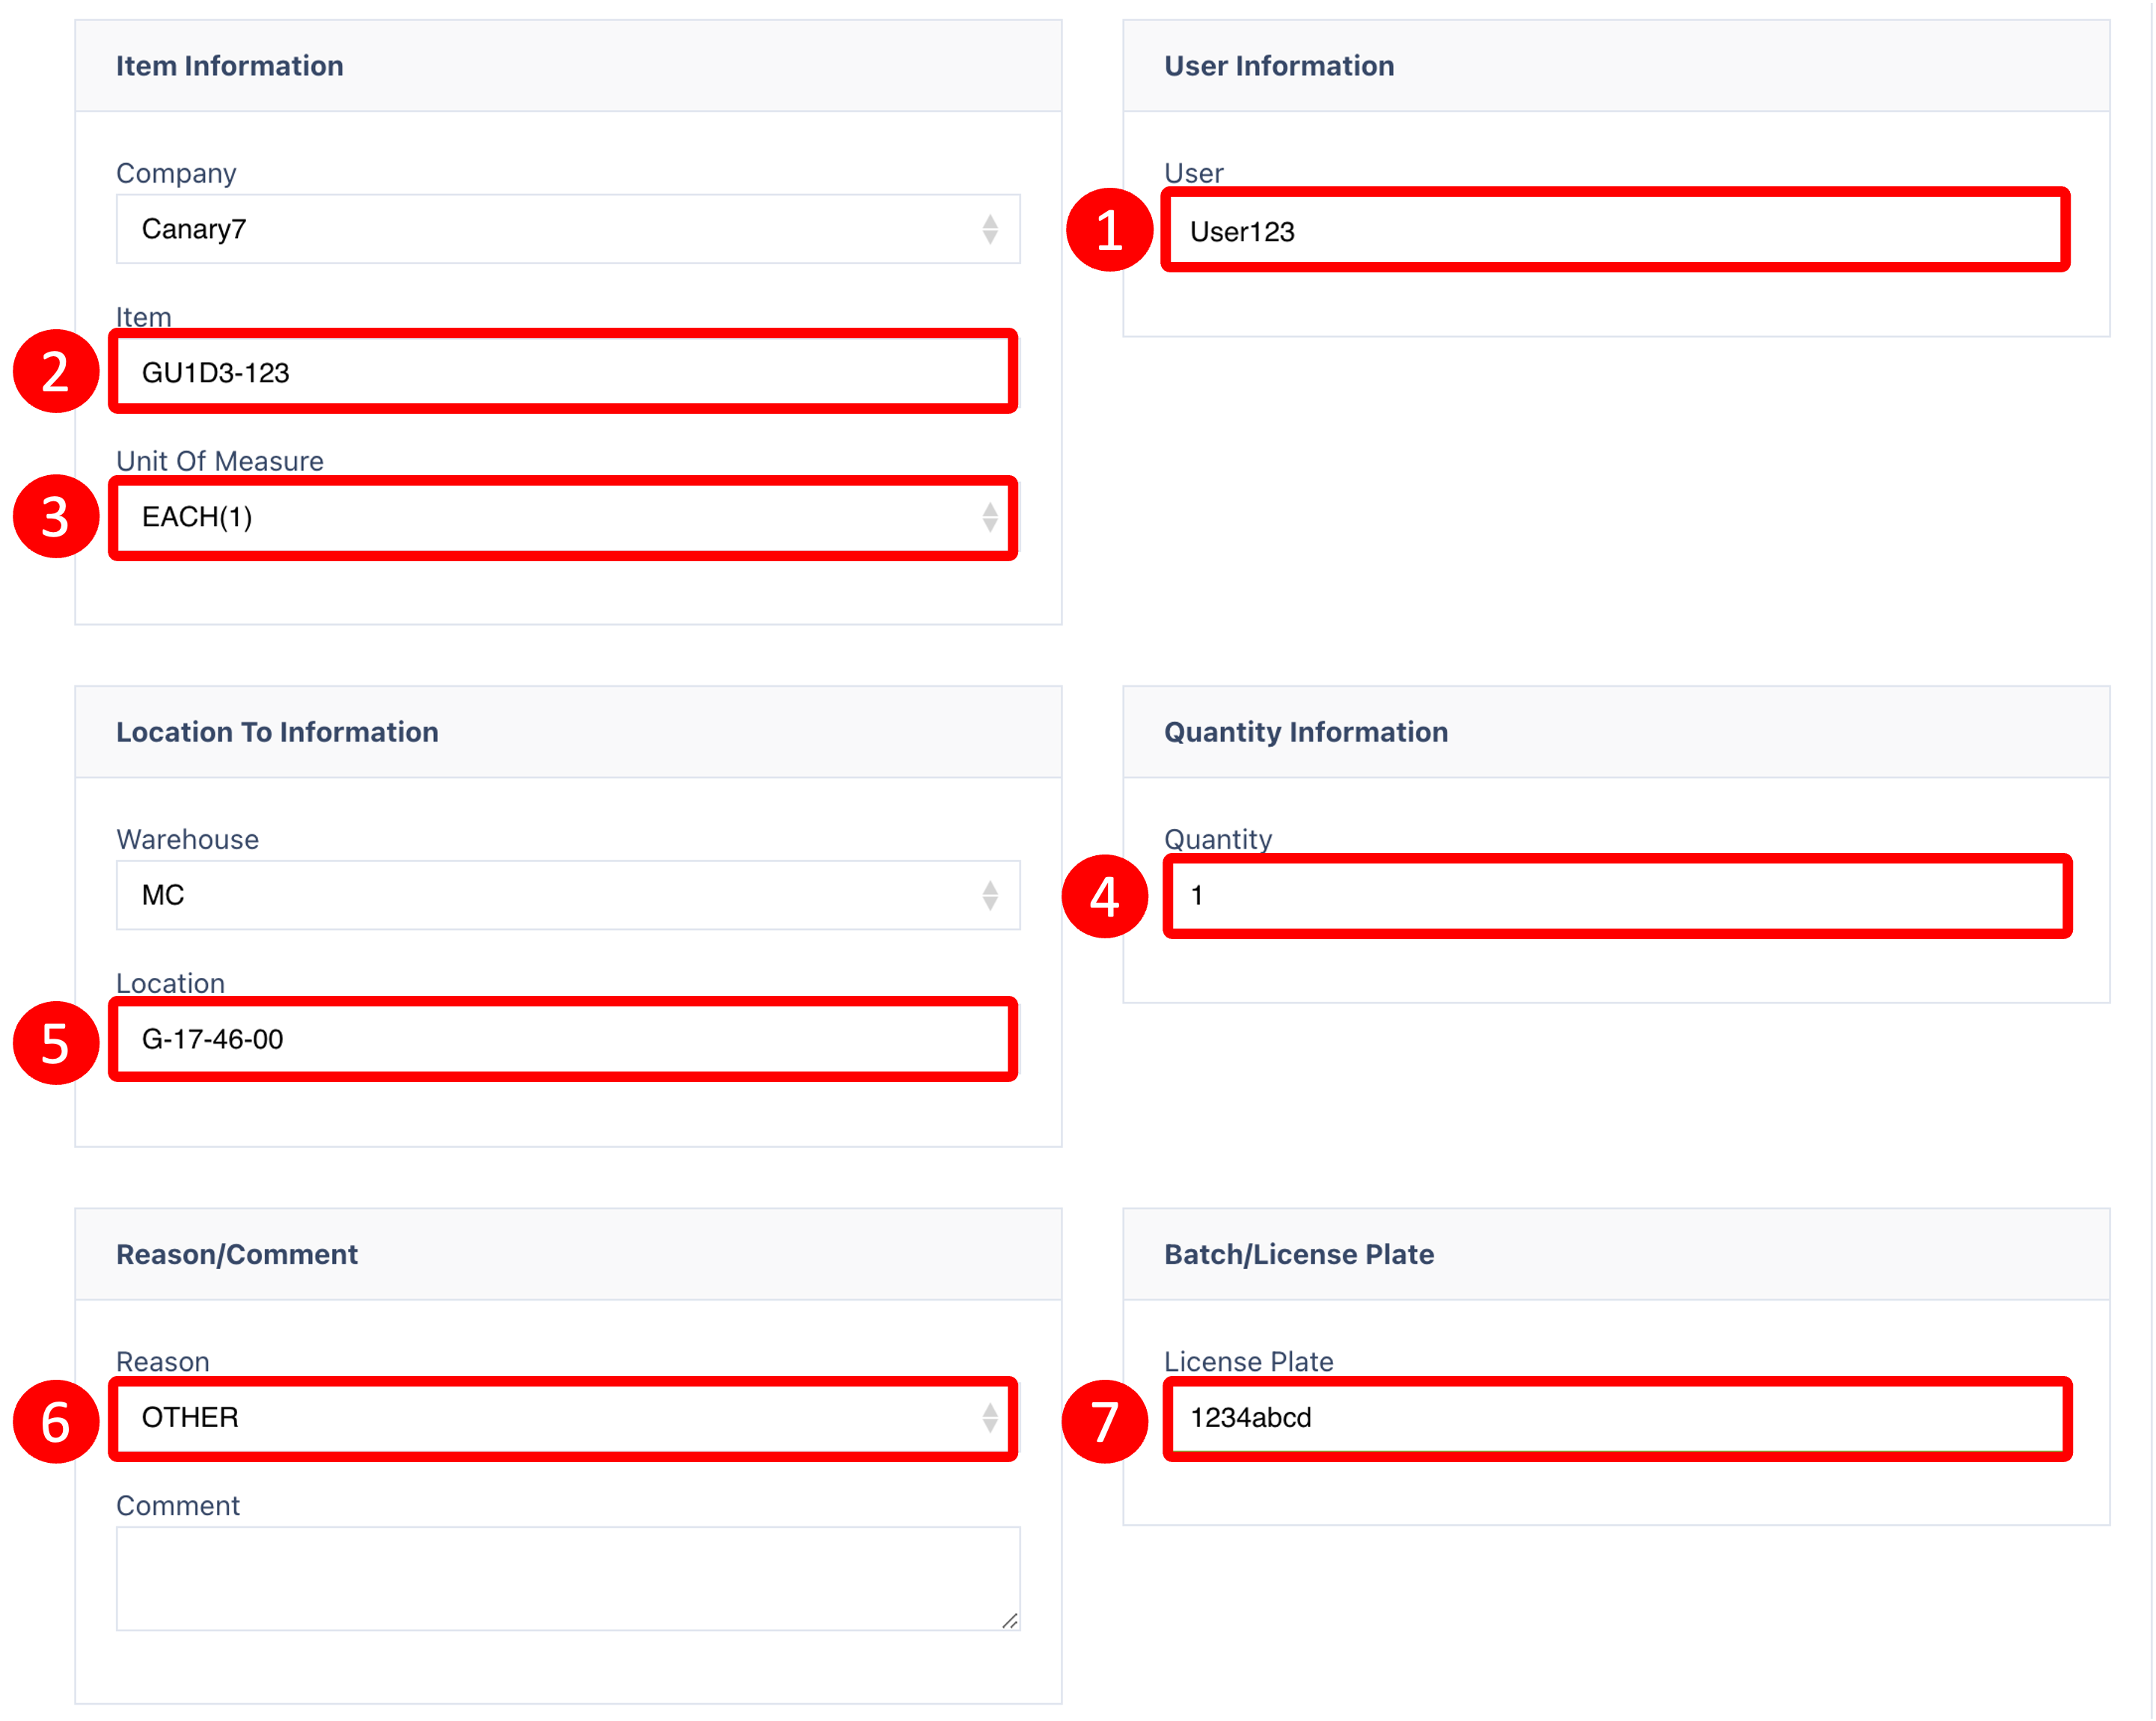
Enter or Select the following:
- User
- Item Code
- Unit of Measure
- Quantity
- Location
- Reason
- License Plate
Once you have selected and entered the required fields, click on the submit button to add.