📦 Understanding Shipment Picking Profile
What is a Shipment Picking Profile?
A Shipment Picking Profile determines which Picking Jobs are displayed to users on the Picking Execution screen. It also governs the verification steps required to complete each job, helping standardise picking behaviour across job zones, shipment types, or warehouse teams.
When a user enters the Picking Execution screen, they are presented with the Picking Profiles assigned to them—each with its own configuration and logic.
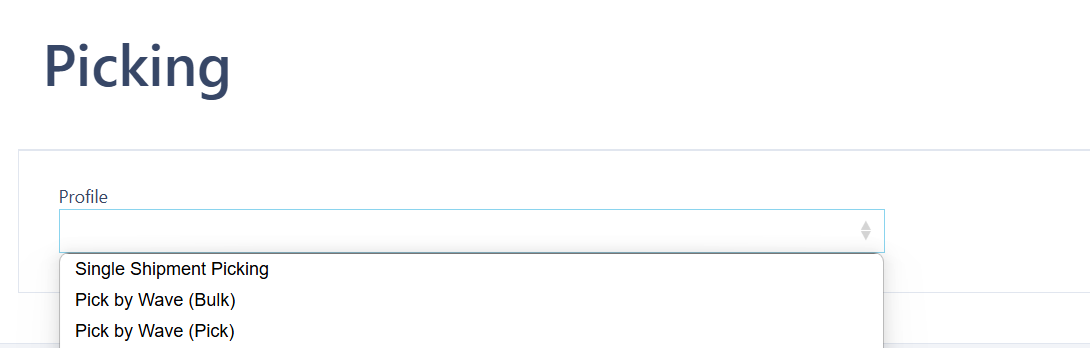
Upon entering your Picking Execution screen (shown above) you will be presented with the various Shipment Picking Profiles that have been created.
🔍 Accessing Shipment Picking Profile
To navigate to Shipment Picking Profile:
Use the Search bar in the Navigation menu and type "Shipment Picking Profile", then select it from the results.
Or go to:
Configuration → Shipment Profile Setup → Shipment Picking Profile
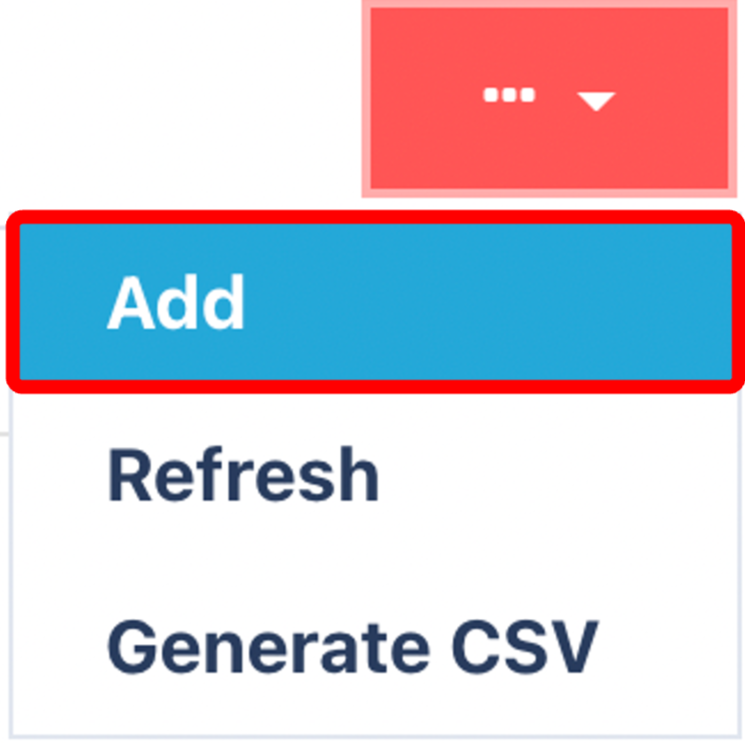
➕ Add Shipment Picking Profile
Click on the Red Action Button , this will bring up a drop-down menu, and select "Add"
Fill in the mandatory fields:
Name – A unique and descriptive name for the profile.
Pick To Location – Define where picked items will be placed.
Initiation Method – Choose how jobs are launched (e.g. manual start, auto-start).
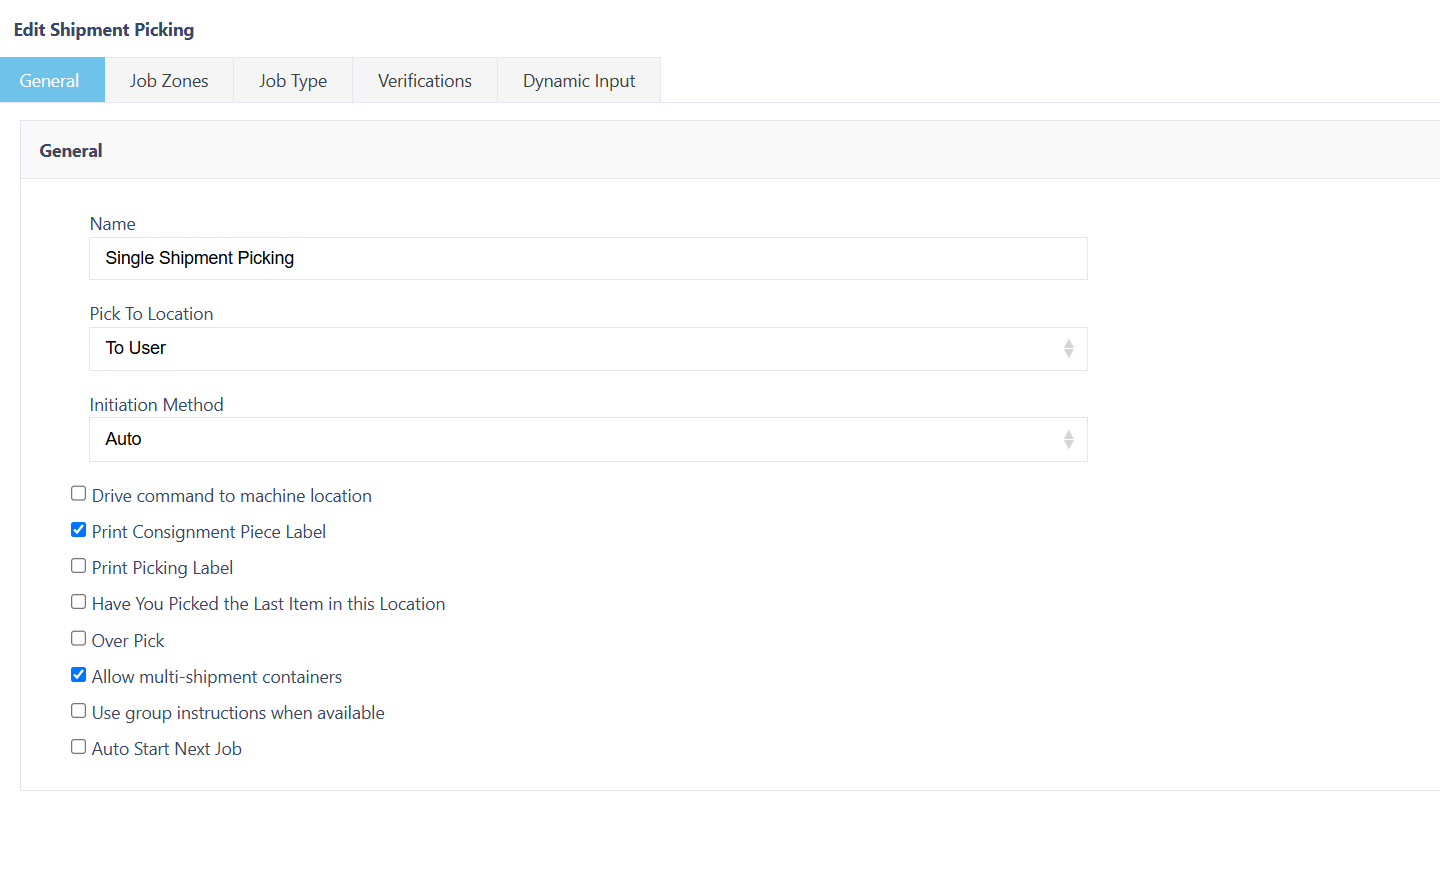
- Select any Additional Features required:
⚙️ Optional Features and Settings
You can enhance the Picking Profile by enabling additional features. Below are some commonly used options:
| Feature | Description |
|---|---|
| ✅ Drive Command to Machine Location | Sends a WCS command to automated equipment. |
| ✅ Print Consignment Piece Label | Automatically prints the consignment label upon pick. |
| ✅ Print Picking Label | Prints a picking-specific label during job execution. |
| ✅ Have You Picked the Last Item in this Location? | Prompts a check if the location is nearly empty. |
| ✅ Over Pick | Allows picking more than allocated (e.g. tolerance or weight-based picking). |
| ✅ Allow Multi-Shipment Containers | Enables items from different shipments to go into the same container (ideal for Single Unit Shipments). |
| ✅ Use Group Instructions When Available | Groups similar picks into a shared instruction, improving efficiency. |
| ✅ Auto Start Next Job | Seamlessly starts the next job once the current one ends. |
| ✅ Accept Reference Only | Allows picking jobs to be confirmed using reference scans (e.g., no item scan required). |
| ✅ Autogenerate Container ID | Automatically assigns a container licence plate if not scanned during picking. |
🗺️ Selecting the Job Zones
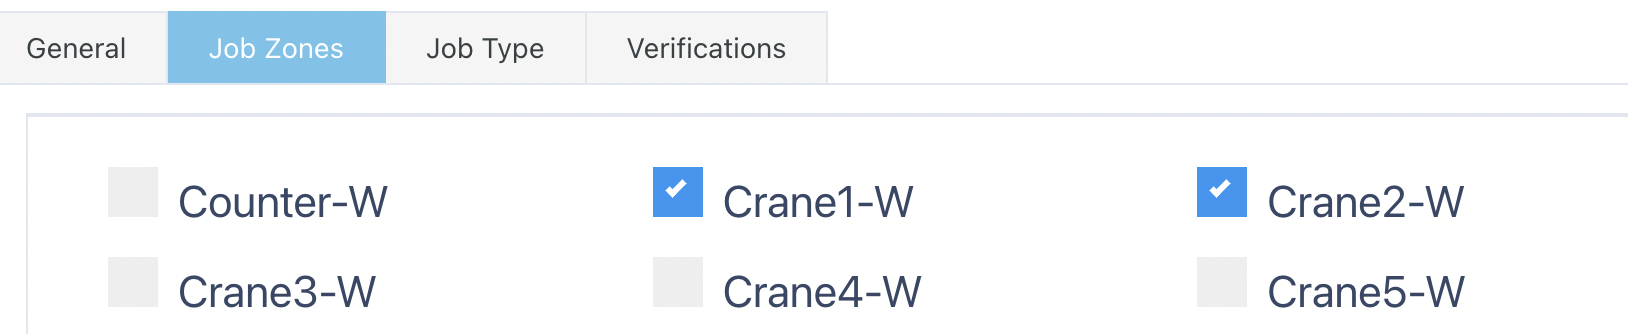
Filter which Job Zones the profile applies to:
This restricts the profile’s use to designated warehouse areas.
Ideal for zone-specific workflows.
📦 Selecting the Job Types

Select the Job Types that you want this Profile to have access to.
✅ Selecting the Verifications
Switch to the Verifications Tab

Navigate to the Verifications tab and enable any additional validation steps required for the profile:
| Verification | Description |
|---|---|
| Location Check Digit | Requires scanning of a random 3-digit code printed on the location label. |
| Pick Units | Displays the total number of units to be picked. |
| Item | Requires mandatory scan of the item code/reference. |
| Pick Single Job Instruction to Multiple Containers | Allows items from one job instruction to be picked into different containers. |
| Short Pick to Another Location | Enables user to pick remaining quantity from another location if the first is short. |
| Use Carrier Label as LP | Uses Carrier Label Number as the container’s Licence Plate. Common in Consign at Wave processes. |
| Batch | Enforces batch number entry or scanning. |
🧠 Dynamic Input
Dynamic Input enables custom scripts that interpret barcode data during scanning. This helps harmonise barcode formats across suppliers and systems.
Key Use Cases:
🏷️ Standardise supplier barcodes into a universal format.
✂️ Trim prefixes, suffixes, or unwanted characters.
🔍 Extract only relevant information (e.g. SKU, Batch).
🔄 Support multiple barcode symbologies with consistent results.
Example: You can create a script that parses “12345-BATCH2024” to extract just the SKU and Batch Number.

Once you have selected and entered the required fields, click on the submit button.png) to add.
to add.