Understanding Cycle Count Job Execution
What is Cycle Count Job Execution?
Cycle Count Job Execution refers to the process of performing inventory counts against a Cycle Count Plan. This tool guides users through the counting process, based on a predefined configuration set in the Cycle Count Profile.
📌 Note: A Cycle Count Plan must be run via Cycle Count Enquiry before any execution jobs can begin.
Accessing Cycle Count Job Execution
Open the Navigation menu.
Enter
Cycle Count Job Executionin the search bar and select it.Alternatively, go to Cycle Count > Cycle Count Job Execution.
How to use Cycle Count Job Execution
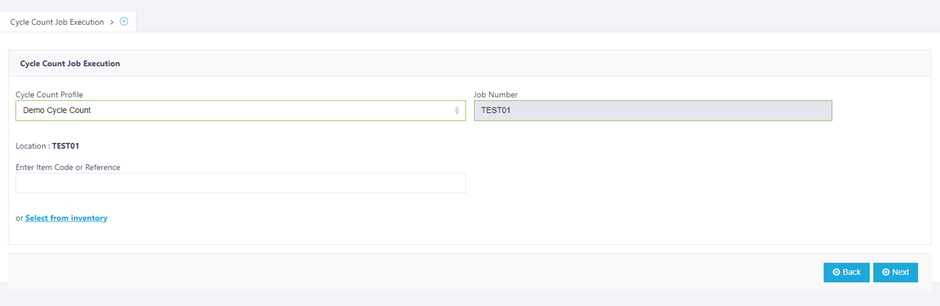
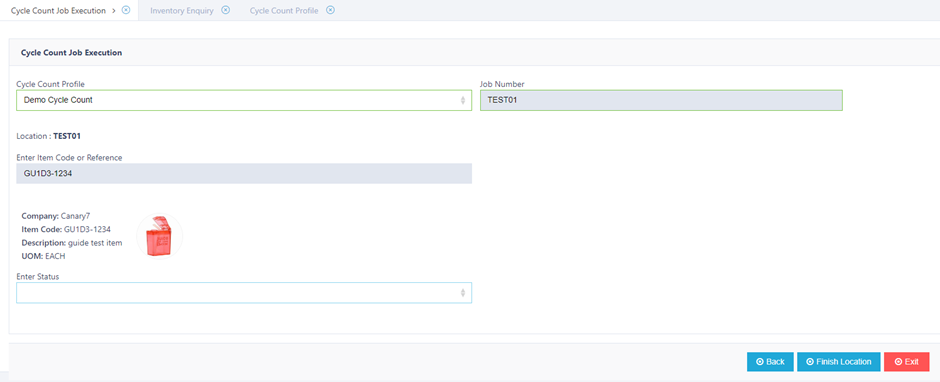
1. Select a Cycle Count Profile
The Cycle Count Profile determines how the job will behave. It includes settings like:
Initiation method:
AutoorJob NumberItem UOM determination method:
Enter item code or reference
Select from inventory
📎 Need to set one up? See Creating a Cycle Count Profile
2. Item UOM Determination
Based on the profile, you’ll either:
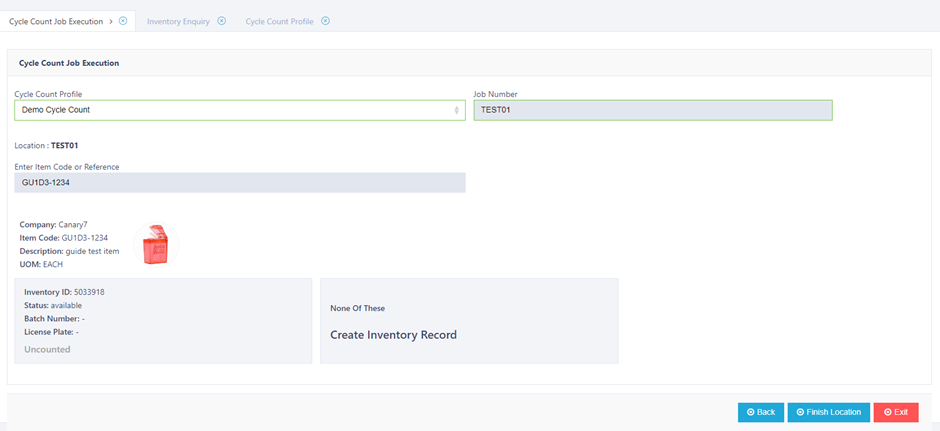
Enter item code or reference:
You’ll be prompted to input an item code or reference.
Then, choose the appropriate Unit of Measure (UOM) from the tile options.
If needed, you can switch to Select from inventory.
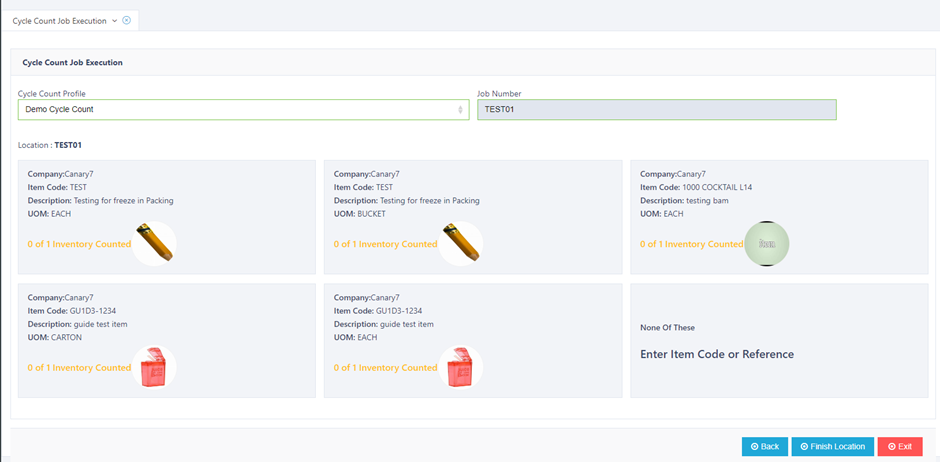
Select from inventory:
You’ll choose the relevant inventory tile.
If you don’t see the item you want, select “None of these: Enter item code or reference” to input it manually.
Option A: Enter Item Code or Reference
Input the item code or reference.
Choose the appropriate Unit of Measure (UOM) from the tile options.
If needed, switch to Select from Inventory.

Option B: Select from Inventory
Select the relevant inventory tile.
If you don’t see the item, click "None of these: Enter item code or reference" to input manually.
🔁 You can always switch between UOM determination methods if required.
3. Inventory Selection & Counting
Once UOM is selected, you will move on to inventory selection:
Counted = Already counted in the plan.
Uncounted = Yet to be counted.
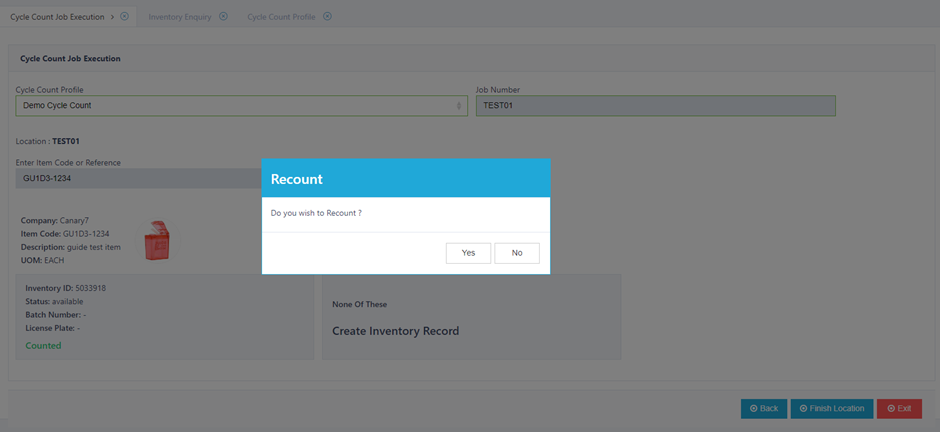
🟡 If you choose a tile marked "counted," you’ll be asked if you want to count again.
If none of the inventory records match:
Select "None of these: Create Inventory Record"
Enter:
Status
License Plate (if applicable)
Batch Number (if applicable)
Expiry Date (if applicable)
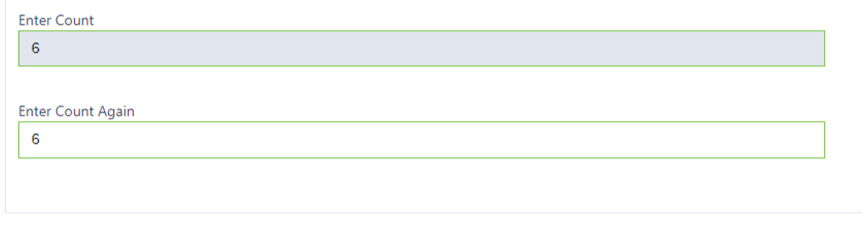
4. Begin Counting
Once inventory is selected or created:
Input the quantity.
Confirm the entry.
Continue through the remaining items in the Cycle Count Plan until complete.
✅ The system will guide you step-by-step until all required counts are performed.