📦 Understanding Replenishment Job Creation
❓ What is Replenishment Job Creation?
Replenishment Job Creation defines the rules for generating jobs that move inventory from reserve or overstock locations to primary picking or operational zones. It ensures replenishment jobs are:
Logically grouped 🧩
Properly filtered 🔍
Efficiently sequenced 🔄
— all to match your warehouse’s operational flow.
🧭 Configuration Overview
The module is split across four key tabs:
| Tab | Purpose |
|---|---|
| General | Defines the job profile name and type. |
| Where | Sets the filters for selecting which inventory is eligible. |
| Group By | Batches replenishment jobs for efficiency. |
| Order By | Determines the sequence in which jobs will be executed. |
🔗 How the 3 Components of Replenishment Work Together
| Component | Function |
|---|---|
| Replenishment Profile | Controls what jobs appear on the execution screen by filtering by zone, type, and verification rules. |
| Replenishment Template (Plan) | Defines the logic: • Demand – Which items/locations need stock • Supply – Where stock should come from. Runs this logic to generate jobs. |
| Replenishment Job Creation | Takes the jobs from the template and: • Filters them further • Groups into logical batches • Orders them for execution ➡️ These are what users see on the Execution screen. |
🚪 Accessing Replenishment Job Creation
To access the module:
🔍 Use the Navigation Search:
Type “Replenishment Job Creation” and select it.🛠️ Or go to:
Configuration → Functional Area Setup → Job Setup → Replenishment Job Creation
➕ Add a Replenishment Job Creation
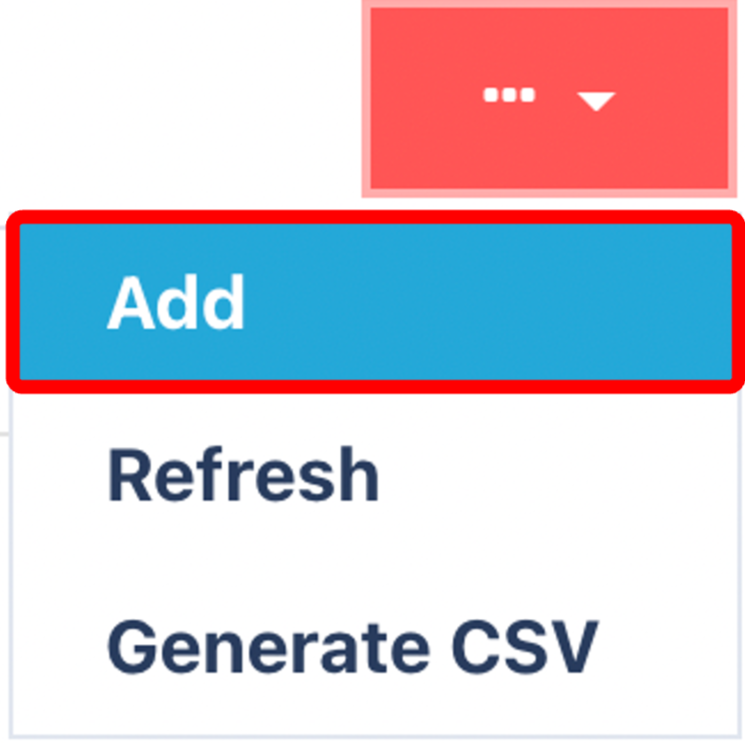
Click on the Red Action Button , this will bring up a drop-down menu, and select "Add"
📋 General Tab
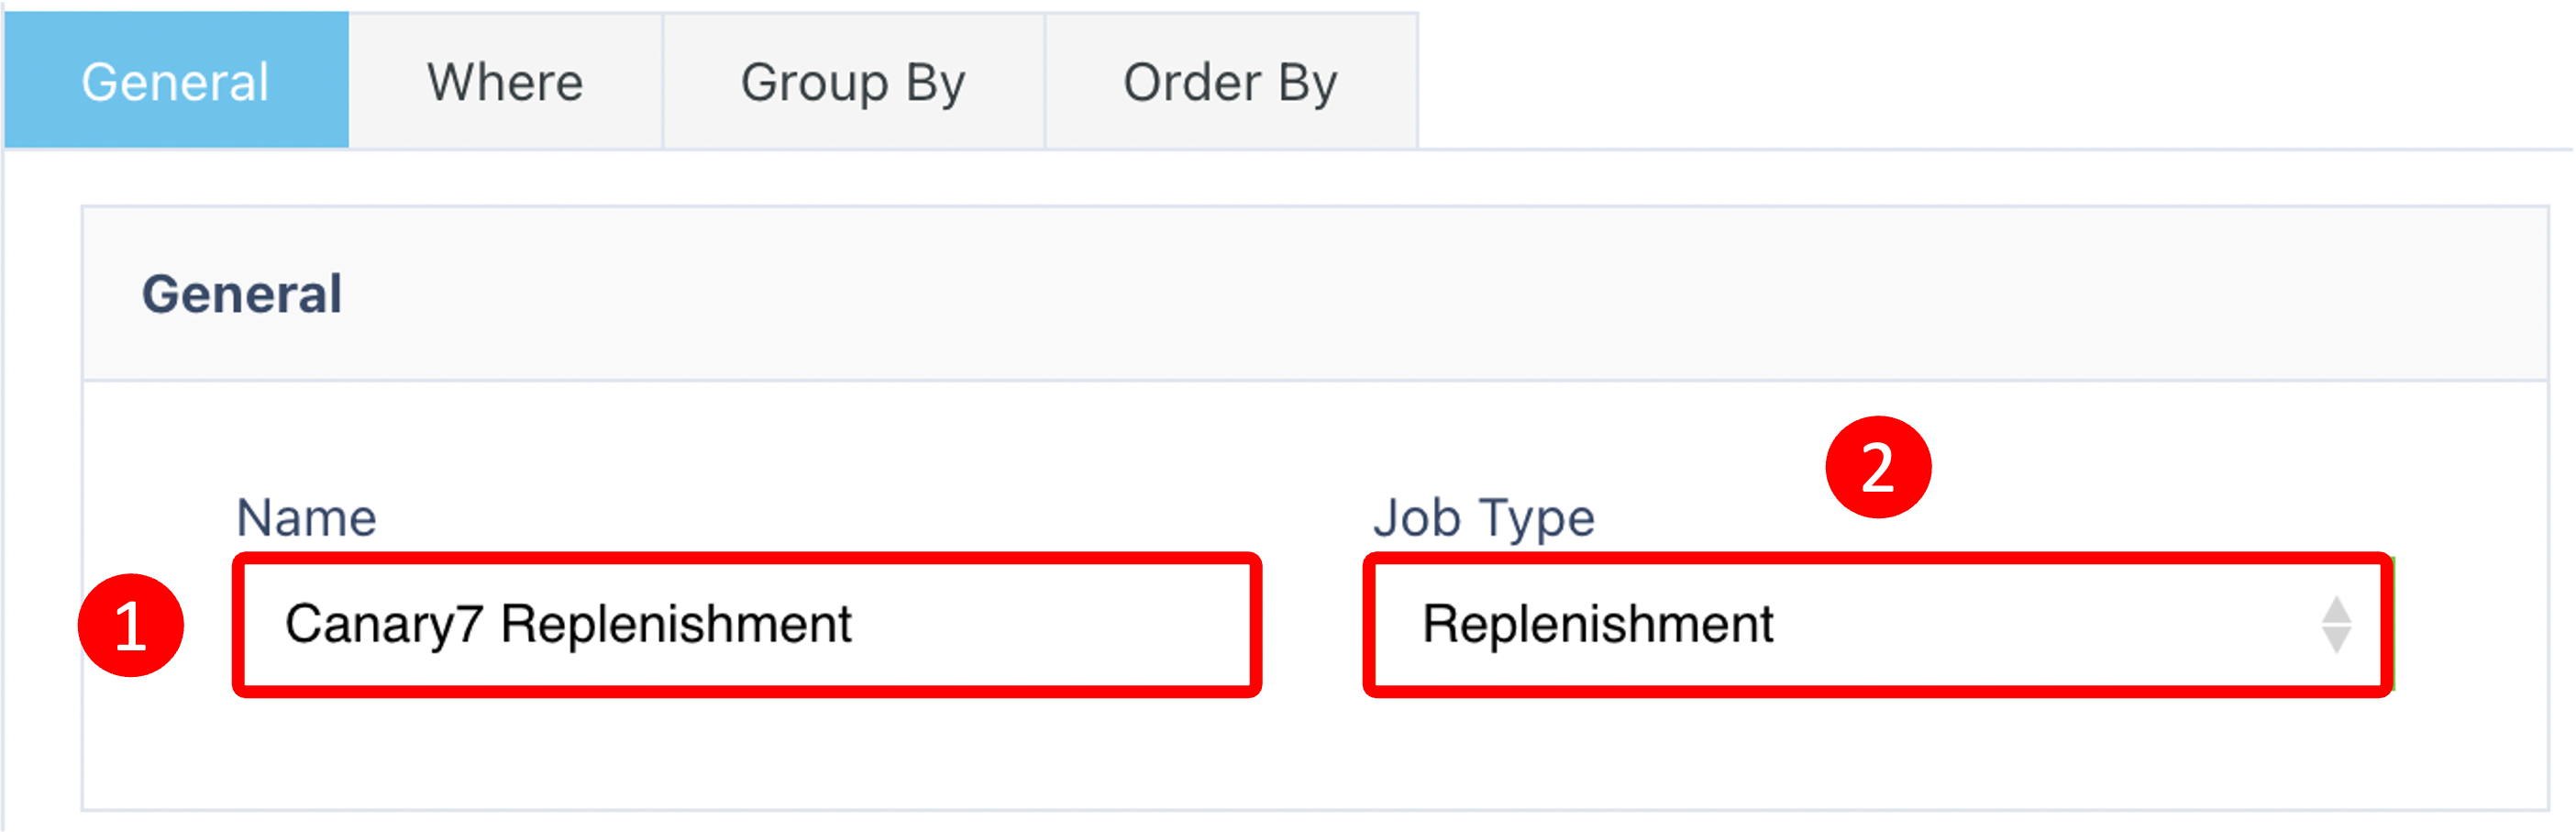
- Define the following:
Name: A meaningful job profile name
Job Type: {{glossary.Job Type}}
Helps categorise the job and match it to appropriate profiles.
📍 Where Tab – Set Filtering Logic
The Where Tab determines which items and locations are eligible for replenishment job creation.
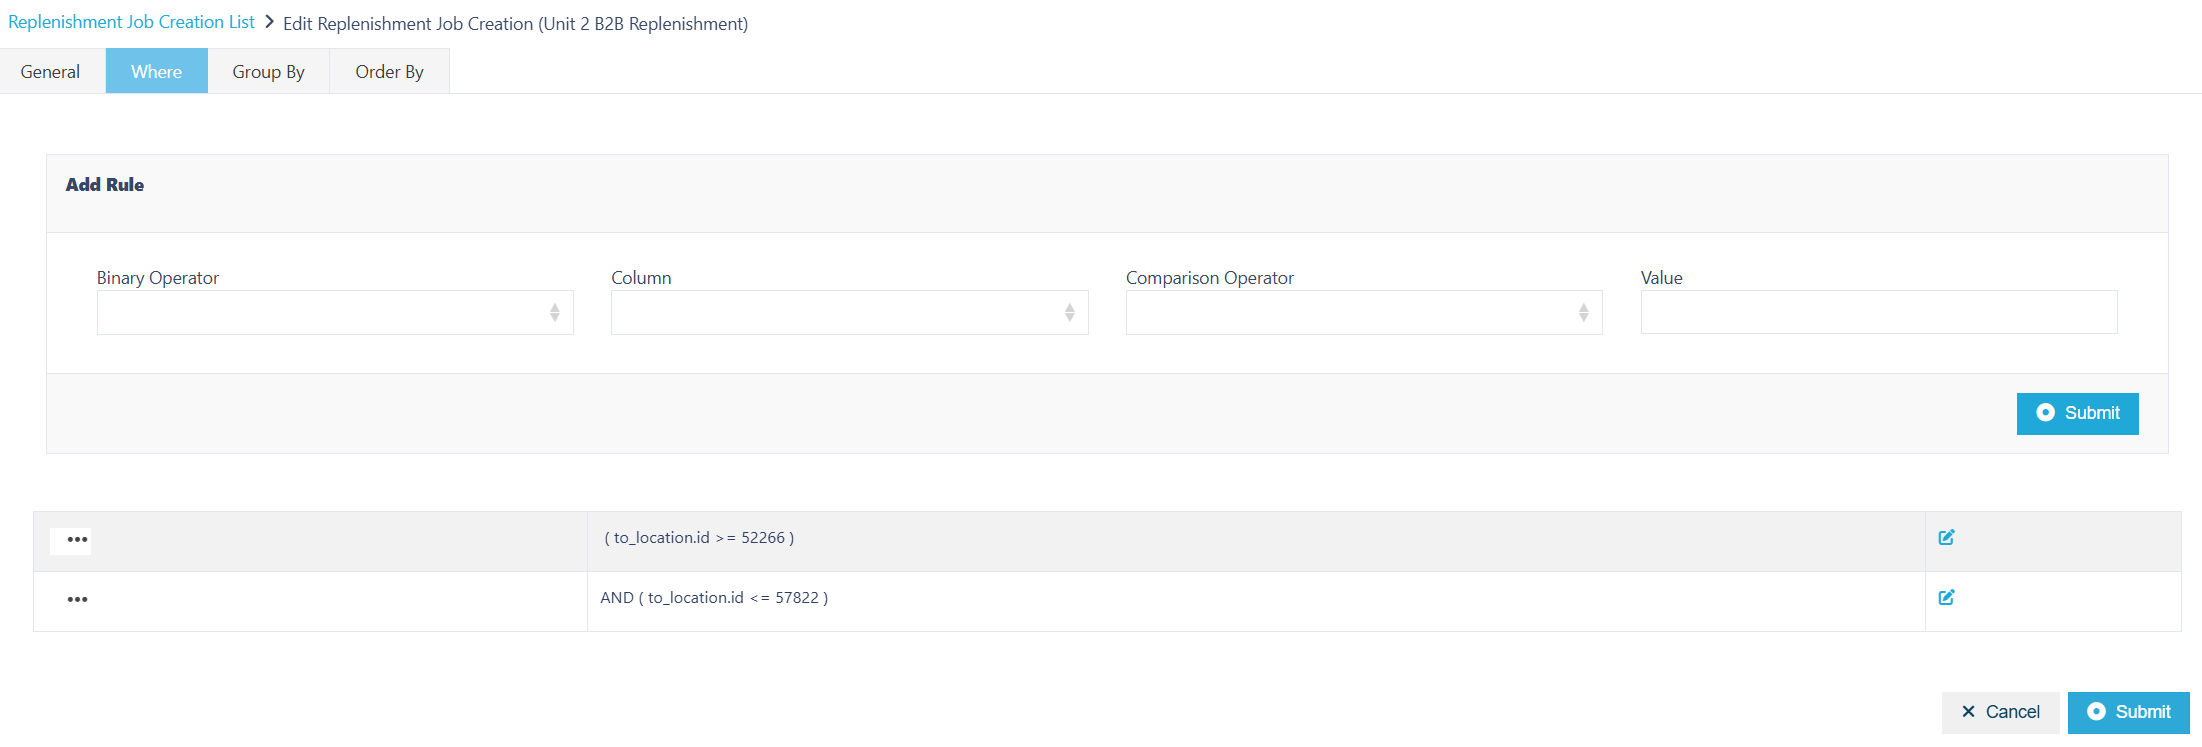
⚙️ How It Works
The tab acts as a filter. Only inventory that matches all the conditions will be selected.
You can use logical expressions like =, AND, OR, and parentheses () for more complex logic.
🧪 Example Condition
➡️ Only items for Company 45, located in the specified zones, are considered.
🧰 Common Filtering Fields
| Field | Description |
|---|---|
item.item_code | Filter by specific product codes. |
company.company_code | Limit to specific clients/companies (useful in 3PL). |
warehouse.warehouse_code | Filter by warehouse site. |
from_location.location_code | Specify the source location (e.g., bulk storage). |
to_location.location_code | Set the destination (e.g., pick face). |
from_zone.name | Filter by the source zone. |
to_zone.name | Target specific destination zones. |
() and logical operators (AND, OR) to build complex but precise filtering logic.💡 Best Practices
Start broad → Then refine by item/location.
Test filters using small sets first.
Use zones wisely → These often represent physical picking/replenishment areas.
✅ After defining your filters:
Click Submit (top) to save.
Click Submit (bottom) to unlock the next tab.
🧩 Group By Tab – Batch Replenishment Jobs
.png)
The Group By Tab determines how replenishment jobs are grouped before they’re assigned and executed. Grouping helps streamline the replenishment process by grouping similar tasks together, making it easier and faster for operatives to complete replenishments in an efficient, structured way.
✅ Recommended: Group by to_zone.name
A particularly effective grouping method is by to_zone.name — this groups all replenishment tasks that deliver stock to the same area of the warehouse.
✅ Recommended: Grouping by
to_zone.nameensures all replenishments for a given zone (e.g., a specific pick face or replen area) are handled together. This minimises unnecessary movement and allows operatives to complete all tasks in a single zone before moving on.
🧰 Available Grouping Fields
| Field | Description |
|---|---|
to_zone.name | 🔝 Recommended – Group by destination zone. |
item.item_code | Group by item for product-specific runs. |
warehouse.warehouse_code | Group by warehouse site. |
from_location.location_code | Group by source location. |
to_location.location_code | Group by specific to destinations. |
from_zone.name | Group by source zone (e.g., Highbay). |
company.company_code | Useful for separating clients in 3PL. |
🧪 Practical Examples
| Scenario | Group By Field | Benefit |
|---|---|---|
| All replenishments to one zone | to_zone.name | Reduces picker movement |
| All pulls from same bulk area | from_zone.name | Streamlines source zone jobs |
| Client-specific jobs | company.company_code | Isolates workflows in shared warehouses |
🔢 Order By Tab – Define Execution Sequence .png)
The Order By Tab sets the execution sequence of jobs, helping align replenishment with warehouse layout.
📚 Ordering Options
| Field Type | Description |
|---|---|
| Location Template Fields | Use structured codes (e.g., A-01-01-A) to mimic the warehouse layout. |
| Pick Sequence | If locations have a defined pick path, order jobs to follow that flow. |
🧪 Example
This will create a “snake-like” picking route through reserve zones — boosting efficiency.
✅ Summary
Once your Replenishment Job Creation is configured:
✅ Jobs target the right inventory
✅ Jobs are grouped to reduce operational inefficiencies
✅ Jobs are sequenced for optimal routing
▶️ Next Step: Trigger the Replenishment
You can now:
Run the Replenishment Template manually (By running a plan on the Replenishment Enquiry screen), or
Let the system trigger it automatically when a permanent location drops below its minimum threshold.
Once you have selected and entered the required fields, click on the submit button.png) to add.
to add.