Understanding Cycle Count Job Creation
🔄 What is Cycle Count Job Creation?
Cycle Count Job Creation allows you to design and define cycle counting jobs in the warehouse.
This feature lets you specify what inventory to count, where to count it, and how those instructions are grouped and ordered — ensuring consistent and efficient inventory accuracy without needing full stocktakes.
It works similarly to other job creation processes, allowing you to apply filtering, grouping, and sequencing rules for smarter execution.
🛠️ Accessing Cycle Count Job Creation
To access:
Open the 📂 Navigation Menu
Use the 🔎 Search Bar, type "Cycle Count Job Creation", and select it
Or go to:
⚙️ Configuration > Functional Area Setup > Job Setup > Cycle Count Job Creation
➕ Add a Cycle Count Job Creation
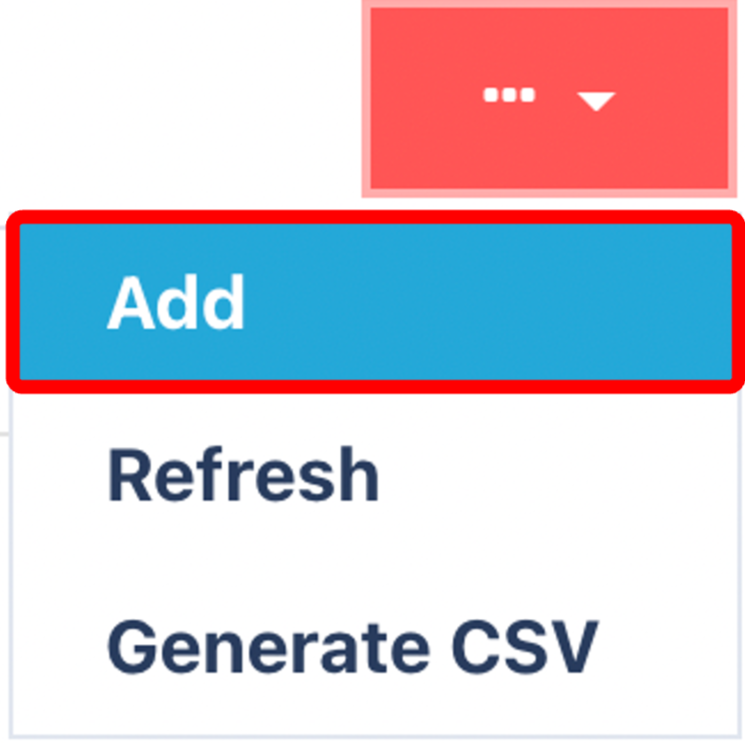
Click on the Red Action Button , this will bring up a drop-down menu, and select "Add"
📝 General Tab – Required Fields

Enter and select the following:
| 🔹 Field | 📘 Description |
|---|---|
| Name | A descriptive name for the job |
| Job Type | Choose the Job Type that reflects this job's purpose |
| Job Number Assignment | Select how the job is initiated: 🔹 Job ID – Each job has a unique ID 🔹 First Instruction Location Code – Operator scans the first location to begin the count (most common) |
📍 Where Tab
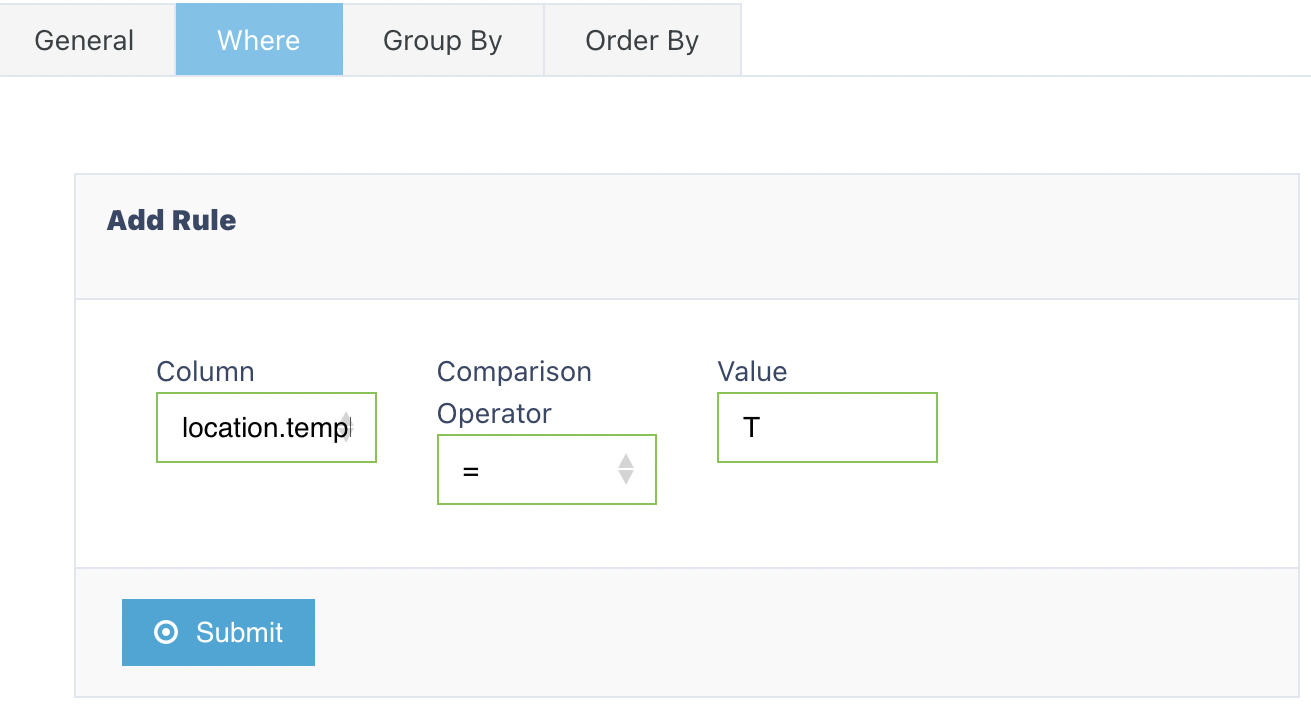
This tab lets you apply rules to target specific inventory locations for cycle counts.
You can use a template, or define custom logic with multiple rules.
Click the ⬆️ upper Submit button to save.
Then click the ⬇️ lower Submit button to unlock the other tab
🧩 Group By Tab – Grouping Instructions
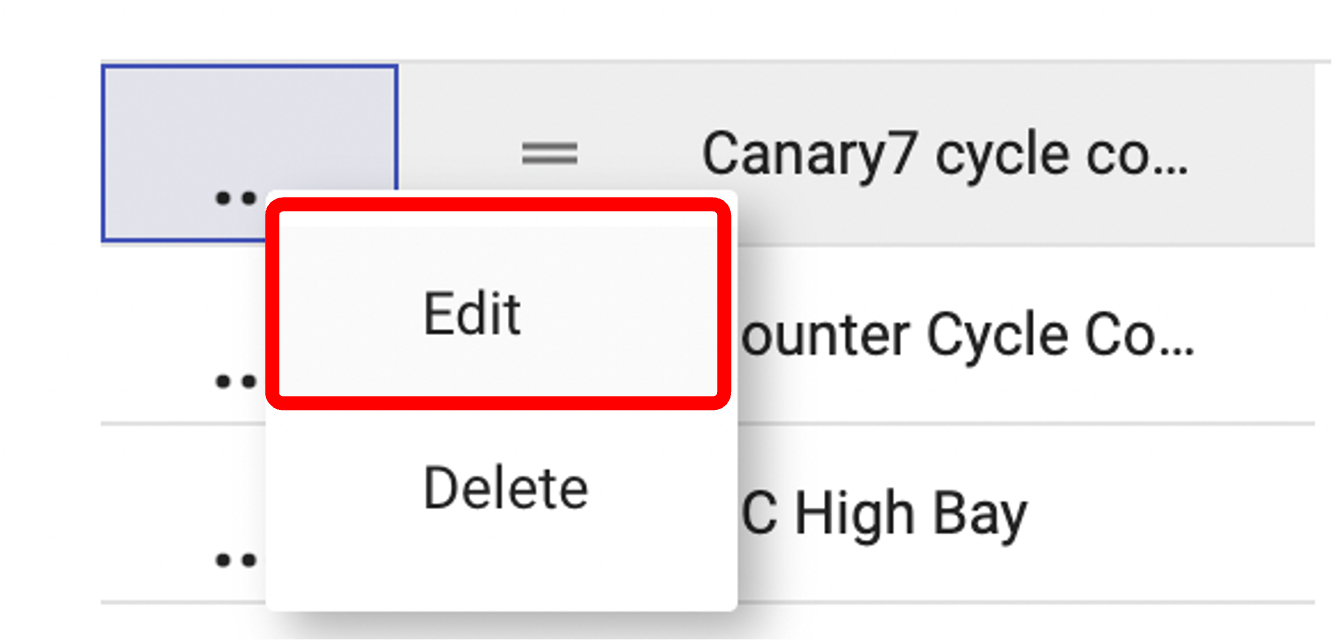
To access:
Click the ⋮ Ellipsis Menu next to the job
Select ✏️ Edit
Open the Group By tab
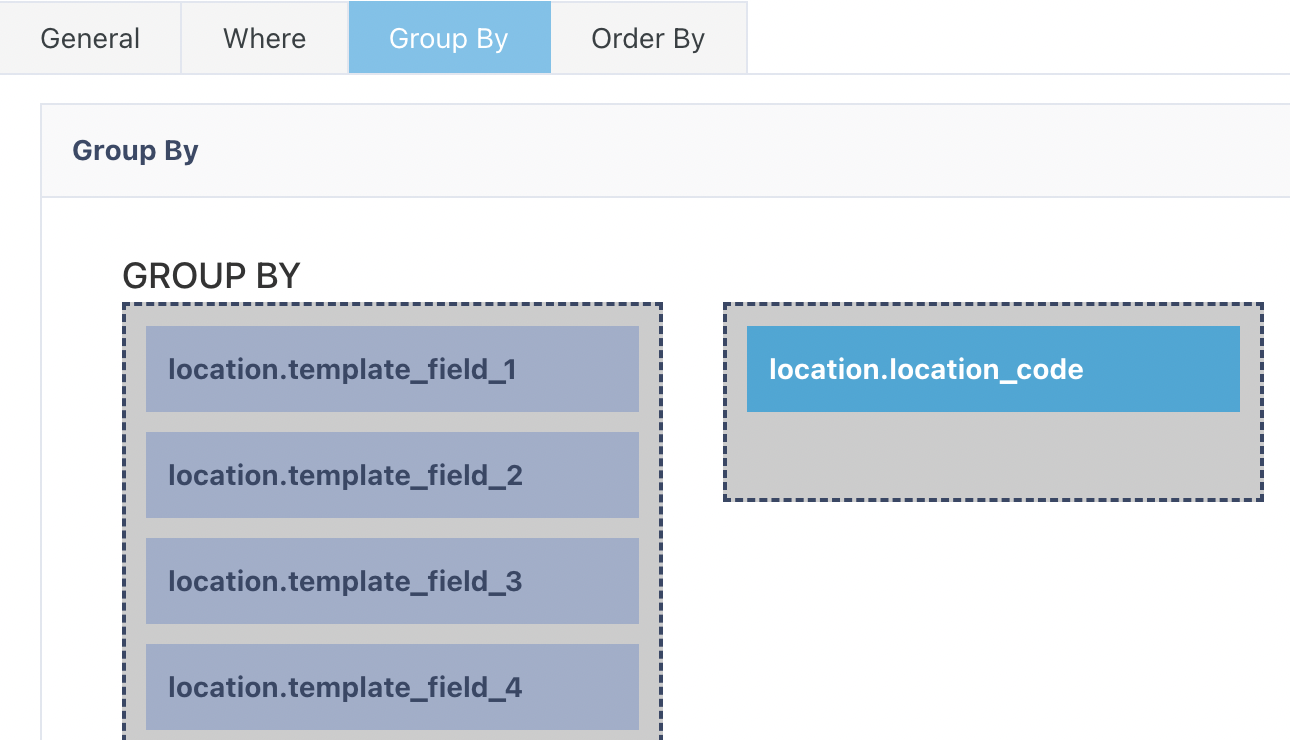
Drag the fields (e.g., Item, Location) to the right side to group the instructions.
🧠 Note: The order matters — it affects how instructions are clustered together.
🔢 Order By Tab – Sorting Instructions
In the Order By tab, drag fields to define the execution sequence.
.png)
Example sorting criteria:
Pick Walk Sequence
Zone
Location Code
This ensures your operatives follow the most efficient route for your operational requirements.
Once you have selected and entered the required fields, click on the submit button.png) to add.
to add.