📦 Understanding Receiving Profiles in Canary7
A Receiving Profile in Canary7 is a configurable set of rules that define how inbound goods are processed in your warehouse. Acting as the entry point for the goods-in workflow, each profile can be tailored to suit different operational scenarios—whether you're handling standard supplier deliveries or unpredictable customer returns.
By setting up multiple Receiving Profiles, you can streamline how various types of stock are received, ensuring flexibility, control, and accuracy in your inbound processes.
💡 Example Use Cases
🟩 Standard Receiving Profile
Designed for structured, planned deliveries (e.g. Purchase Orders from suppliers).
Typical settings may include:
Initiation by Receipt Number – Ensures goods are matched against pre-booked deliveries.
Manual License Plate Assignment – Users apply a pre-printed barcode label to each container upon check-in.
Over Receiving Disabled – Prevents users from receiving more than the expected quantity.
This profile supports tight inventory control and data integrity in regulated receiving environments.
🟦 Returns Receiving Profile
Ideal for less structured scenarios like customer returns.
This profile might include:
Blind Receiving Enabled – Users can receive items without a predefined receipt or order.
Over Receiving Allowed – Useful when returned quantities don’t match the original shipment.
Custom Default Dock – E.g. RTN-01 instead of the standard GIN-01, to route returns through a dedicated area.
🔍 Accessing Receiving Profiles
To access Receiving Profiles:
Go to the Navigation Menu.
Use the Search Bar to type and select Receiving Profile.
You can also navigate via:
Configuration > Receiving Profile Setup > Receiving Profile.
➕ Adding a Receiving Profile
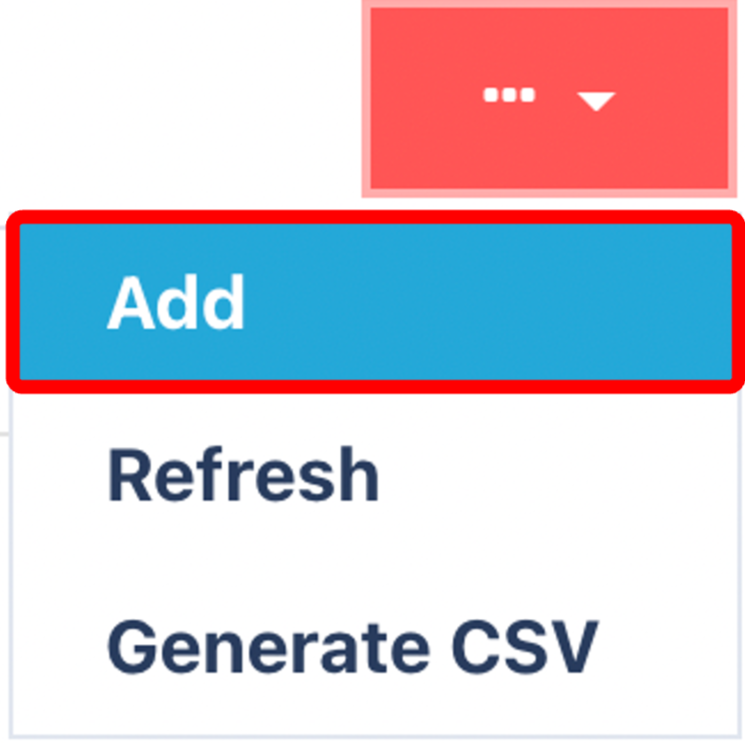
Click on the Red Action Button , this will bring up a drop-down menu, and select "Add"
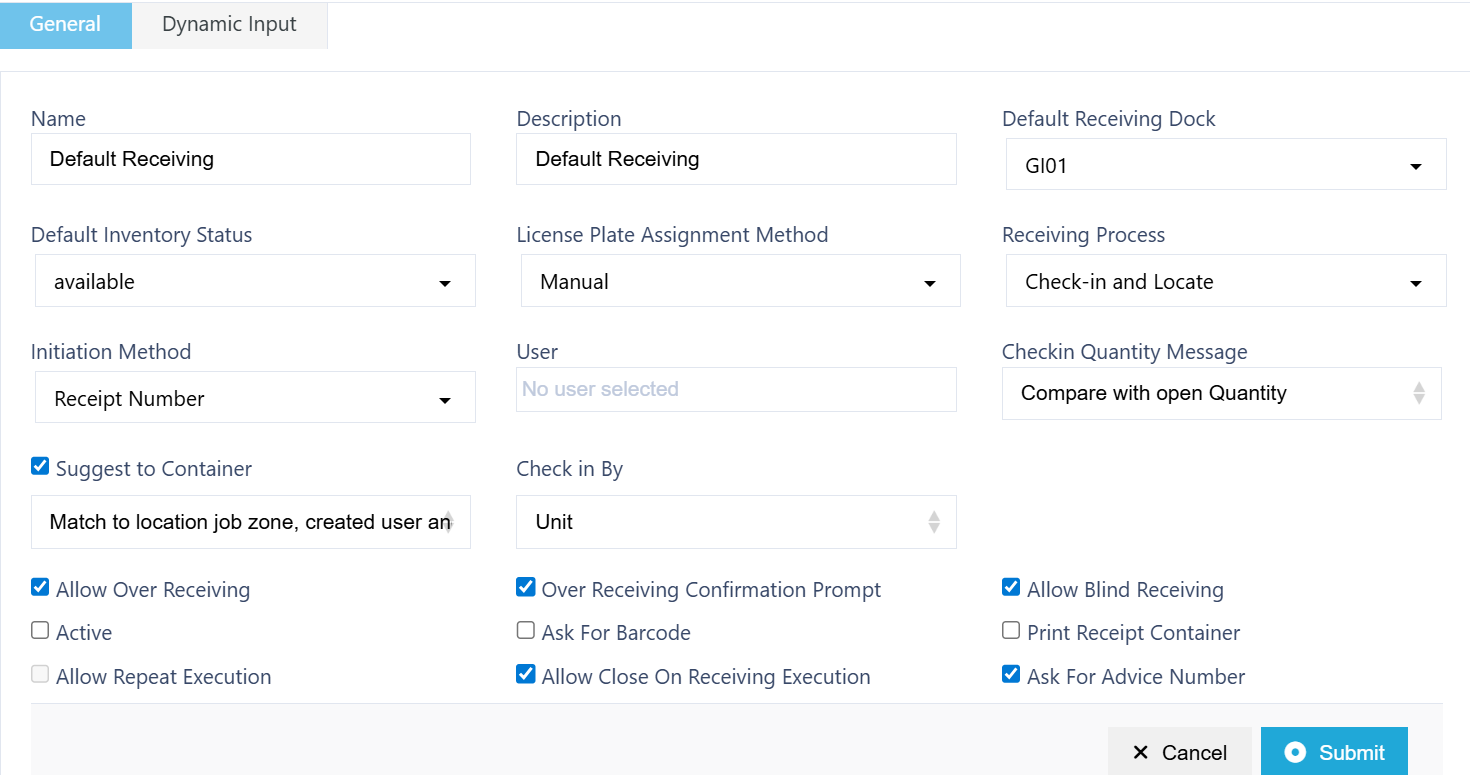
Enter in Mandatory Fields
To create a new profile, click Add.
Fill in the required fields:
| Field | Description |
|---|---|
| Name | The name of the profile |
| Description | A short description of the profile's purpose |
| Default Receiving Dock | The dock where inbound goods are received (e.g. GIN-01, RTN-01) |
| Default Inventory Status | The status goods will be assigned upon receipt |
| License Plate Assignment Method | Choose between: - Manual: Apply pre-printed barcodes to containers - Auto: System auto-generates container numbers and prints labels |
| Receiving Process | Choose between: - Check and Put (1-step) - Check and Locate (2-step) |
| Initiation Method | Choose Receipt Number or Order Number to start the receiving process |
| Users | Assign users or user groups who can use this profile |
| Check-in Quantity Message | Set a prompt for quantity comparison: - Compare with open quantity - No message (allows under-receiving) |
🛠️ Additional Receiving Options (Toggles)
Refine your receiving workflows further by toggling the following options On or Off as needed:
📋 Quantity & Execution Control
| Toggle | Function |
|---|---|
| Allow Over Receiving | Enables users to receive more than the expected quantity. |
| Over Receiving Confirmation Prompt | Displays a warning if the user exceeds the expected quantity. |
| Allow Repeat Execution | Allows large volumes of the same item to be received multiple times, triggering separate Putaway Jobs and printing multiple receipt containers. |
| Check-in Quantity Message | (Set above) Controls whether users are alerted when receiving fewer or more items than expected. |
| Check In By | Choose between Unit (e.g., 3 boxes) or Quantity (e.g., 90 units total). Useful for different types of goods or clients. |
🧾 Identification & Validation
| Toggle | Function |
|---|---|
| Ask for Barcode | Prompts users to enter or scan an item barcode during receiving. |
| Ask for Advice Number | Adds a field for entering a unique Advice Number, offering an additional layer of verification. |
📦 Container & Putaway Behaviour
| Toggle | Function |
|---|---|
| License Plate Assignment Method | (Set above) Choose Auto (system-generated) or Manual (user applies a label). |
| Print Receipt Container | Automatically prints a barcode label for each received container. |
| Suggest to Container | Smart container suggestion based on item destination. Groups items heading to similar work zones for optimised putaway. |
Once you have selected and entered the required fields, click on the submit button.png) to add.
to add.