📍 Understanding Locating Rules in Canary7
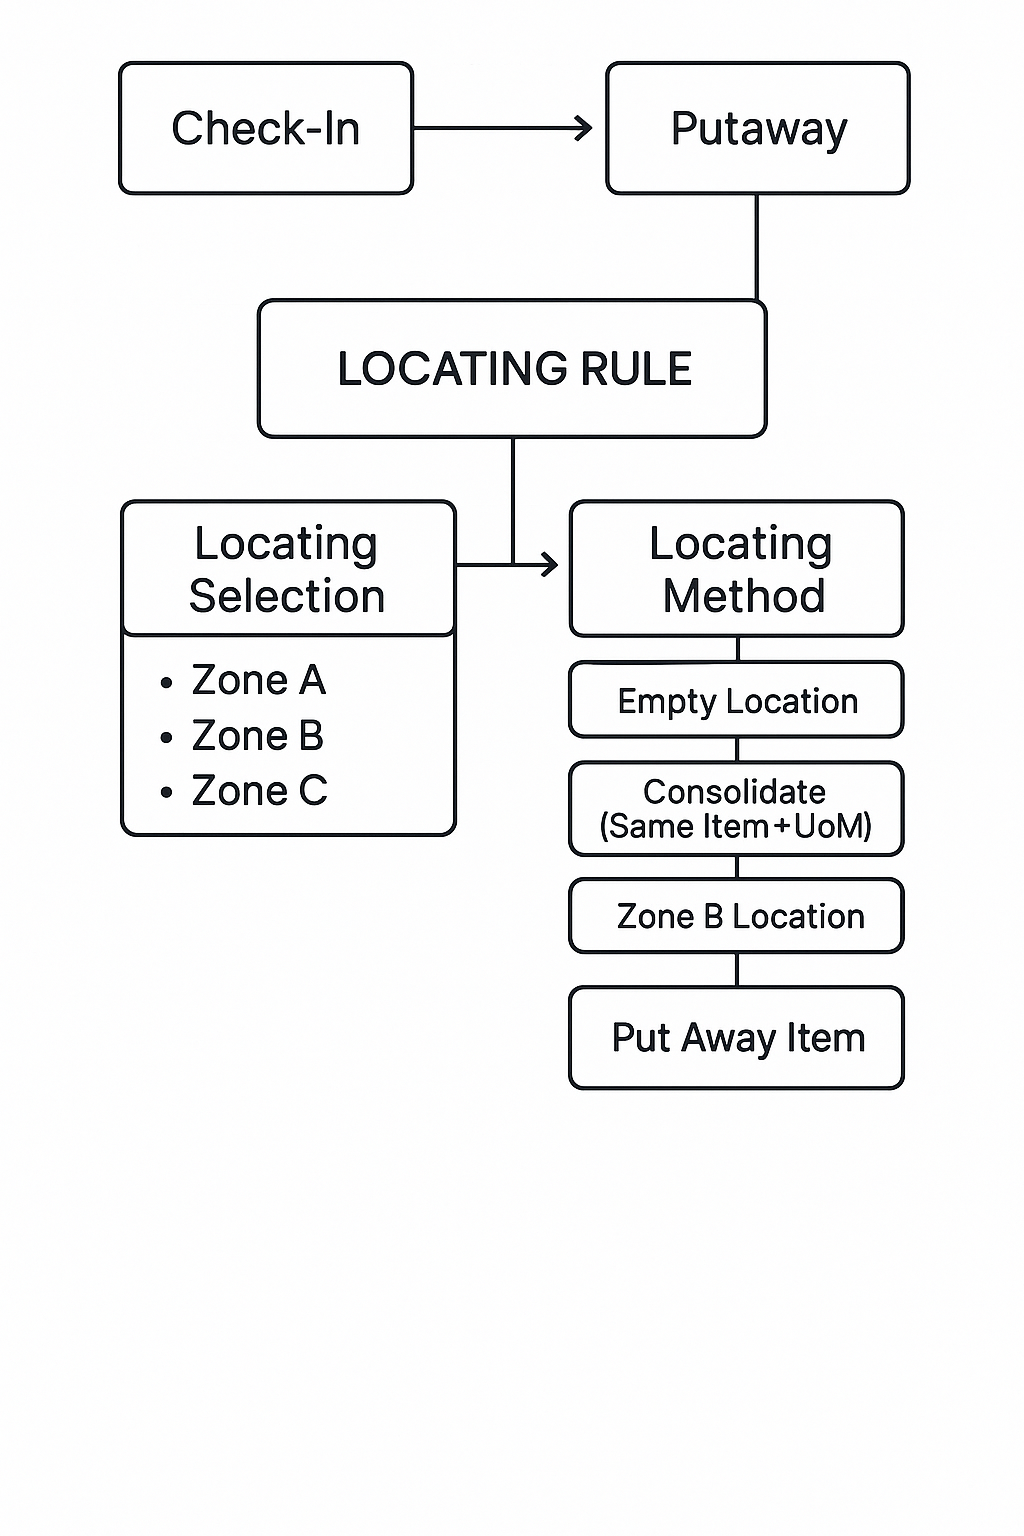
A Locating Rule in Canary7 defines how and where products should be stored once they arrive in the warehouse. These rules drive Putaway and Replenishment operations, ensuring stock is directed to the most appropriate location based on warehouse layout, inventory characteristics, and business logic.
Locating Rules are essential for:
✅ Smart and efficient putaway
🔄 Replenishment logic
🏗️ Space optimisation
📦 Consistent, rule-based storage decisions
They can be automatically assigned using the Locating Assignment Master, ensuring the right rule is applied to the right product without manual intervention.
🧠 How Do Locating Rules Work?
When a Receipt is uploaded, the system checks each item on the receipt detail against its assigned Locating Rule. Each rule contains one or more Locating Rule Details, and each detail has two critical components:
🔎 1. Locating Selection
This acts as a filter to narrow down the pool of eligible storage locations.
You can filter by:
📦 Zones (e.g. Ambient, High Bay, Fast-Moving)
📚 Aisles or Racks
📍 Specific Locations
🧾 Custom Attributes (if defined)
🔄 2. Locating Method
Once eligible locations are selected, the Locating Method tells the system how to choose the final destination:
| Method | Description |
|---|---|
| Permanent Location | Sends the item to its fixed, predefined storage location. Ideal for items with a home location. |
| Empty Location | Sends the item to any completely empty storage location. |
| Consolidate (Same Item + UoM) | Looks for a location that already contains the same item and Unit of Measure. |
| User Defined (Location as per Selection) | Gives the first matching location from the filtered list and allows manual entry. |
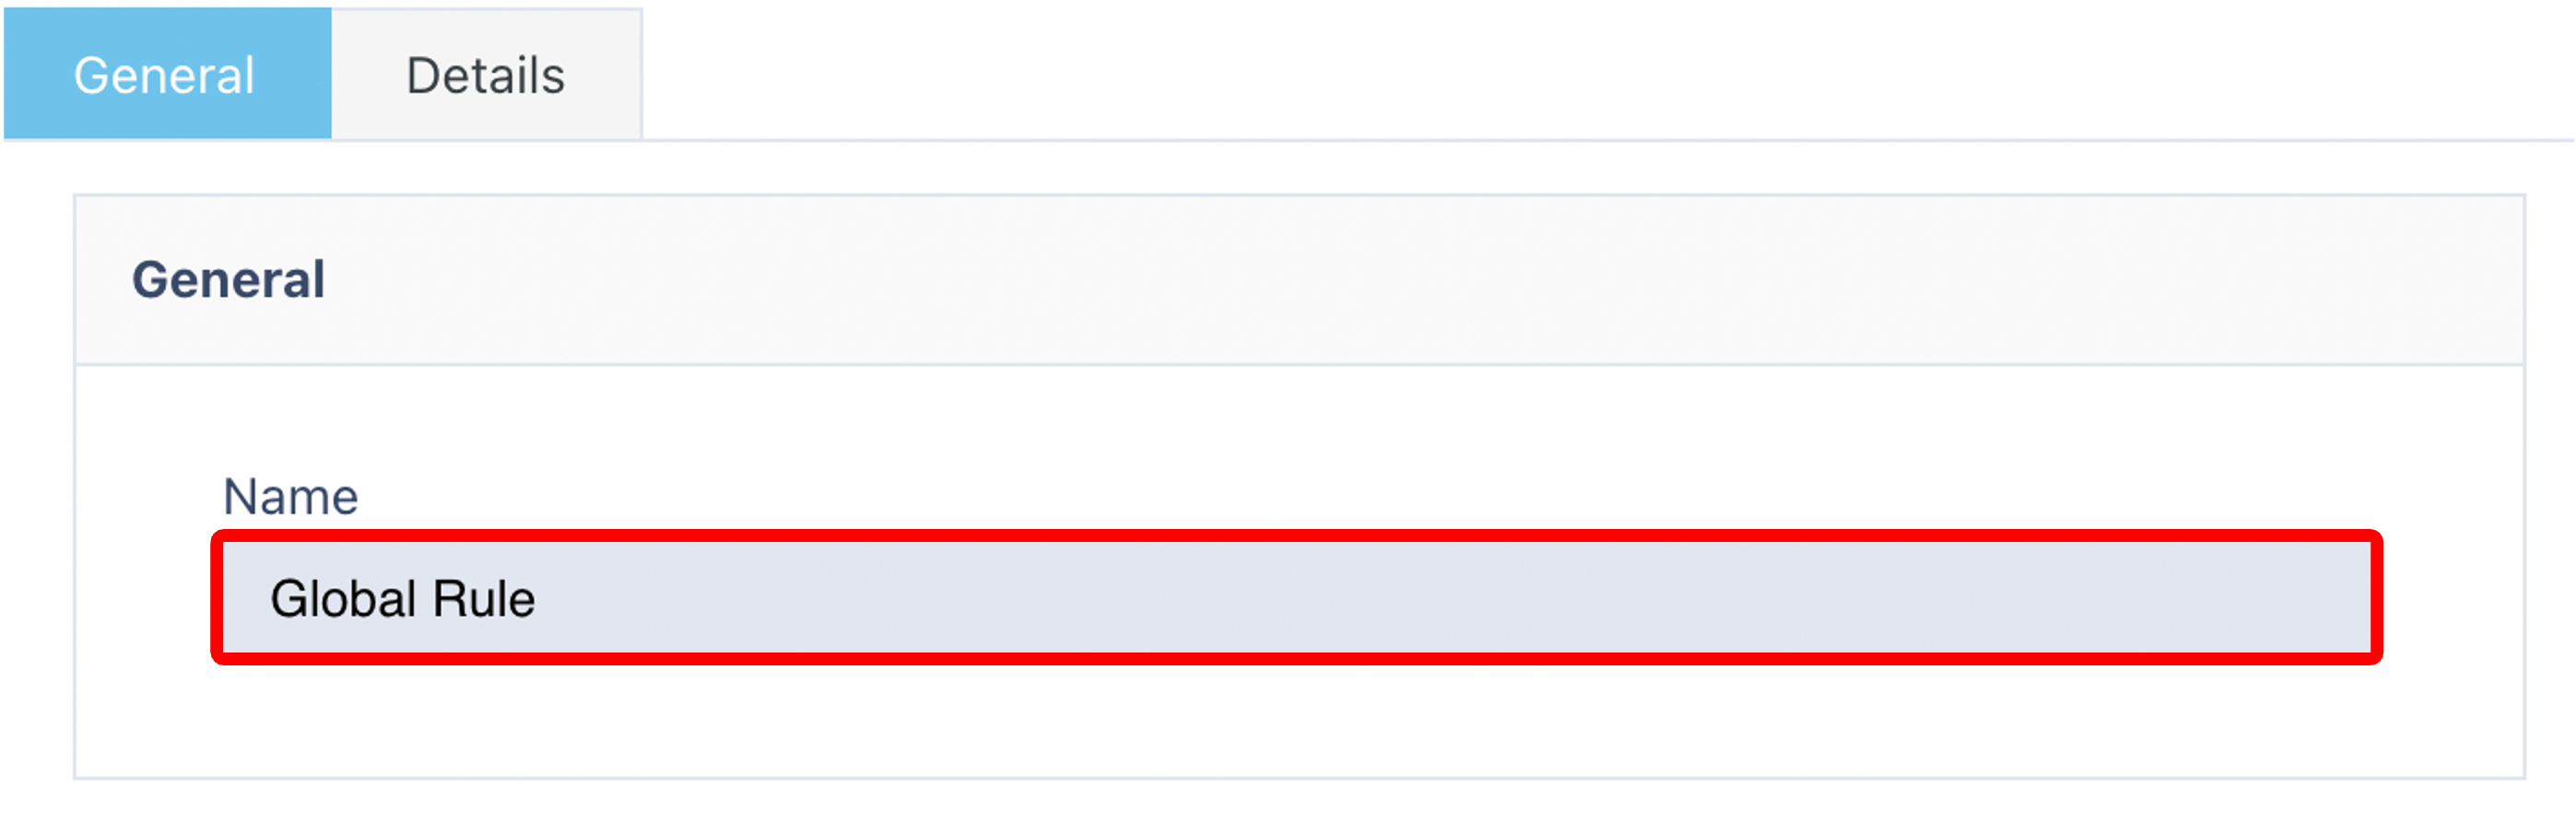
🌍 Best Practice: The Global Locating Rule
It’s recommended to create a Global Locating Rule that acts as a fallback when no specific rule applies.
This rule should:
Use a broad Locating Selection (covering all inventory zones).
Include all four Locating Methods, ordered from most preferred to least.
📝 Suggested method order:
Consolidate
Permanent Location
Empty Location
User Defined
This ensures all items will always have a valid location during putaway or replenishment.
⚙️ Customising Locating Rules
Locating Rules can be as simple or complex as your warehouse needs:
🔁 A fast-moving SKU might avoid “High Bay” zones and only locating to Ground Level Pickfaces.
🧩 A bulky item might require specific aisle locations.
📊 You can define multiple rules targeting zones, aisles, bins, item types, or even companies.
This flexibility helps optimise:
Picker travel time
Storage efficiency
Replenishment logic
Overall warehouse performance
🔍 Accessing Locating Rules
To find Locating Rules in the system:
Go to the Navigation Menu.
Use the Search Bar and type "Locating Rule".
Alternatively, go to:
Configuration > Receiving Profile Setup > Locating Rule.
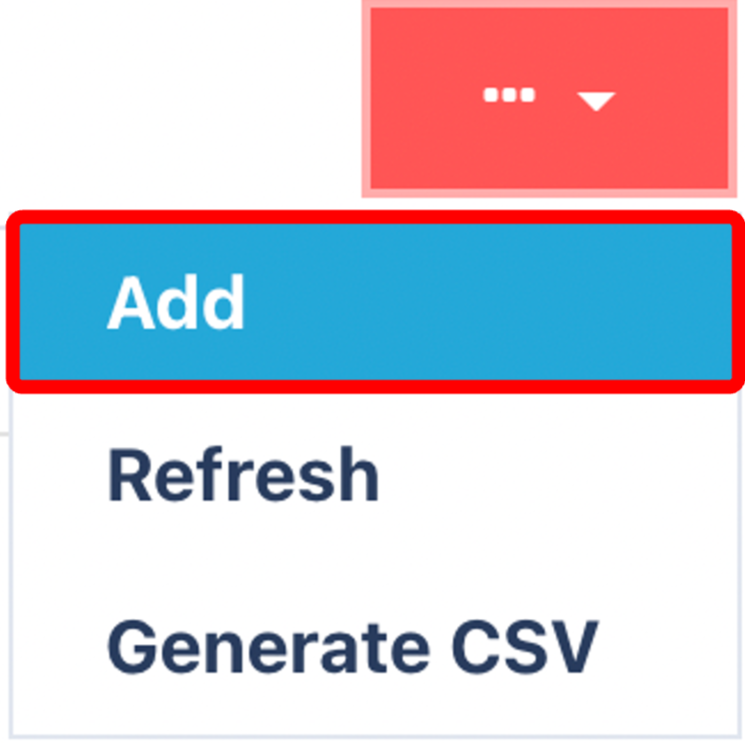
➕ Adding a New Locating Rule
Click on the Red Action Button , this will bring up a drop-down menu, and select "Add"
Enter a Name for your rule (e.g., Fast-Moving SKU Putaway).
Click on the Submit Button.png) to continue.
to continue.
🔧 Adding Locating Rule Details
Within the details tab, click on the red action button and click on "add".
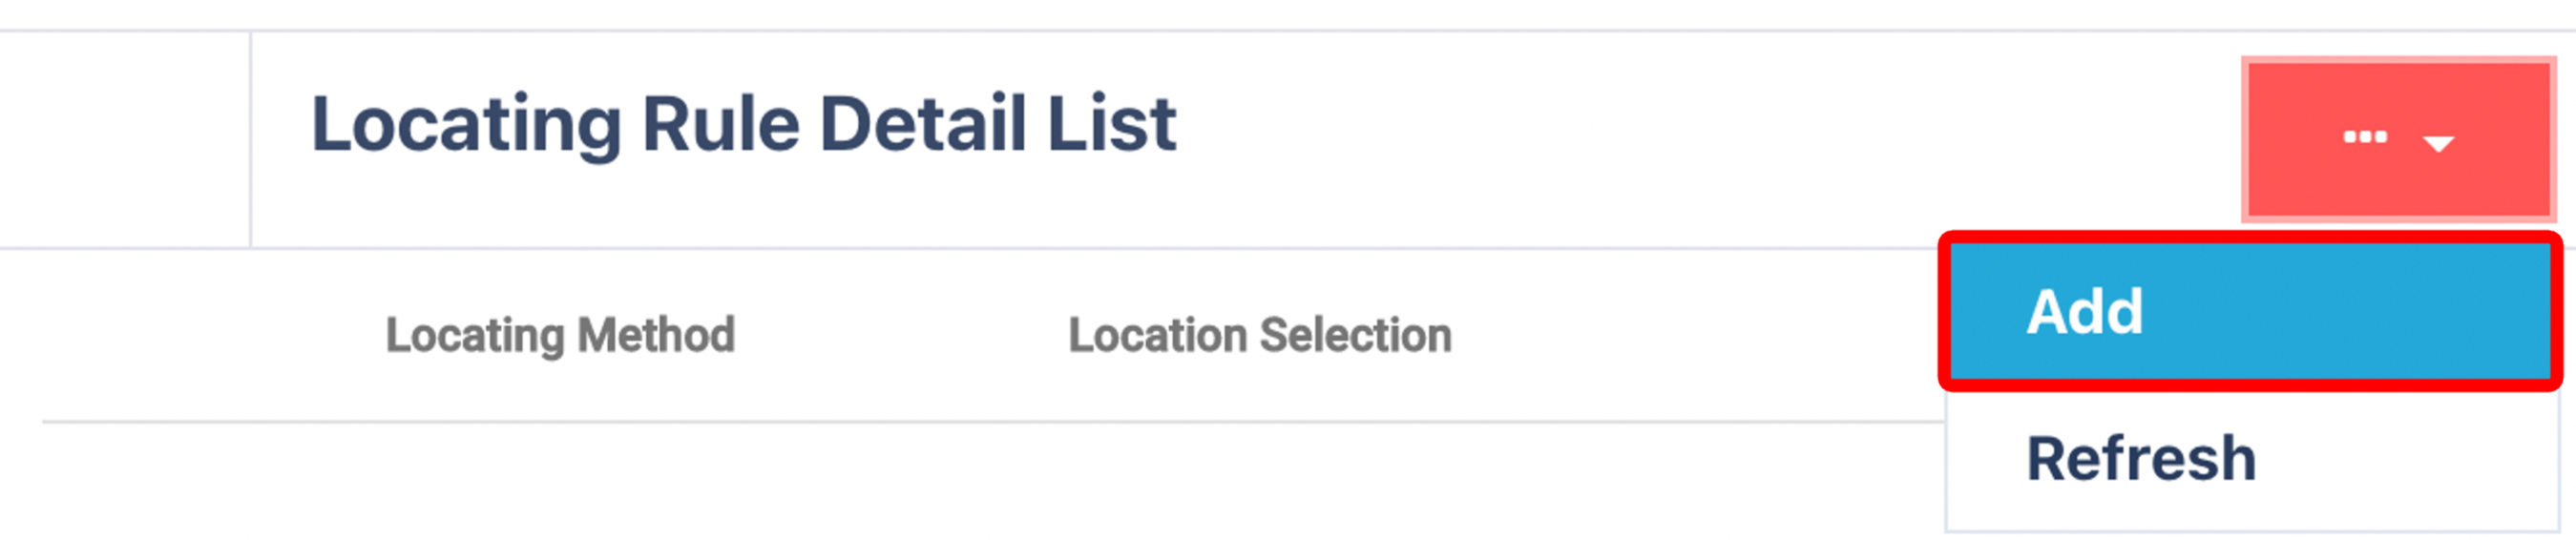
Select the Mandatory Fields
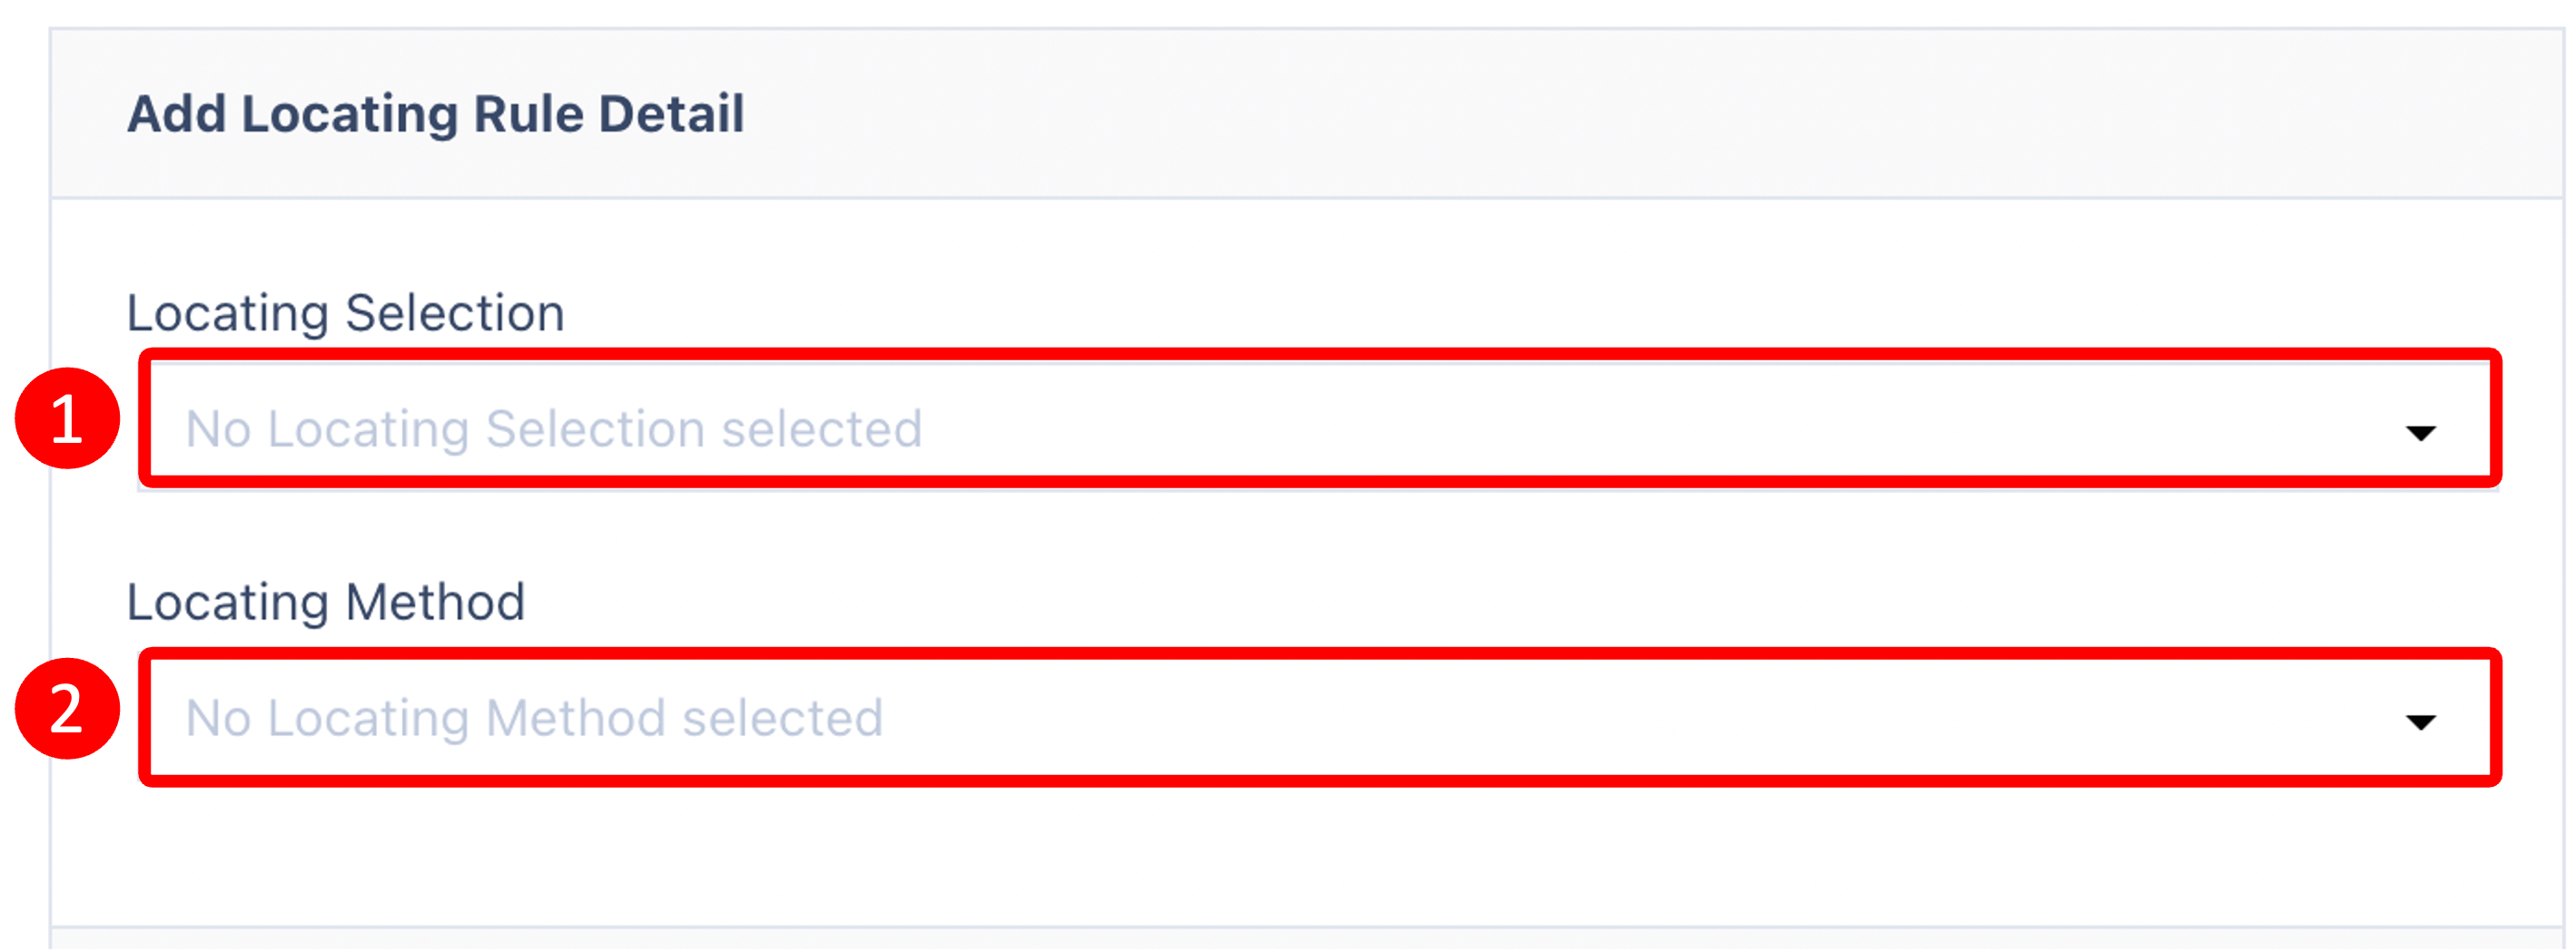
Select the following mandatory fields:
Locating Selection – defines the location pool.
Locating Method – choose one of the four methods.
📝 Method options recap:
Consolidate (Same Item + UoM)
Empty Location
Permanent Location
Location as per Selection
Click Submit to save your detail.
Click on the Submit Button to continue.
🔢 Setting the Order of Rule Details
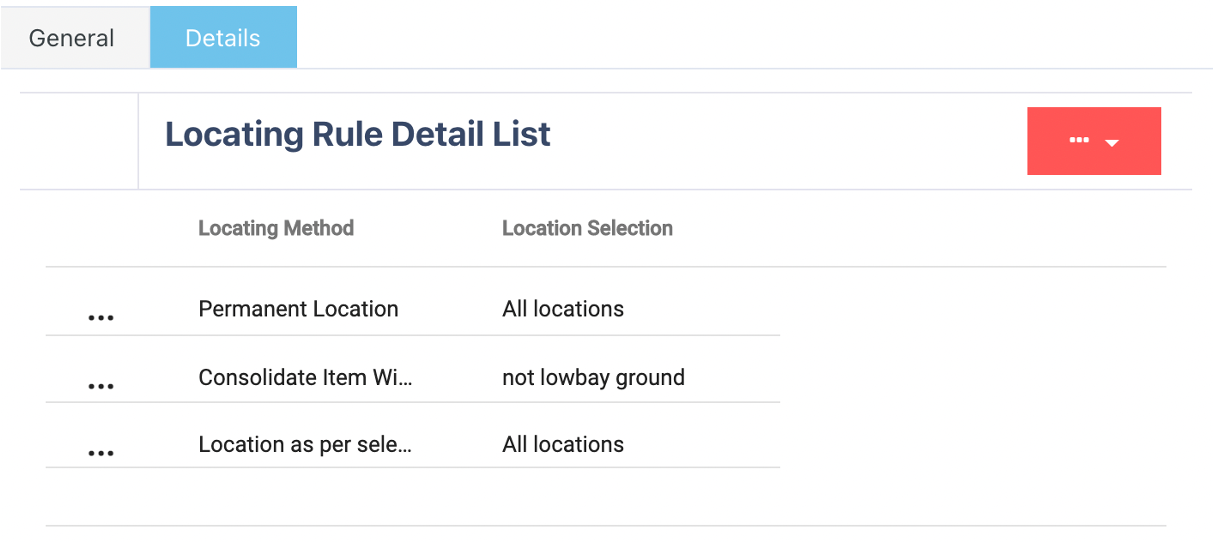
The system checks rule details top to bottom:
If the first rule fails to find a location, it tries the next.
Right-click a rule detail and choose Move Up or Move Down to change the order.
💡 Tip: Put your most preferred methods (e.g. Consolidate) at the top for optimal efficiency.