📦 Understanding Packing in Canary7
What is Packing
Packing in Canary7 is the process of taking items from one or more Pack From Containers that belong to the same shipment and placing them into one or more new Pack Into Containers (outbound containers). This consolidates the items and prepares the shipment for efficient, accurate dispatch.
✅ Key Benefits
Consolidation: Combines items into shipment-specific outbound containers.
Accuracy: Reduces errors by guiding users through each item.
Flexibility: Supports multiple initiation methods and automation options.
🔍Accessing Packing
To access Packing:
Navigation menu: Type "Packing" into the search bar and select Packing
Menu path: Shipping > Packing
🛠️ How to Use Packing
1️⃣ Selecting a Packing Profile

Choose the appropriate Packing Profile from the drop-down menu.
Ensure the correct initiation method is configured in the profile to match your packing process.
If you need to set up a new profile, refer to Adding a Packing Profile.
2️⃣ Enter the Pack To Location and Scan your Container
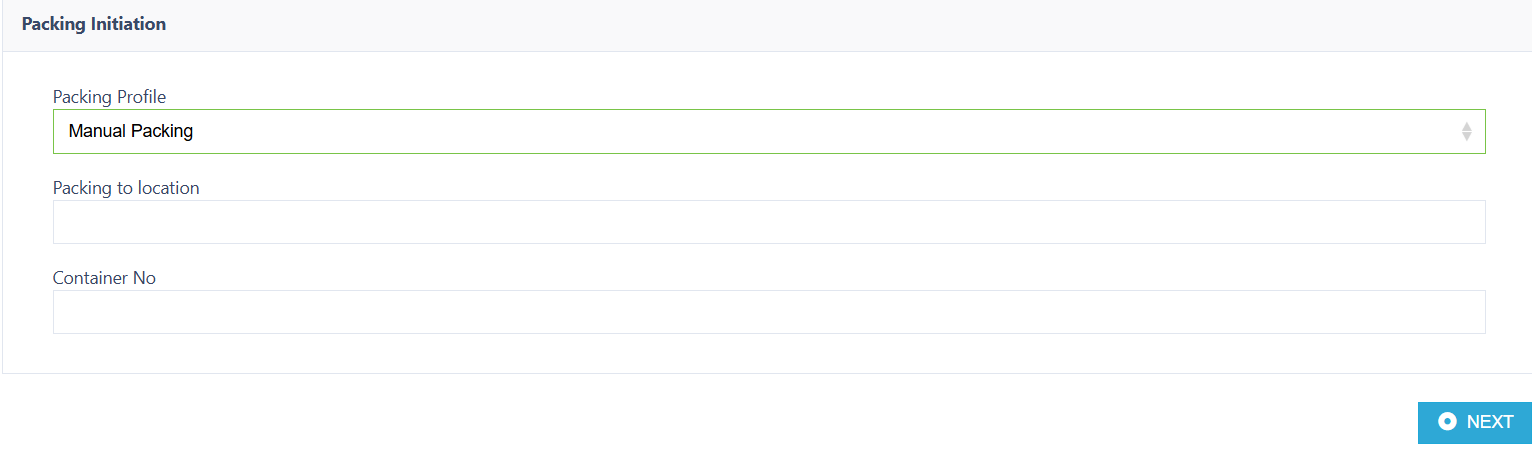
Enter the Packing To Location - This will relate to your Packing Station i.e. PAC-01, PAC-02, etc.
Enter/Scan the Container Number
Click on the next button  to continue.
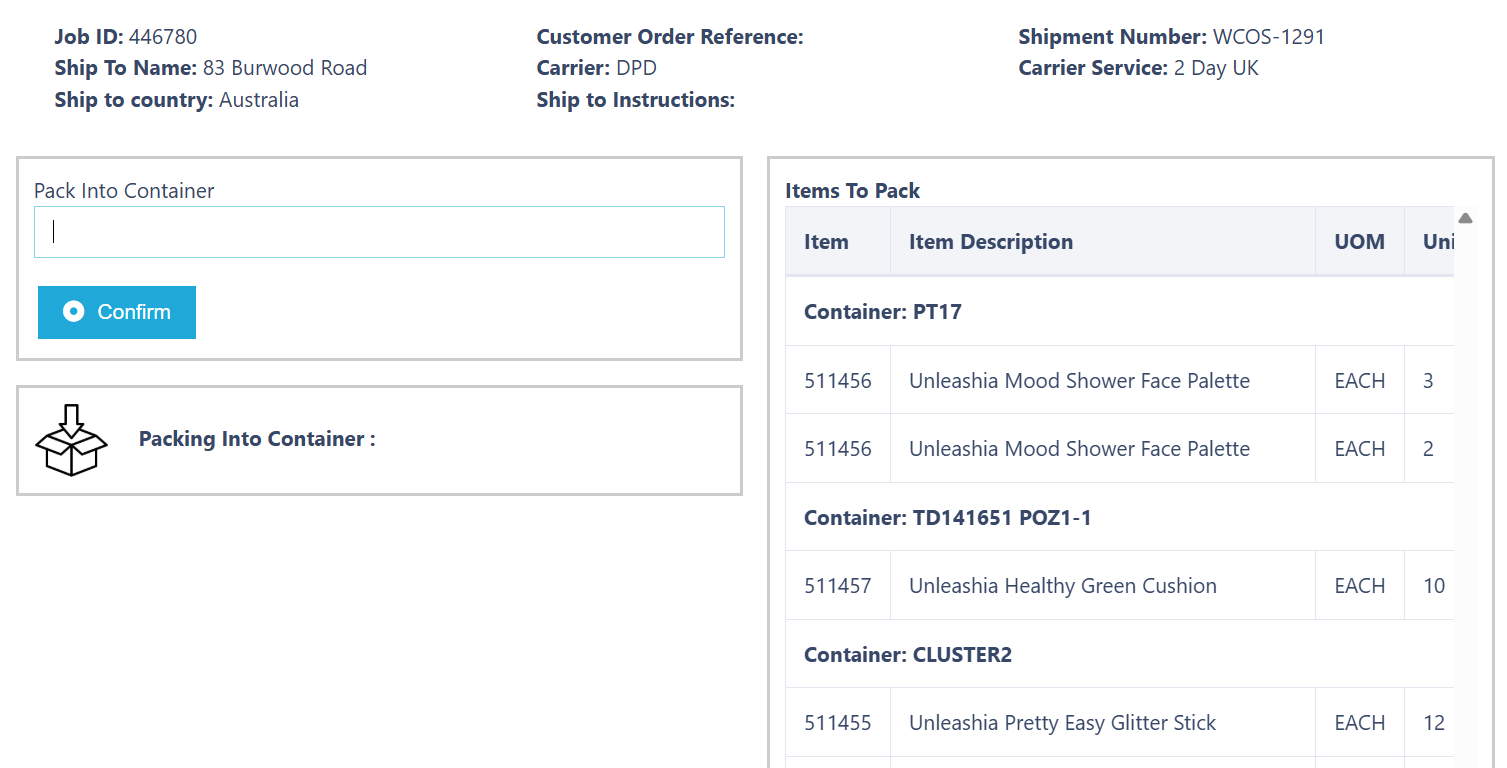
3️⃣ Creating the Pack Into Container
On the next screen, you’ll see all Pack From Containers linked to the shipment on the right-hand side, along with their detailed contents.
You’ll be prompted to Enter or Scan your Pack Into Container (the new outbound container).
Tip: If your Packing Profile has Auto Generate Pack To Container ID enabled, the container will already be generated. You’ll just need to confirm this – helping speed up the process (below).
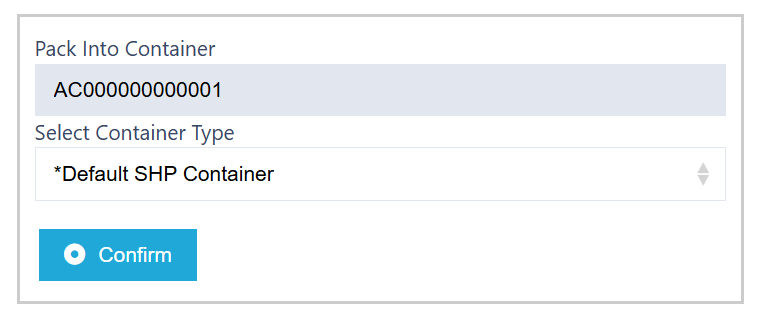
Enter the first container and click on the confirm button to continue.
4️⃣ Packing Your Items
Scan each item and enter the desired quantity.
Note: If your Packing Profile has Preset to 1 enabled, the quantity will default to 1 per scan.
As you confirm items, they will move from the Pack From Container (right side) into the Pack Into Container (left side).
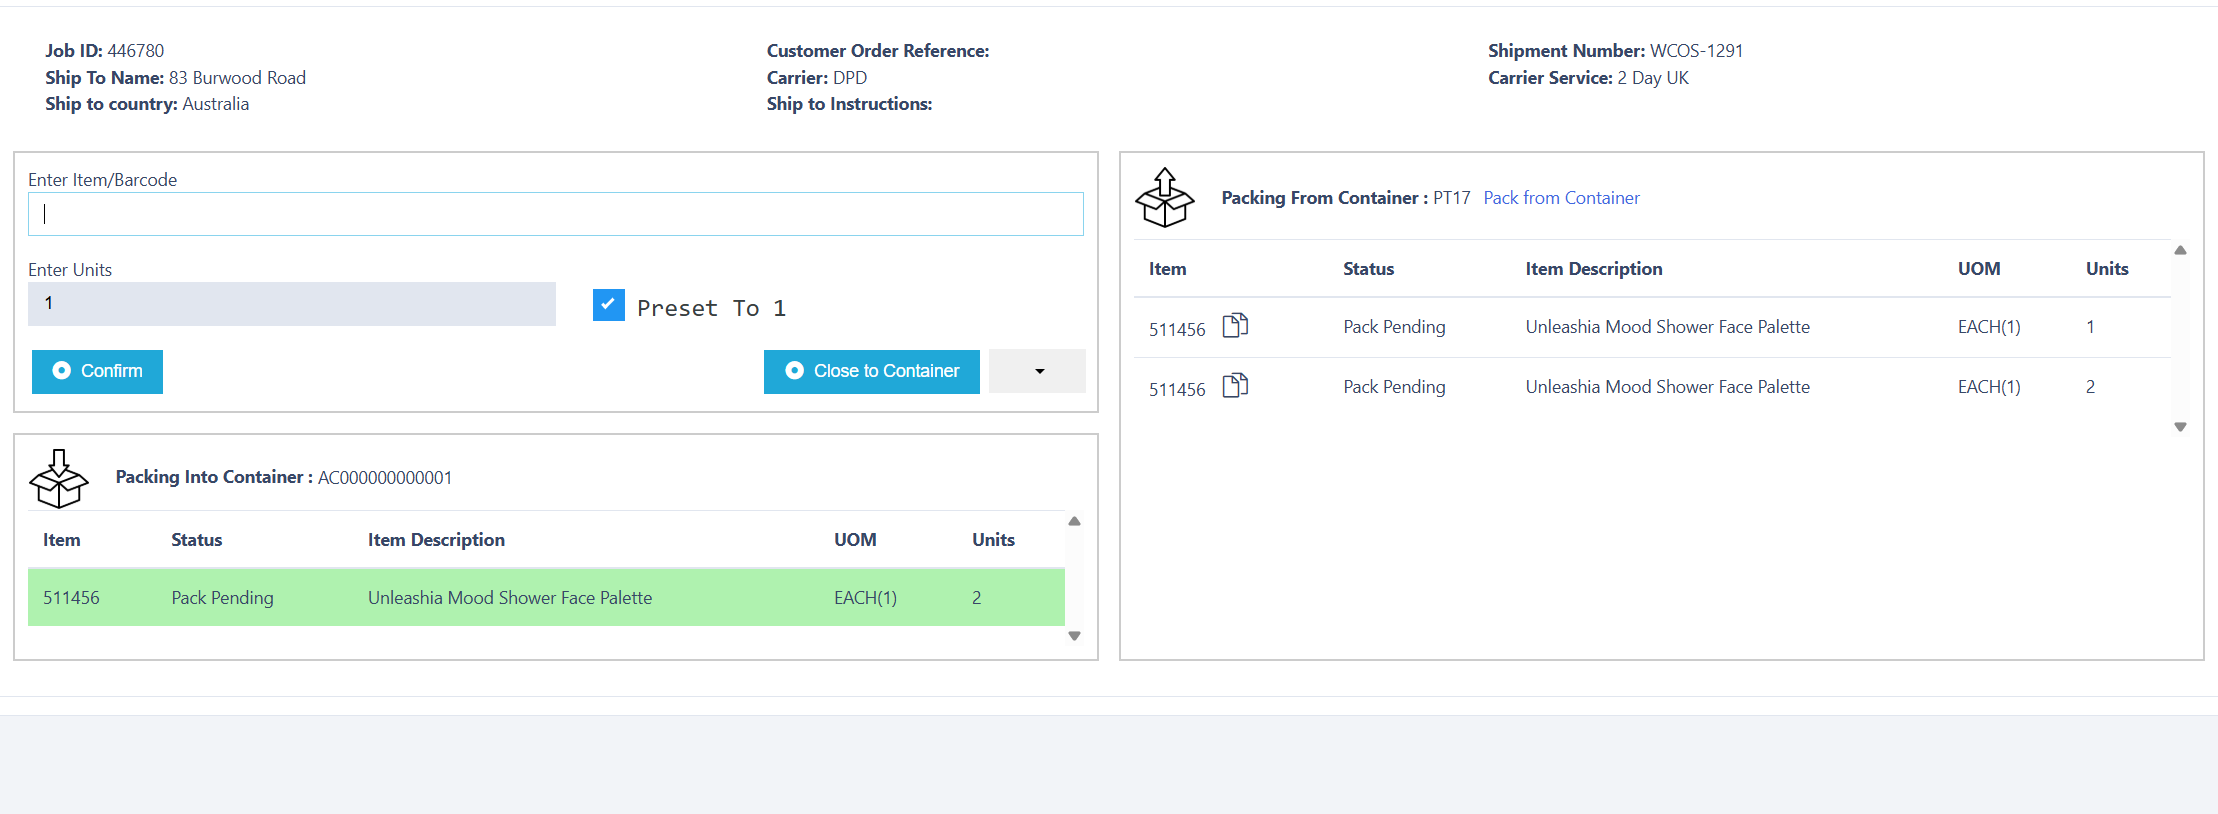
As you Scan and Confirm your items, they will move from the Packing From Container (Right), to the Packing Into Container (Left) to continue.
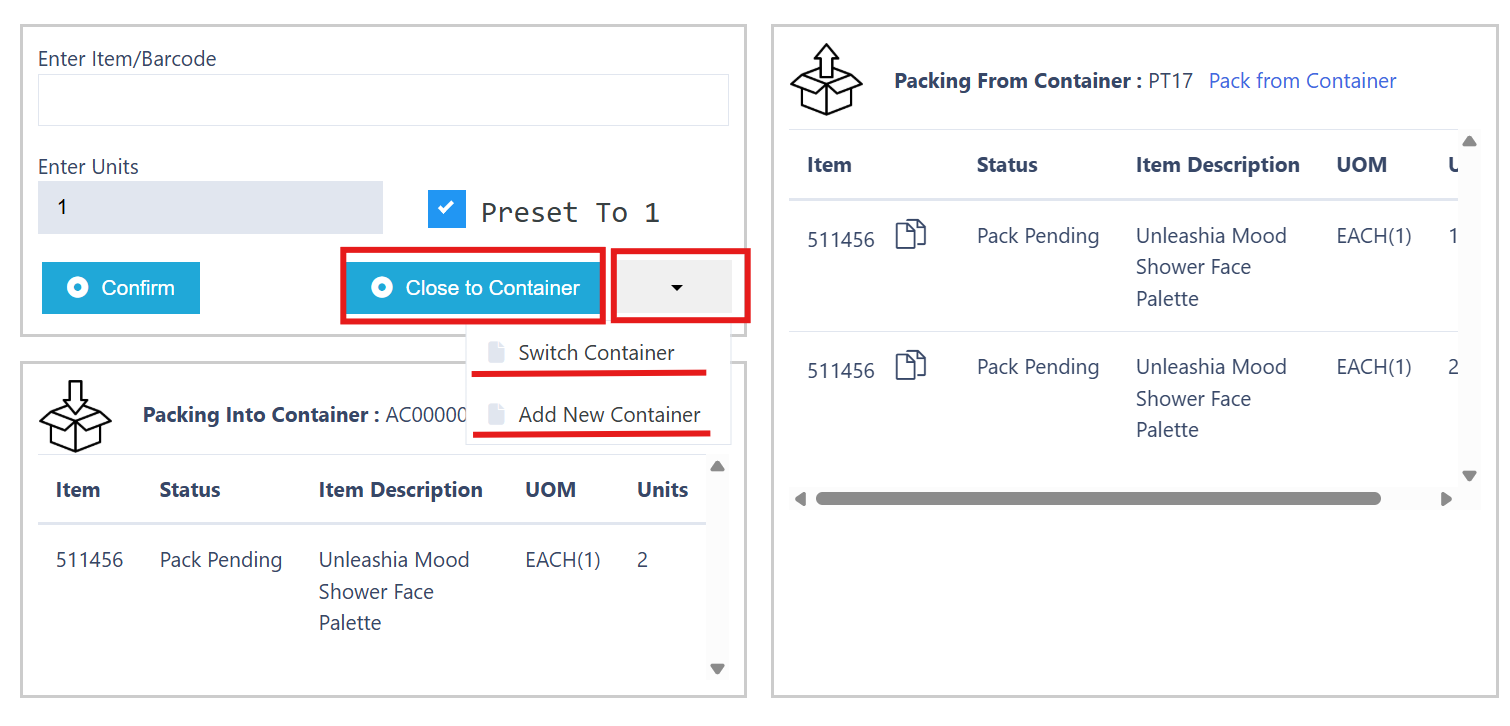
5️⃣ Managing Containers
Once packing begins, you have three options depending on your workflow:
Close To Container – Mark the current container as complete.
Switch Container – Use a different Pack Into Container for the next items.
Add New Container – Start packing into a new outbound container.
Once all Items are packed into their required Outbound Containers, Packing Execution is now complete.
⚙️ Additional Configurations
These optional features enhance the Packing process to support different operational needs:
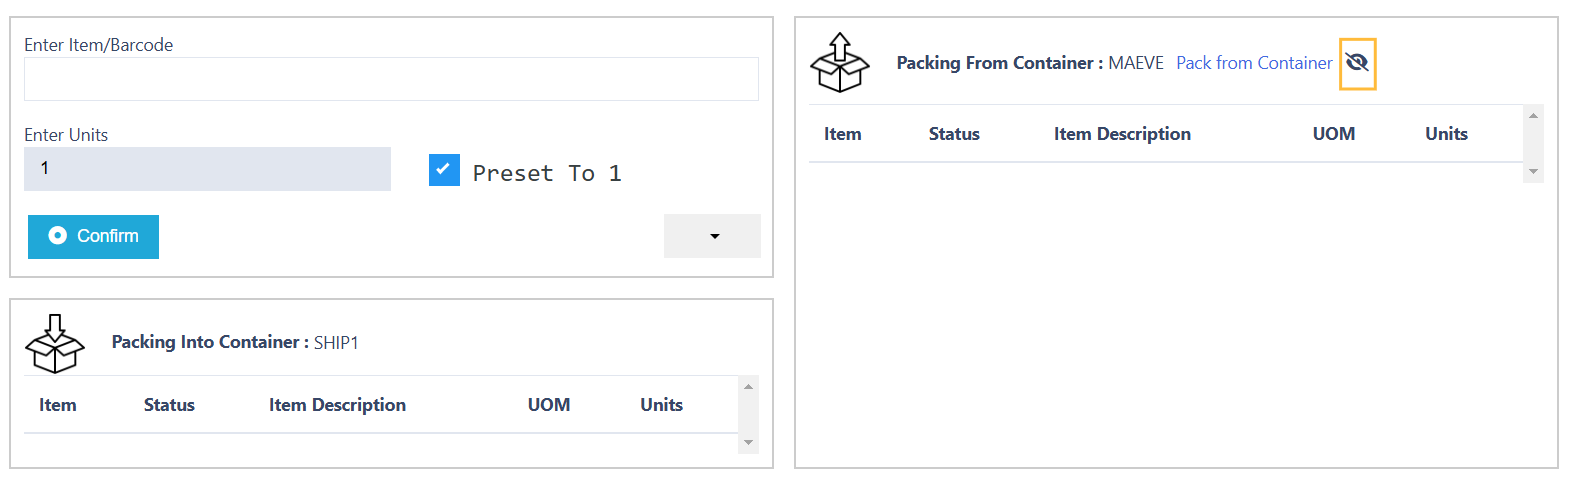
🔒 Blind Packing
In this mode, users are not shown the contents of the Pack From Container. They must scan each item physically in front of them.
Blind Packing enforces real-time item verification, commonly used in high-accuracy environments or regulated sectors where the user must physically scan each item without seeing expected contents.
If the user clicks the Eye icon to reveal the contents, Blind Packing is aborted.
This action is logged in the inventory history as a "Blind packing failure".
⚡ Auto Pack
When enabled, this automatically packs all items from the Pack From Container into a single, system-generated outbound container, without user intervention.
This is particularly useful for high-throughput, low-variance workflows.
Ideal for B2C shipments or scenarios where all items are always packed together, such as single-line orders.
🏷️ Print Consignment Piece Label
This enables automatic printing of a consignment piece label during the packing process.
Useful for carriers requiring individual piece-level labelling -
Useful for carriers requiring individual piece-level labelling - This automatically prints a label for each individual package or box (piece) in a consignment, helping meet carrier labelling requirement
🚚 Run Carrier Assignment at Job Completion
For orders with flexible carrier options, this setting triggers carrier assignment only after the packing job is completed.
Ideal for operations where carrier is finalised late in the process.
⚠️ Note: Ensure carrier rules are correctly configured to avoid missed assignments when using this option.
📋 Summary Workflow
Configure Packing Profile - Set initiation methods and options.
Access Packing - From the menu or search bar.
Scan Pack To Location - You packing station.
Scan Pack From Container(s) - Load containers linked to the shipment
Create or Auto-Generate Pack Into Container – Based on profile settings. Pack items
Pack Items – Scan and confirm quantities. Confirm Container Closure
- Close, Switch, or Add Containers – Depending on how the packing is split.
8. Finalise – Enter weight/location and complete the job (if required).