Understanding Location Selection
What is Location Selection?
Location Selection allows users to delineate between certain locations based on their functionality within Canary7. For example: We can create location selections for All Inventory Locations, Pickable Inventory Locations, Bulk Inventory Location, Returns Inventory Locations, Fast-moving Pickface Locations etc.
By categorising locations in this way, users can apply targeted operational logic to optimise warehouse workflows.
Common Use Cases:
🧮 1. Allocation Rules
Use Location Selections to restrict where inventory can be allocated from. For example:
Only allocate from locations marked as Pickable Inventory.
Exclude Bulk Inventory or Returns from sales order fulfilment.
📦 2. Picking Job Creation
Target specific zones or types of stock for picking jobs:
Create picking jobs that pull from Fast-Moving Aisles only.
Separate B2B and B2C picking based on storage strategy.
🔄 3. Replenishment Rules
Configure rules that replenish from Bulk Inventory to Pick Face based on predefined selections:
Replenish only from zones flagged as Bulk Storage.
Trigger replenishment for pick locations part of a Pickable Inventory selection.
📋 4. Cycle Counting
Automate and prioritise cycle counts by location group:
Run weekly cycle counts in High Risk or High Velocity zones.
Schedule counts for Returns Inventory to confirm quality control.
Available Criteria for Location Selections:
Location: Select specific locations using their unique identifiers (e.g., Location Code).
Warehouse: Filter locations based on the warehouse to which they belong, particularly useful for multi-warehouse environments.
Location Type: Classify locations by type (e.g., Pick, Bulk, Staging, or Returns), allowing for targeted selection based on function.
Locating Zone: Define location selections by zone (e.g., Ground Level, Upper Storage), helping to separate locations by physical storage areas.
Allocation Zone: Choose locations based on their assigned allocation zone, which determines how items are allocated within the warehouse.
Work Zone: Filter locations by their work zone, such as areas used specifically for picking, packing, or staging.
Location Code: Use specific location codes to narrow down the selection of locations, especially when dealing with highly granular warehouse configurations.
Location Template: Target locations based on a predefined template for consistent location setup across the warehouse.
Location Template 1 (2, 3, 4, 5): Select locations based on additional template fields (e.g., Template 1, Template 2, etc.) to refine selections further, enabling a more customized location strategy.
Location Pick Sequence: Allows the targetting of specific Pick Walk Sequences.
Accessing Location Selection
To access Location Selection:
Open the Navigation menu, type Location Selection into the search bar, and select it.
Alternatively, navigate via:
Configuration > Functional Area Setup > Inventory Control Setup > Location Selection.
Adding a Location Selection
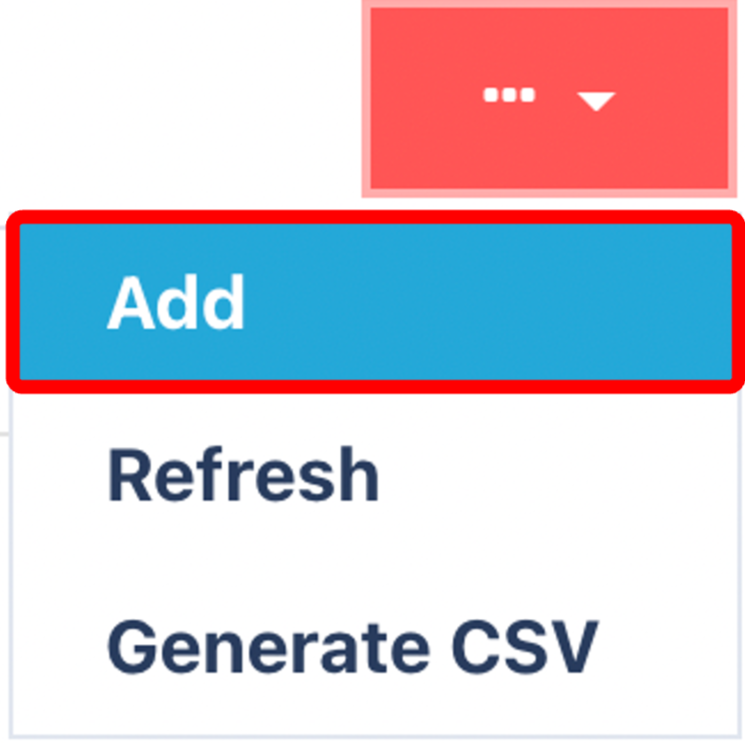
Click on the Red Action Button , this will bring up a drop-down menu, and select "Add"
Complete the General Tab
.png)
Enter a descriptive Name for your Location Selection.
Choose the relevant options in Select where from to specify the scope - Choose between Inventory or Location
Complete the Where Tab
Use this tab to define conditions for the locations to include. For example, selecting locations with Crane 3 AND of High Bay Pallet type.
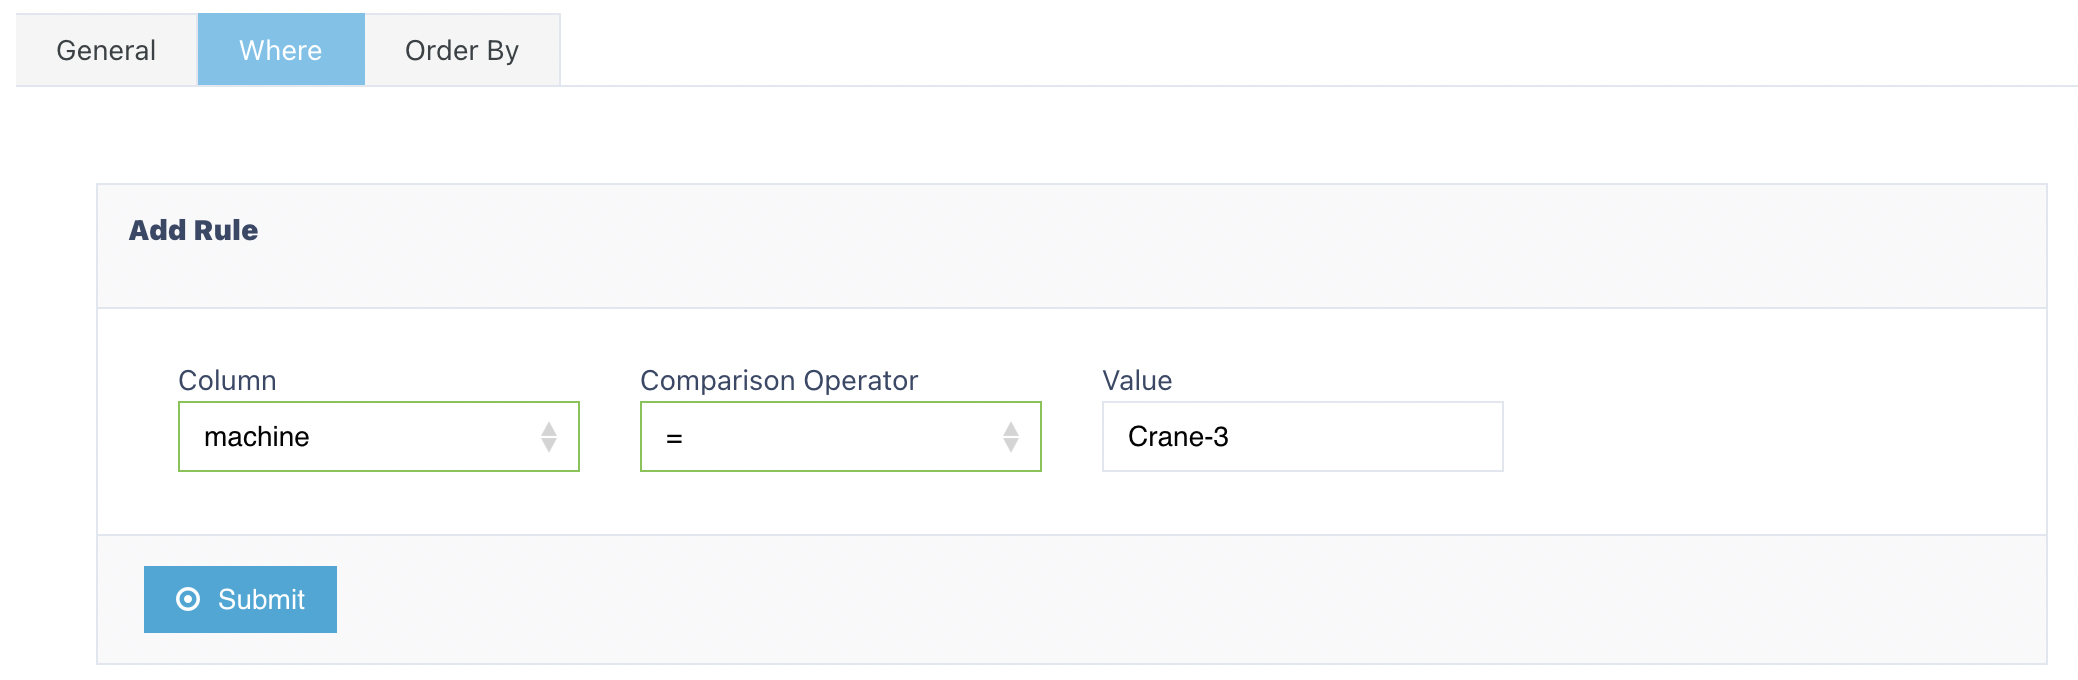
Add each condition and click the Submit button beside it (not the submit at the page bottom).

When multiple conditions exist, combine them with logic operators:
AND (all must be true)
OR (any can be true)
NOT (exclude specific conditions)
This lets you build precise and flexible selection rules.
Complete the Order Tab

Determine how the selected locations are sorted when the selection is used.
Drag fields from the left box to the right box in the desired order to prioritise or group locations logically.
Multiple sorting fields can be used to fine-tune the order.
Once you have selected and entered the required fields, click on the submit button.png) to add.
to add.