📦 Understanding Inventory Selection
🎯 What is Inventory Selection?
Inventory Selection lets you filter and group specific items within Canary7 based on criteria like item attributes or storage details. This powerful feature helps you create targeted inventory pools that streamline your warehouse processes — from picking and replenishment to cycle counting. Whether isolating pickable stock, separating items by company (ideal for 3PLs), or focusing on specific categories, Inventory Selection puts you in full control of your inventory workflows.
⚙️ How Inventory Selection Works
You define your selection criteria using Comparison Operators that filter items based on attributes such as Company, Inventory Status, Item Category, and more. This lets you create highly specific, tailored groups of inventory aligned with your operational goals.
🚀 Using Inventory Selections in Your Workflow
Inventory Selections can be applied across many warehouse operations:
🛒 Picking Job Creation: Include only items from the selected inventory pool in picking jobs.
🔄 Replenishment Rules: Target replenishment efforts on chosen inventory groups.
📋 Cycle Counting: Focus cycle counts on specific subsets of your stock.
By filtering inventory based on item-specific attributes, you gain refined control and improve operational accuracy.
🔍 Available Criteria for Inventory Selection
You can filter inventory using these common attributes:
📌 Item: Select specific items by unique identifiers (Item Code, SKU).
🏢 Company: Filter items by company ownership—great for 3PL multi-client setups.
📍 Location: Choose items stored in particular warehouse locations.
🏭 Warehouse: Target items across one or multiple warehouse sites.
📉 Minimum Stock Level: Select items below a certain stock threshold to trigger replenishment.
📈 Maximum Stock Level: Identify items exceeding max levels for redistribution or clearance.
🗂️ Item Category: Group items by category, like perishables or electronics.
🔗 Item Group: Cluster similar items for streamlined processing.
🚦 Item Status: Filter items by status (available, quarantined, damaged).
🧾 Item Batch: Select items by batch number for traceability or expiry management.
Use comparison operators like equals, greater than, or less than to create precise selections.
🔑 Accessing Inventory Selection
Open the Navigation menu, type Inventory Selection in the search bar, and select it.
Or navigate to:
Configuration > Functional Area Setup > Inventory Control Setup > Inventory Selection
➕ Adding an Inventory Selection
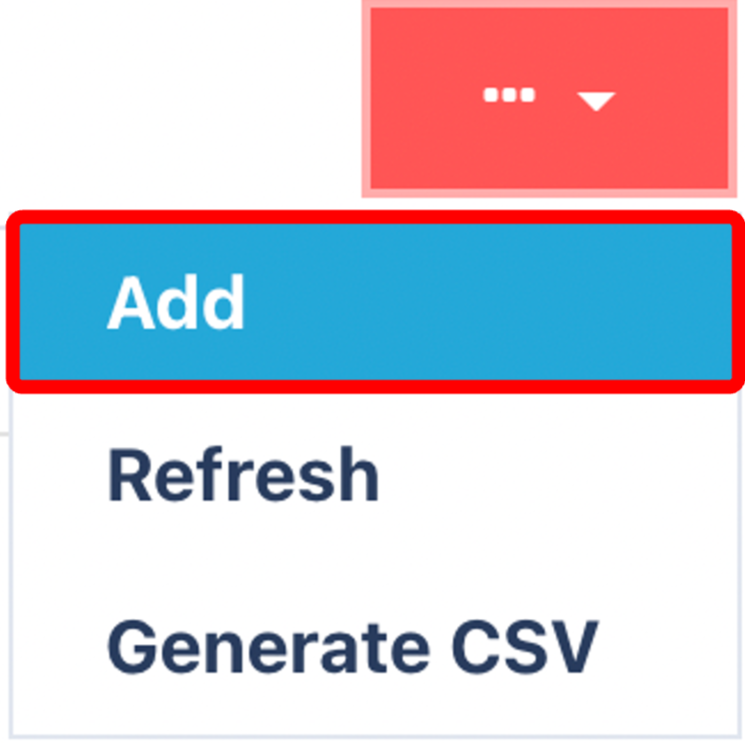
Click on the Red Action Button , this will bring up a drop-down menu, and select "Add"
Enter the name of the Inventory Selection
.png)
Click Add to create a new selection.
Enter the name of the Inventory Selection in the General Tab.
Complete the Where Tab to set rules involving logic and comparison operators. For example, create a selection for items across two warehouse locations.
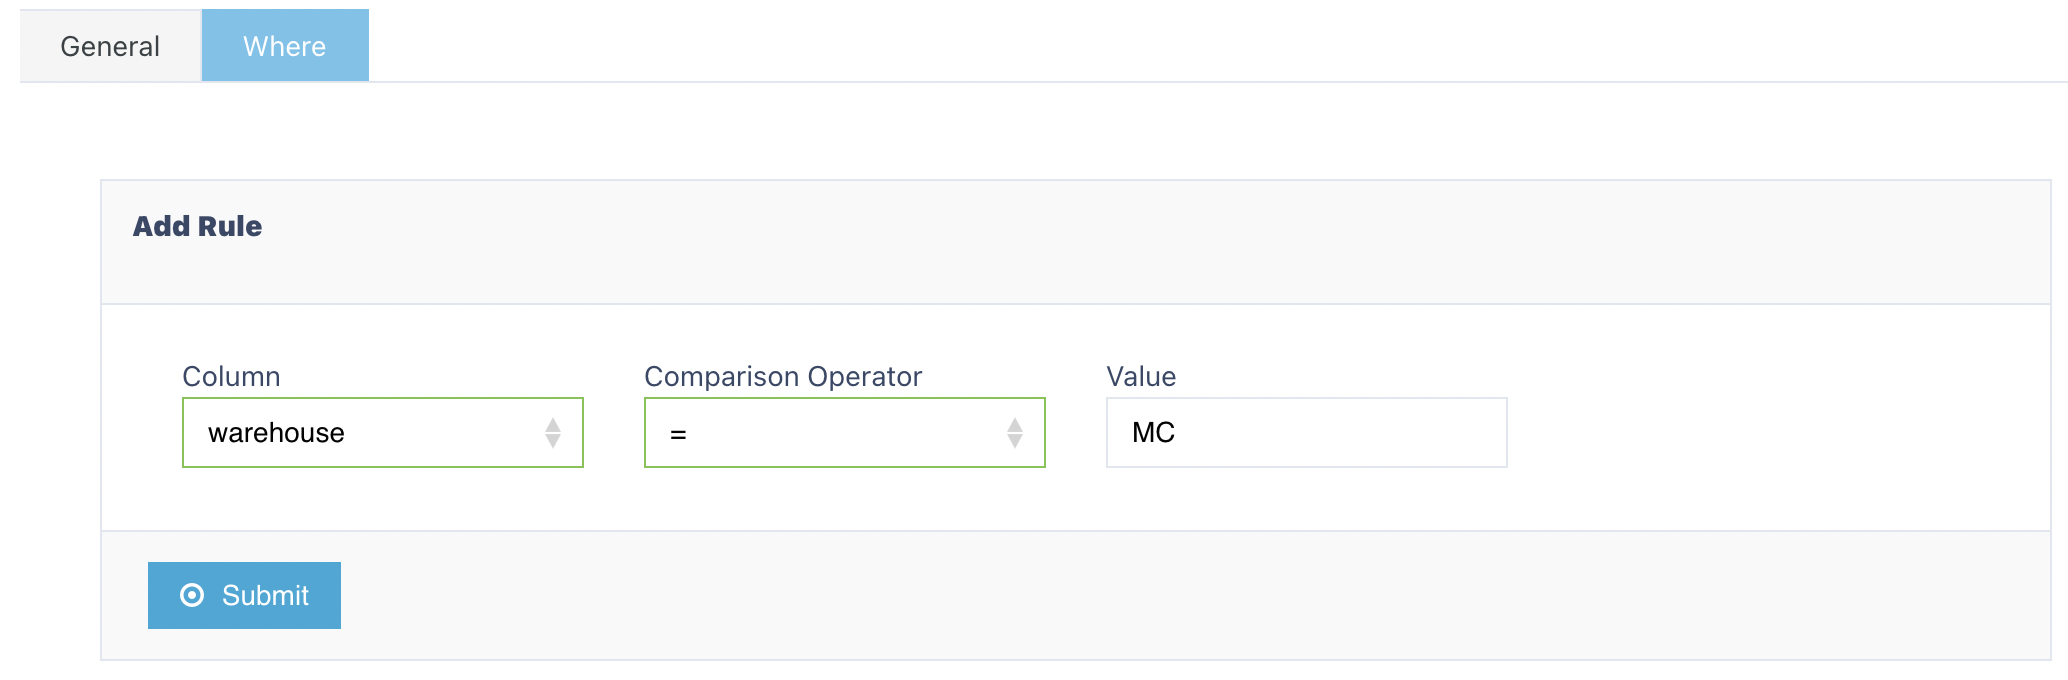
After setting each criterion, click the Submit button beside it (not the page bottom).

Once all criteria are added, click Save.
Once you have selected and entered the required fields, click on the submit button.png) to add.
to add.