📍 Understanding Location
What is a Location?
In Canary7, a Location refers to a specific position where an Item is stored within the Warehouse. Locations are typically organised within zones (e.g., Receiving Dock, Picking Zone, Returns Area) to streamline inventory management.
Each Location consists of a Location Format, such as Area, Rack, Row, and Level, allowing precise tracking of inventory inside the warehouse.
Locations may also have assigned attributes like:
Size
Weight capacity
Storage type (e.g., racks, shelves, floor space)
These attributes ensure optimal storage conditions and efficient warehouse operations.
Accessing Location
To access Location in Canary7:
Use the Navigation menu, type "Location" in the search bar, and select Location.
Alternatively, navigate via:
Configuration> Functional Area Setup > Inventory Control Setup > Location
Searching for a Location
To find inventory locations within a specific location type or get a full list, you can perform a search with various filter fields. Leaving all fields blank returns all locations.
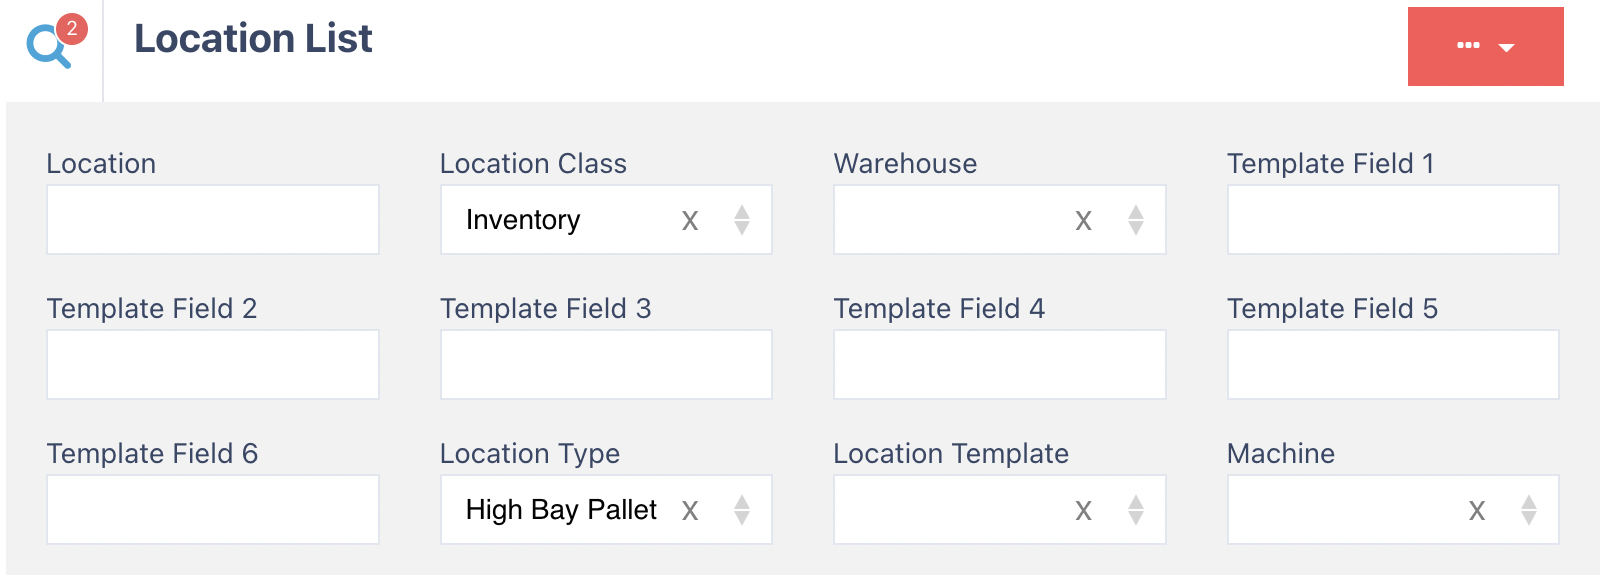
Search Fields
Location
Location Class
Warehouse
Template Fields 1 to 6
Location Type
Location Template
Click Search to view results.
Once you have entered all the information, you need to find your results click on the search button to continue.
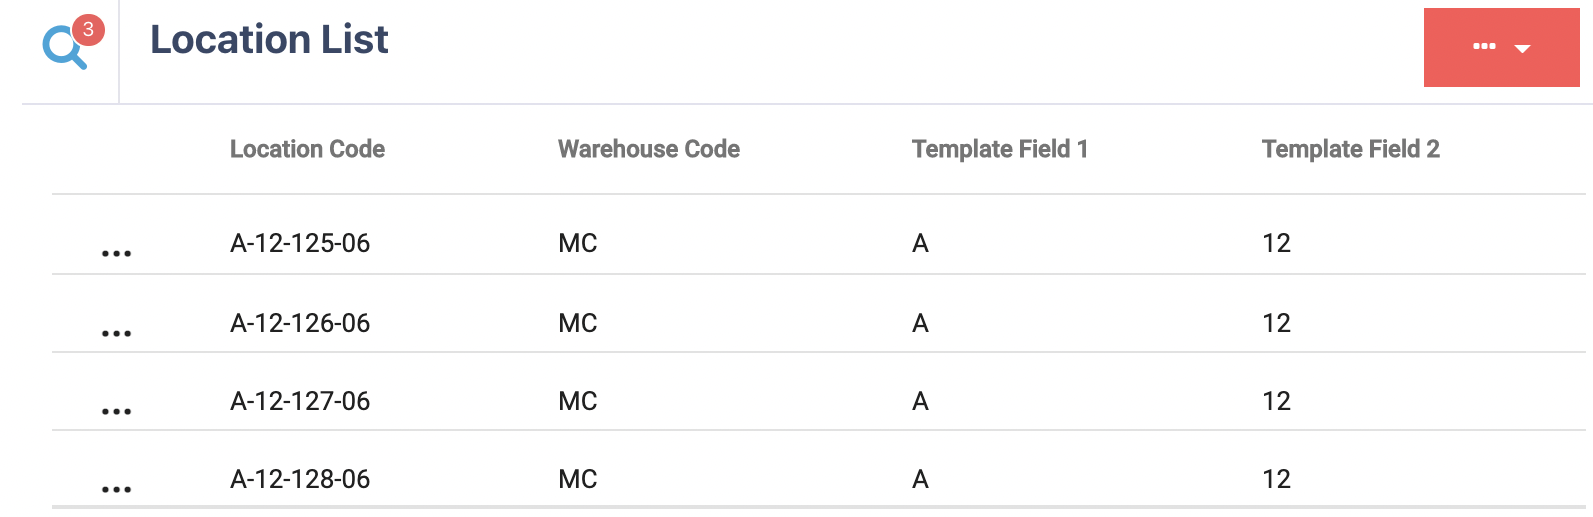
Location Code
Warehouse Code
Template Fields 1 to 6
Location Check Digit
Location Class
Location Template
Machine
Status
Adding Locations via import CSV
You can bulk add locations by importing a CSV file.
Use the Location CSV template to prepare your file.
Note: Row 2 contains an example to help you complete the CSV correctly.
Importing the CSV
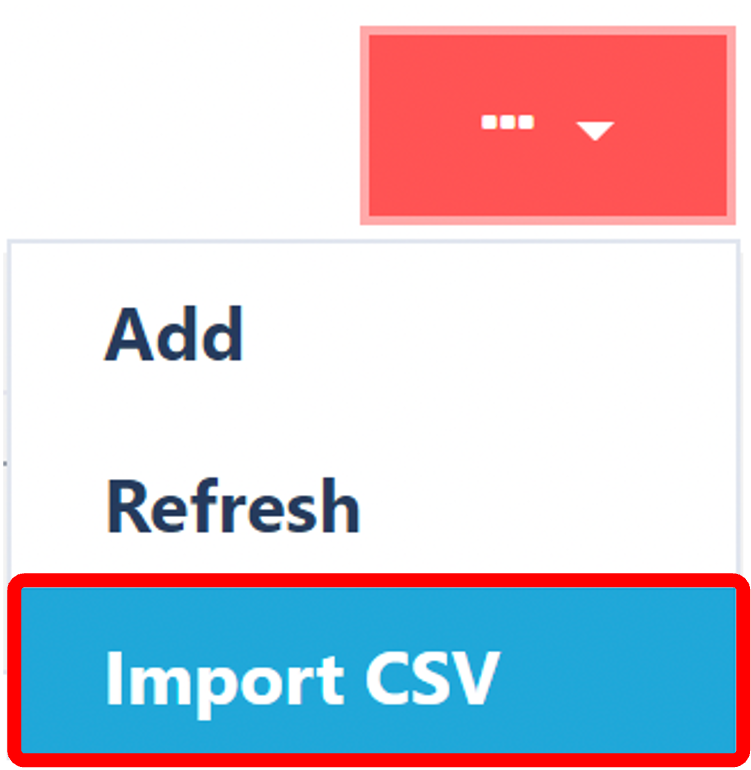
Click Import CSV.
Click on the Red Action Button . This will bring up a drop-down menu, and select "Import CSV".
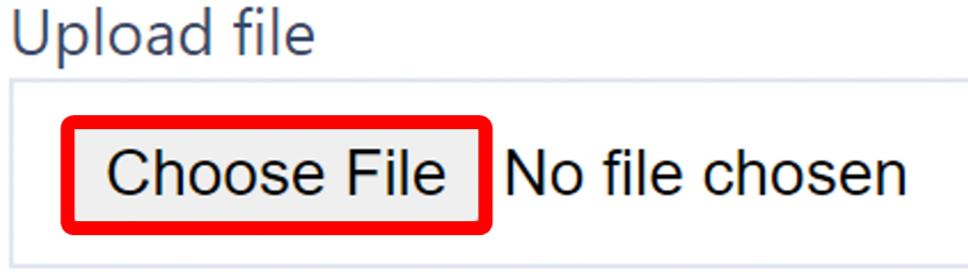
Choosing File
Click Choose File, locate your CSV, and open it.
Click Import to upload and process.
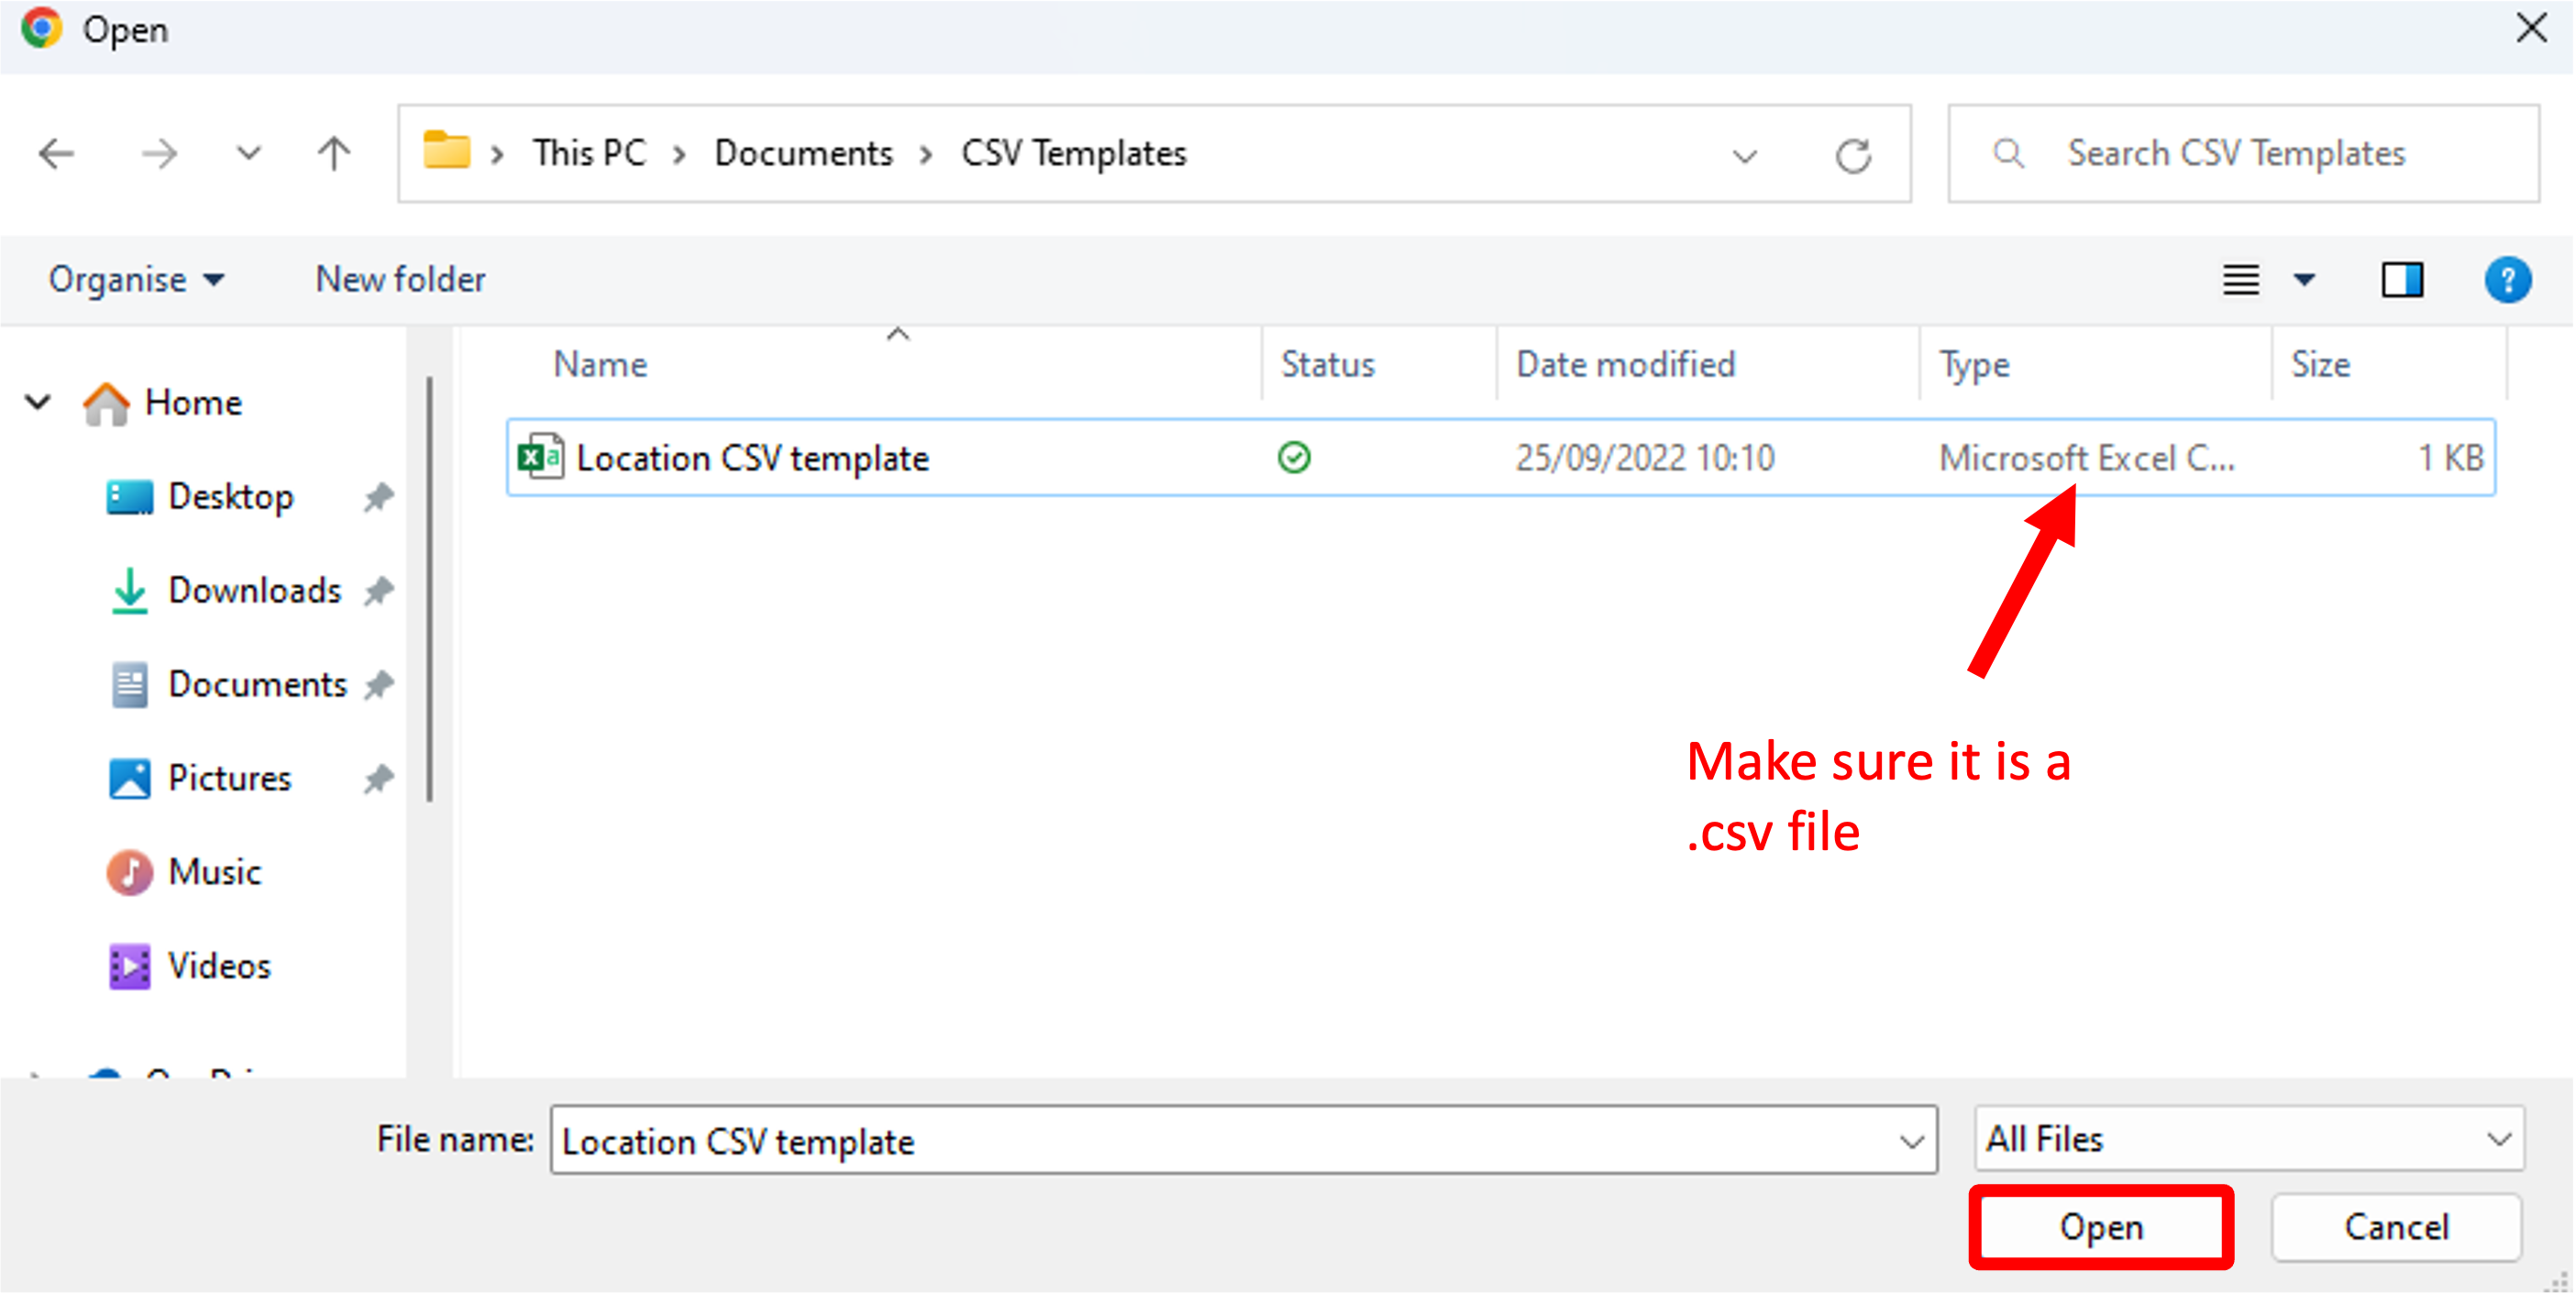
Once you have selected and entered the required fields, click on the Import button to upload your file.
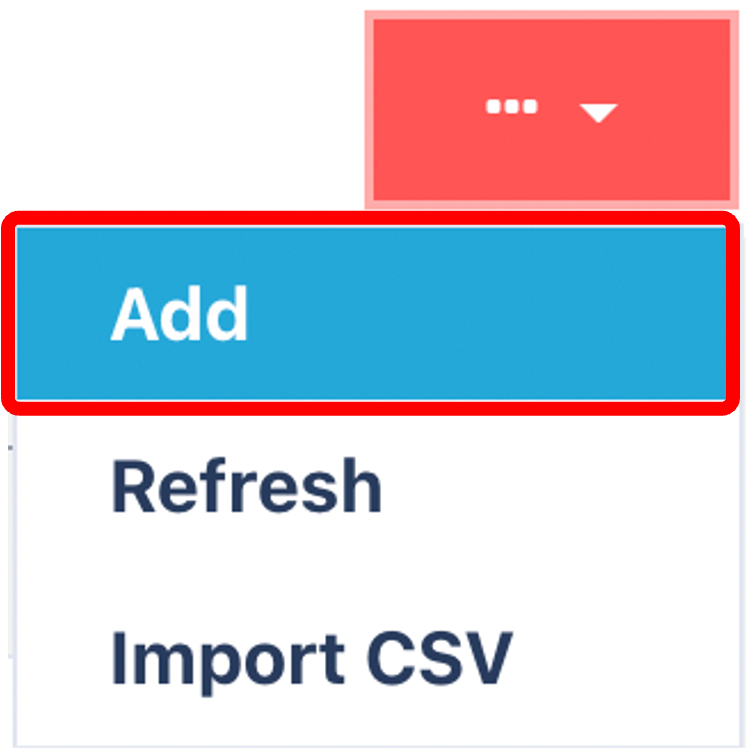
Adding Locations Manually
Click on the Red Action Button, this will bring up a drop-down menu, and select "Add"
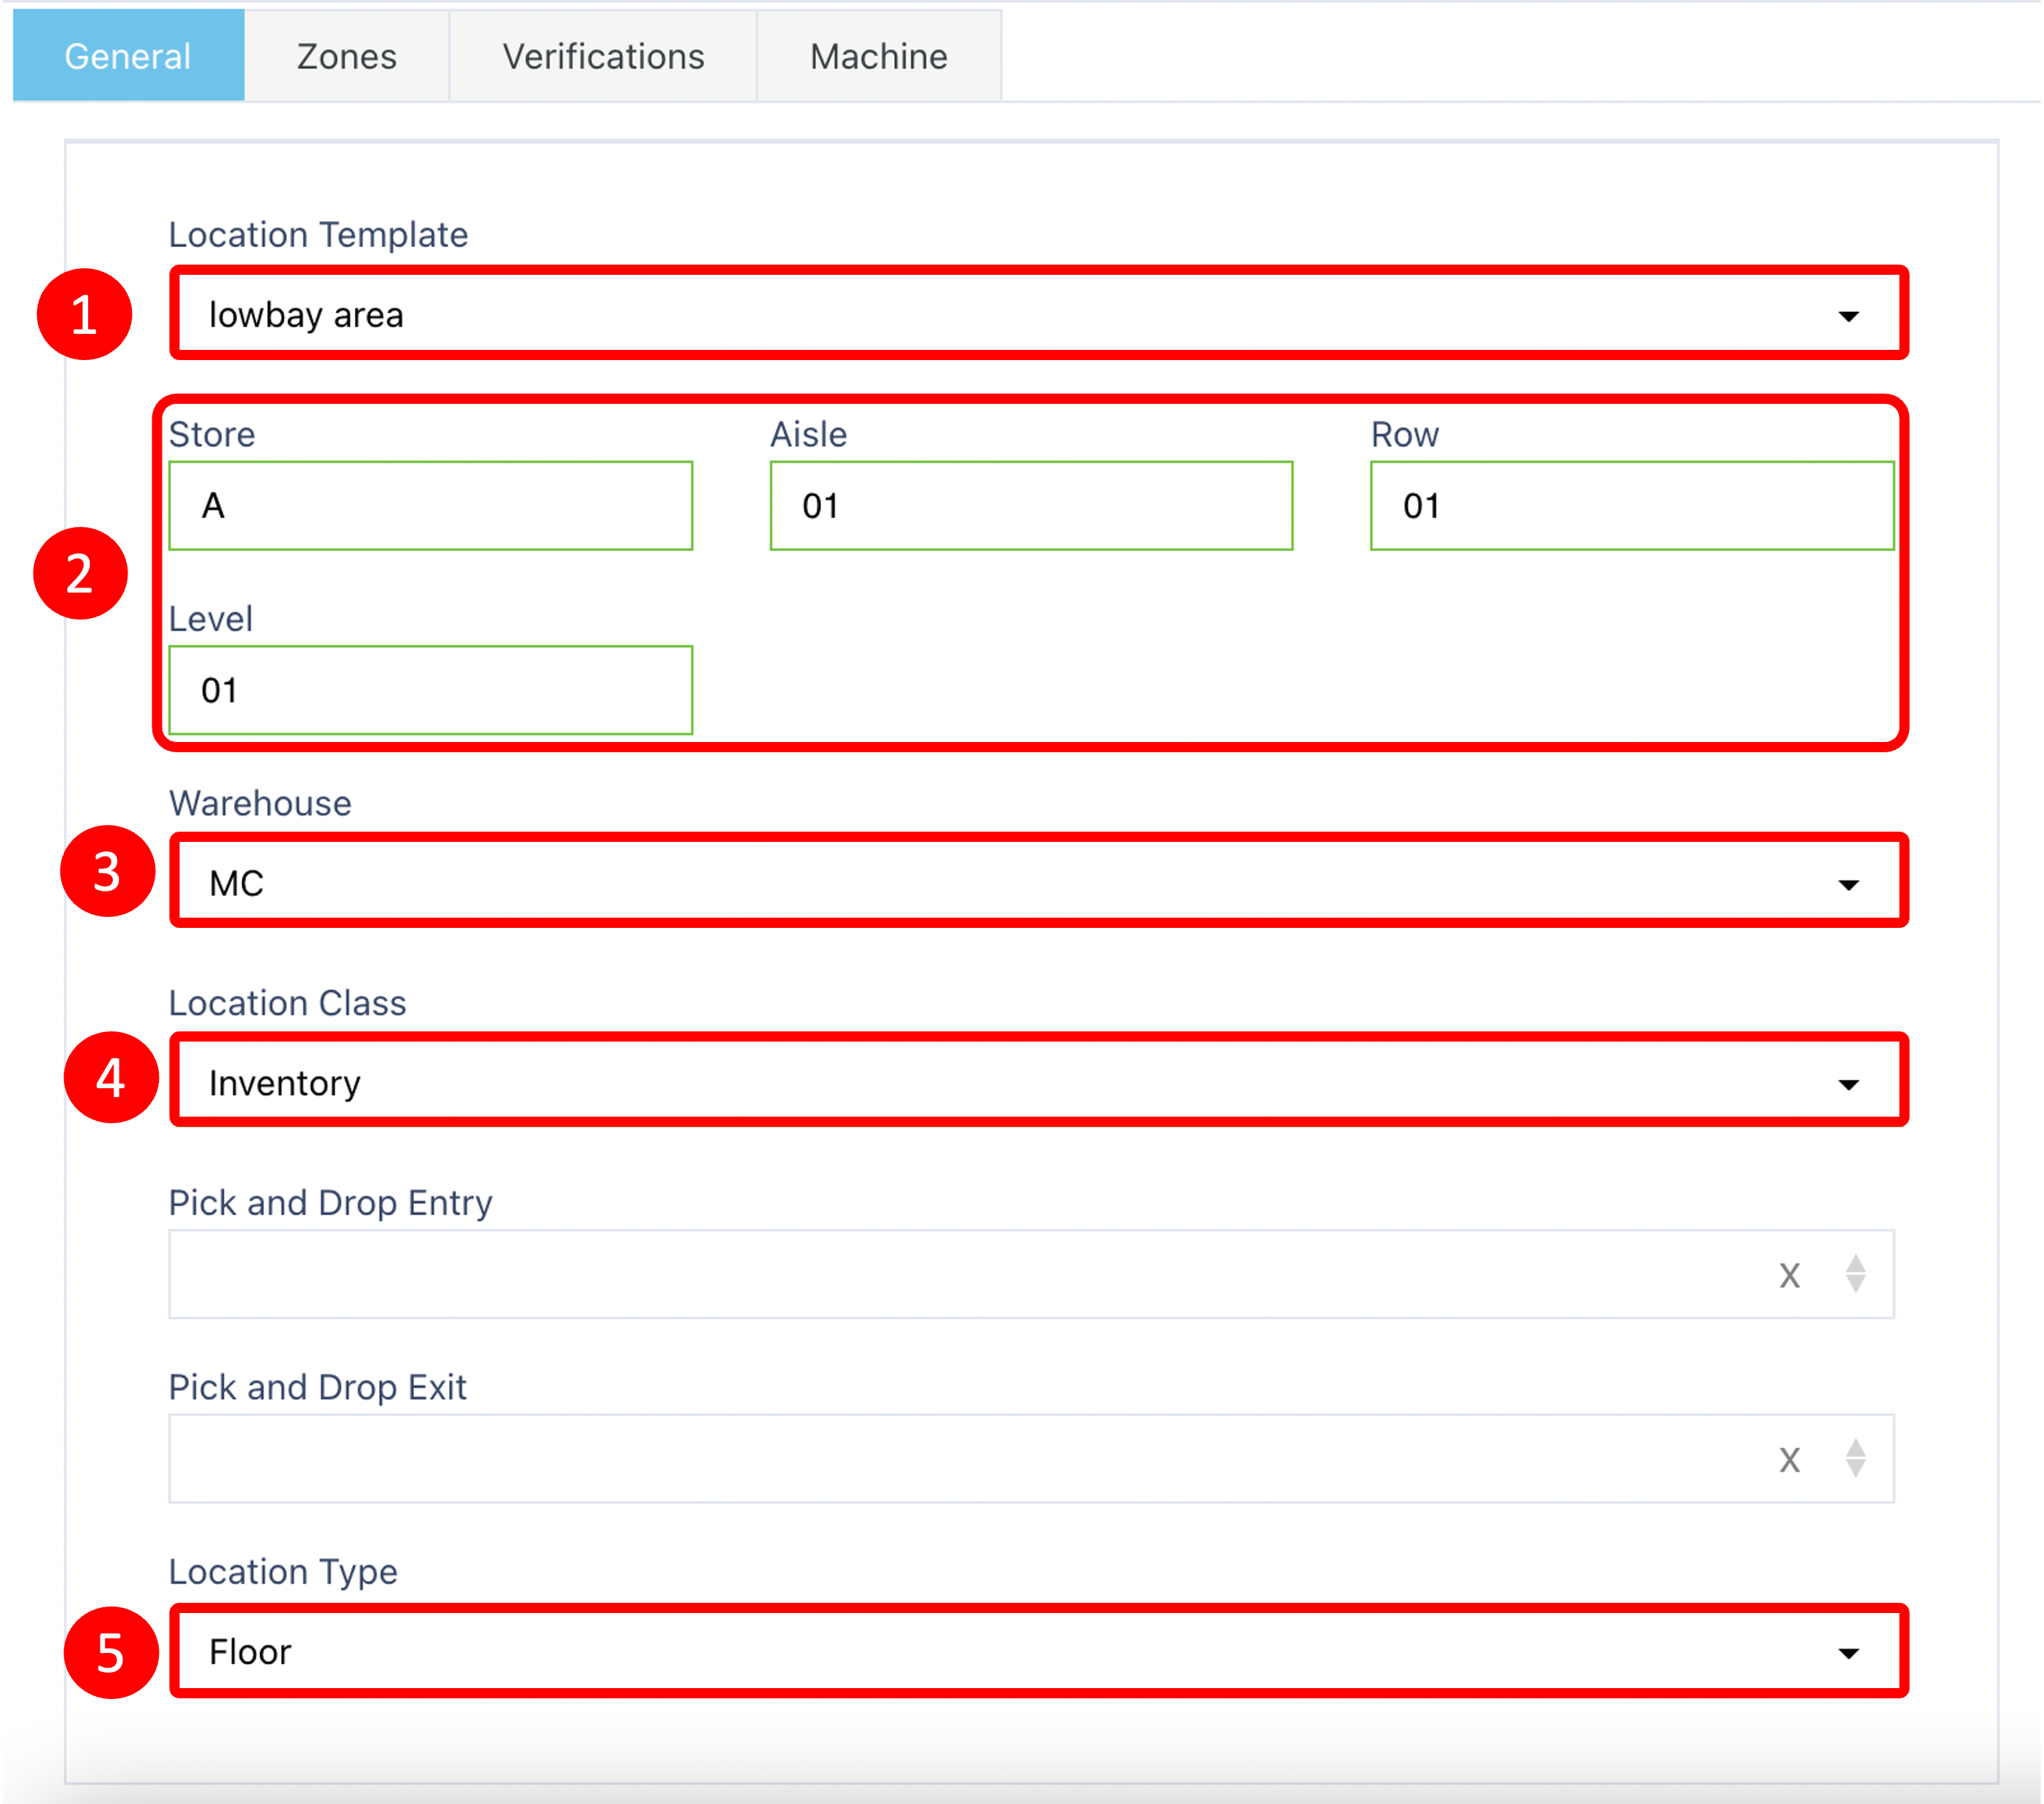
Enter mandatory fields in the general tab
Steps
Click Add to create a new Location.
In the General tab, enter or select mandatory fields:
Location Template or Format ([Location Format Guide])
Location Template Field
Warehouse ([Warehouse Guide])
Location Class ([Location Class Guide])
Location Type ([Location Type Guide])
The Pick and Drop Entry & Exit fields are optional but often necessary.
Selecting the Zones
If Inventory is selected as the Location Class, you will be prompted to select relevant zones on the Zones tab.
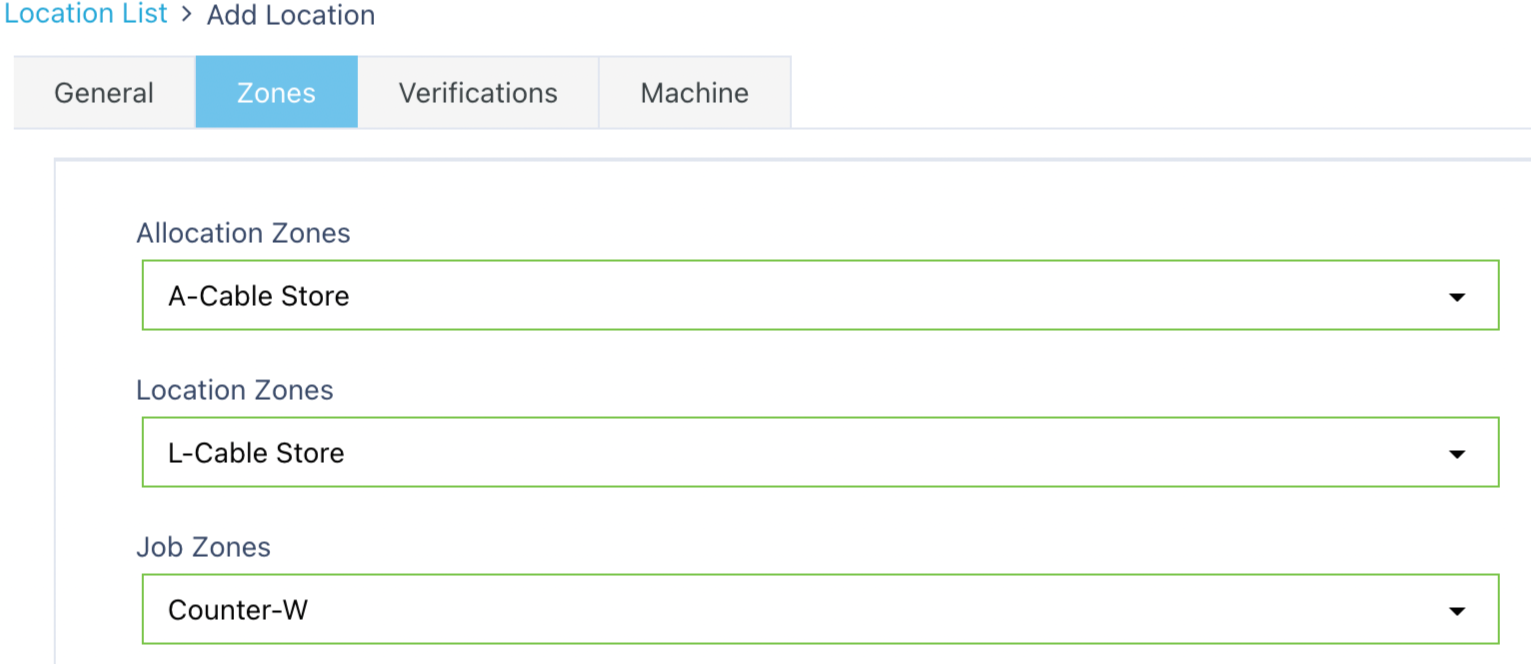
Zones come in three classes:
Allocation
Locating
Job
Typical Canary7 setups use:
Global Allocation and Locating Zones
Work Zones to delineate operational functions (e.g., Bulk Work Zone vs. Pick Work Zone)
Selecting Location Verifications
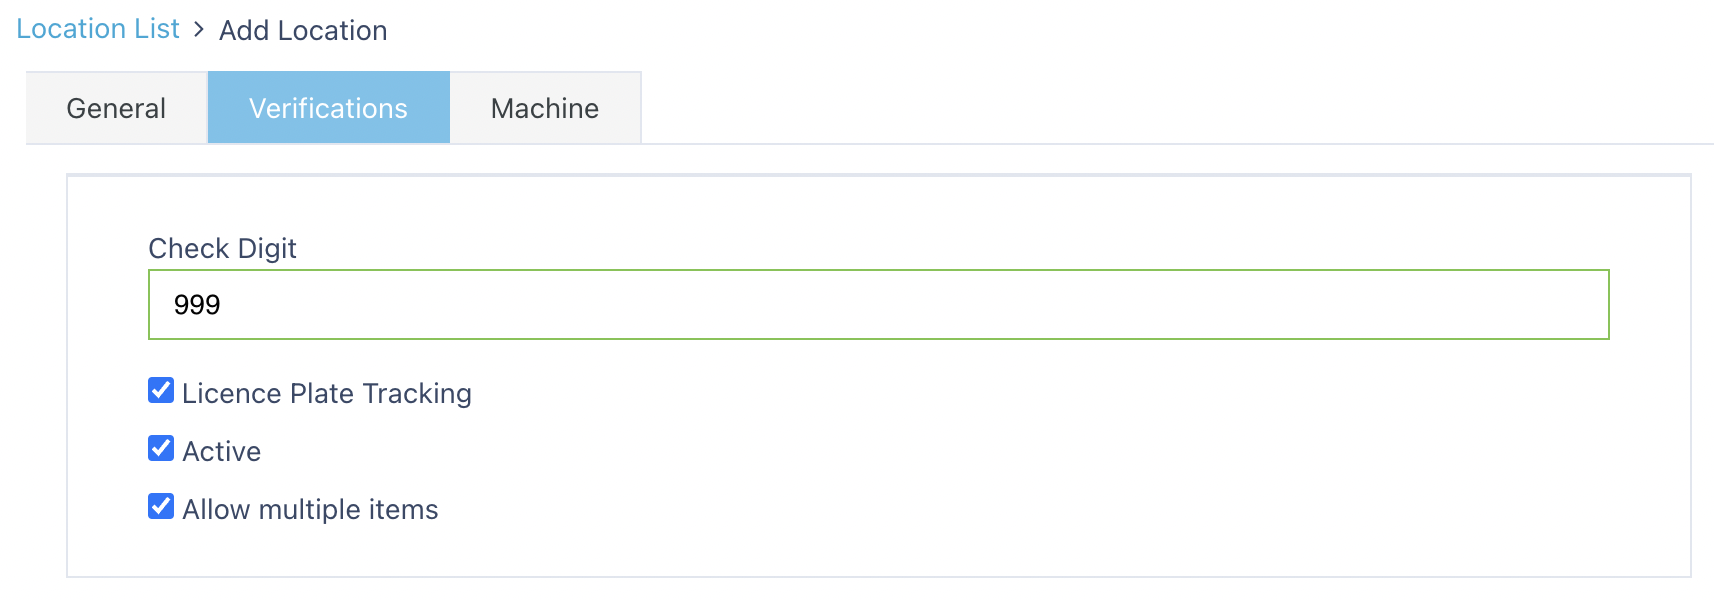
Check Digit:
A numeric code (usually a randomized 3-digit number) printed on location labels. It verifies operators are scanning or entering the correct location during tasks (e.g., picking, putaway). When enabled, scanning or entering the check digit is required to proceed, reducing errors.License Plate Tracking:
Enables tracking of License Plates (unique IDs for containers, pallets, totes). This allows inventory to be tracked at the License Plate level, providing more granular control.Active:
Determines if the location is currently available for warehouse operations. Inactive locations cannot be selected for receiving, picking, storing, etc., useful for maintenance or decommissioning.Multiple SKUs Allowed:
Enables storage of more than one unique item (SKU) in the location. Typically enabled. If disabled, the location enforces item exclusivity.
Entering Machine fields
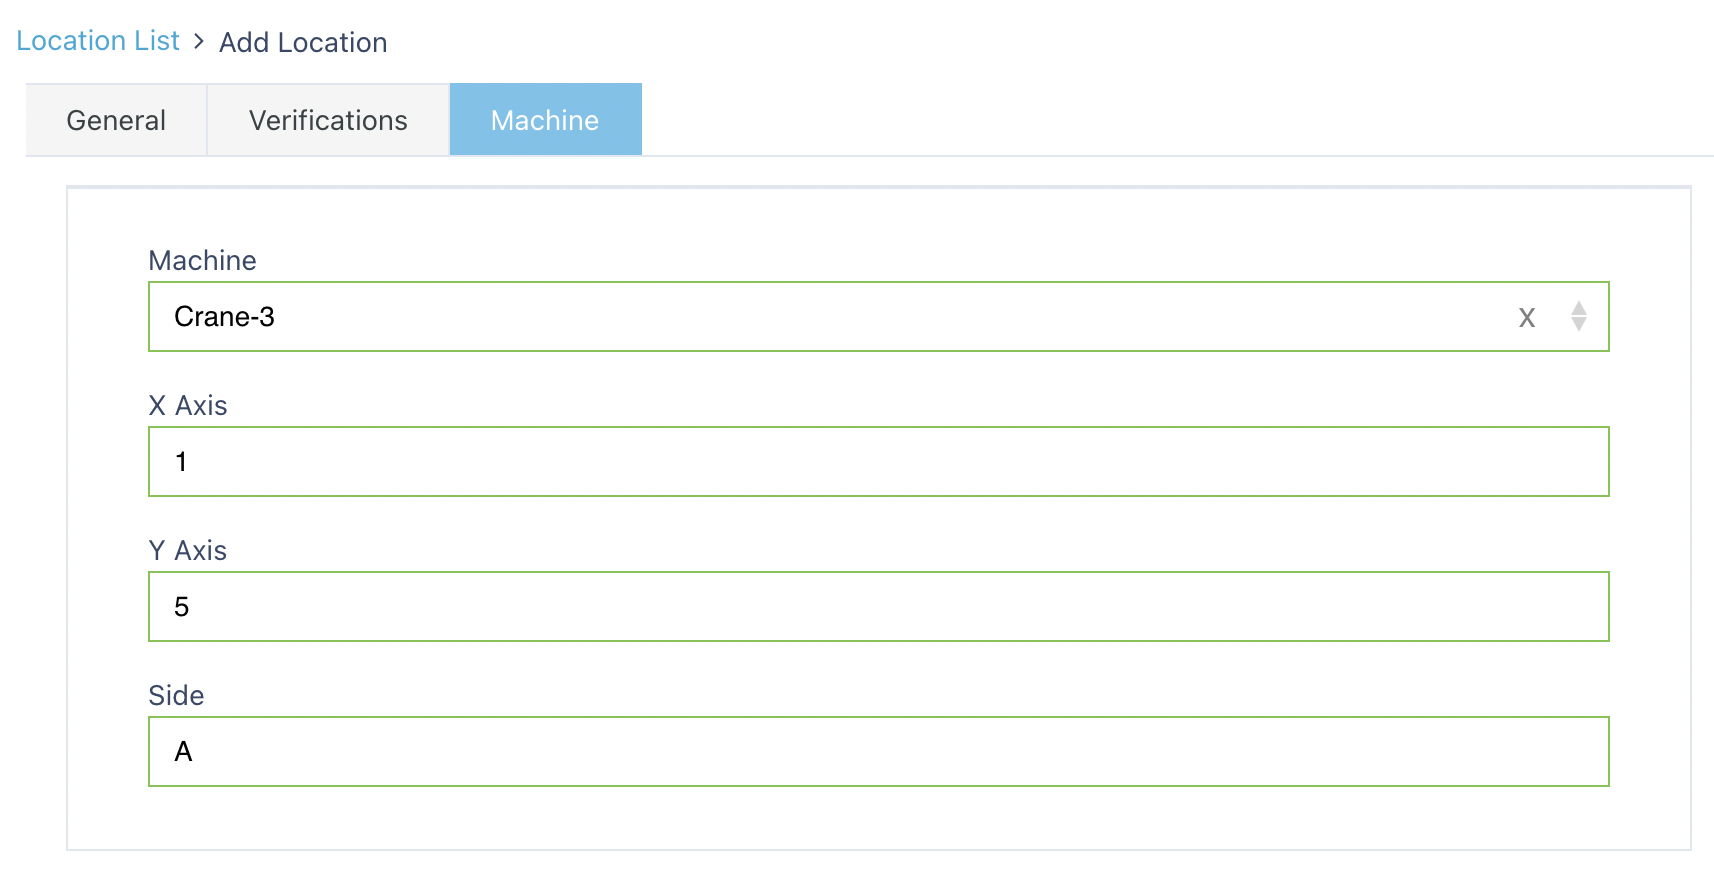
Used only if your warehouse has automated Warehouse Control Systems (WCS), such as:
Automated high-bay cranes
Shuttle systems
Robotic palletisers
These fields configure machine integration.
Once you have selected and entered the required fields, click on the submit button.png) to add.
to add.