Understanding Item Selection
🔍 What is Item Selection?
Item Selection in Canary7 is a powerful tool that lets you filter items based only on their item-level attributes — without considering location-based criteria. It enables you to segment and control which items are included in key warehouse processes like allocation, replenishment, or cycle counting.
This is especially useful when you want to group items based on shared characteristics, regardless of where they’re stored. For example, you might want to:
✅ Include only Available inventory (e.g. exclude Quarantined or Damaged).
🏷️ Filter items by Supplier (Company) — useful in 3PL setups.
📦 Segment by Item Category such as Perishables, Fragile Goods, etc.
⚙️ Where is Item Selection Used?
Once set up, Item Selections can be applied to control which items are eligible for:
📦 Allocation Rules – Only allocate certain types of stock.
🧾 Picking Job Creation – Restrict picking to specific items.
🔁 Cycle Counts – Target specific item groups for regular checks.
🔄 Replenishment Rules – Trigger restocking for selected item types.
Because it works independently of locations, Item Selection is ideal when item characteristics are more important than their physical placement.
🛠️ Defining Item Selections
Item Selections are built using comparison operators like:
=, <>, >, <, LIKE, etc.
These are applied on the Where tab to build rules based on item data.
✅ Example Criteria You Can Use:
| Criteria | Description |
|---|---|
| Item | Target specific items. |
| Company | Filter by supplier/customer (Company). |
| Item.Code | Target by SKU or product code. |
| Item.Company ID | Use the unique ID of the related Company (3PLs). |
| Item Min/Max Stock Level | Filter based on stock thresholds. |
| Item Source Code | Segment by source code via integration. |
| Item Category | Perishables, Electronics, Apparel, etc. |
| Item Group | Use groupings like Small/Medium/Large. |
| Item Batch | Useful for tracking expiry or recall items. |
| Item Status | Available, Quarantined, Damaged, etc. |
📂 Accessing Item Selection
To access:
Open the Navigation Menu.
Use the search bar and type "Item Selection".
Alternatively, go to:
Configuration > Functional Area Setup > Inventory Control Setup > Item Selection.
➕ Adding a New Item Selection
Click on the Red Action Button , this will bring up a drop-down menu, and select "Add"
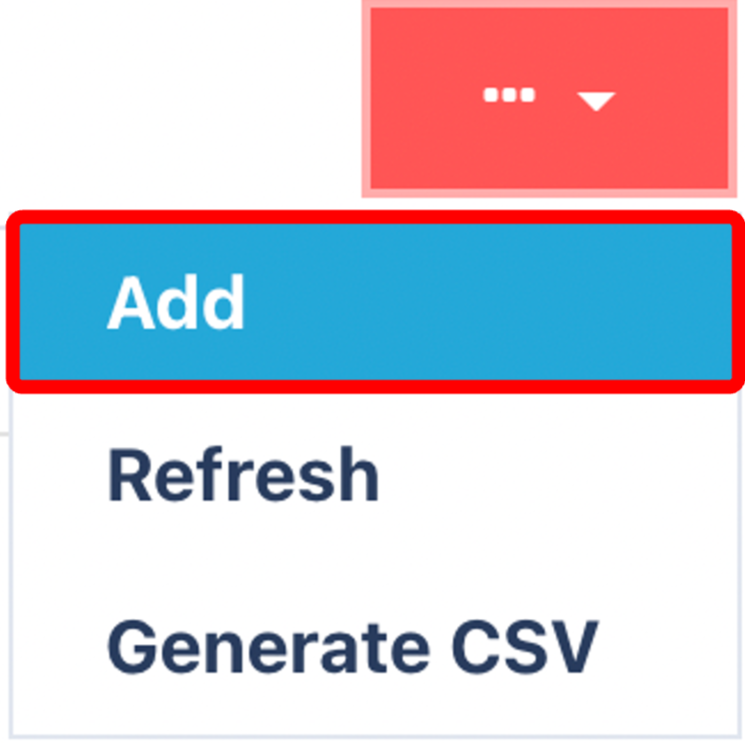
Click Add
On the General tab, enter:
📝 Name for your selection.
🧠 Choose a relevant Selection Class (e.g., Replenishment, Allocation).
.png)
Choose a new one that is relevant to this selection.
Complete the Where Tab
Go to the Where tab:
Define rules using fields like
Item.Company,Item.Code,Item.Status, etc.Use comparison operators to build logical filters.
If adding multiple rules, choose a logic operator (
AND/OR) to define how rules combine.
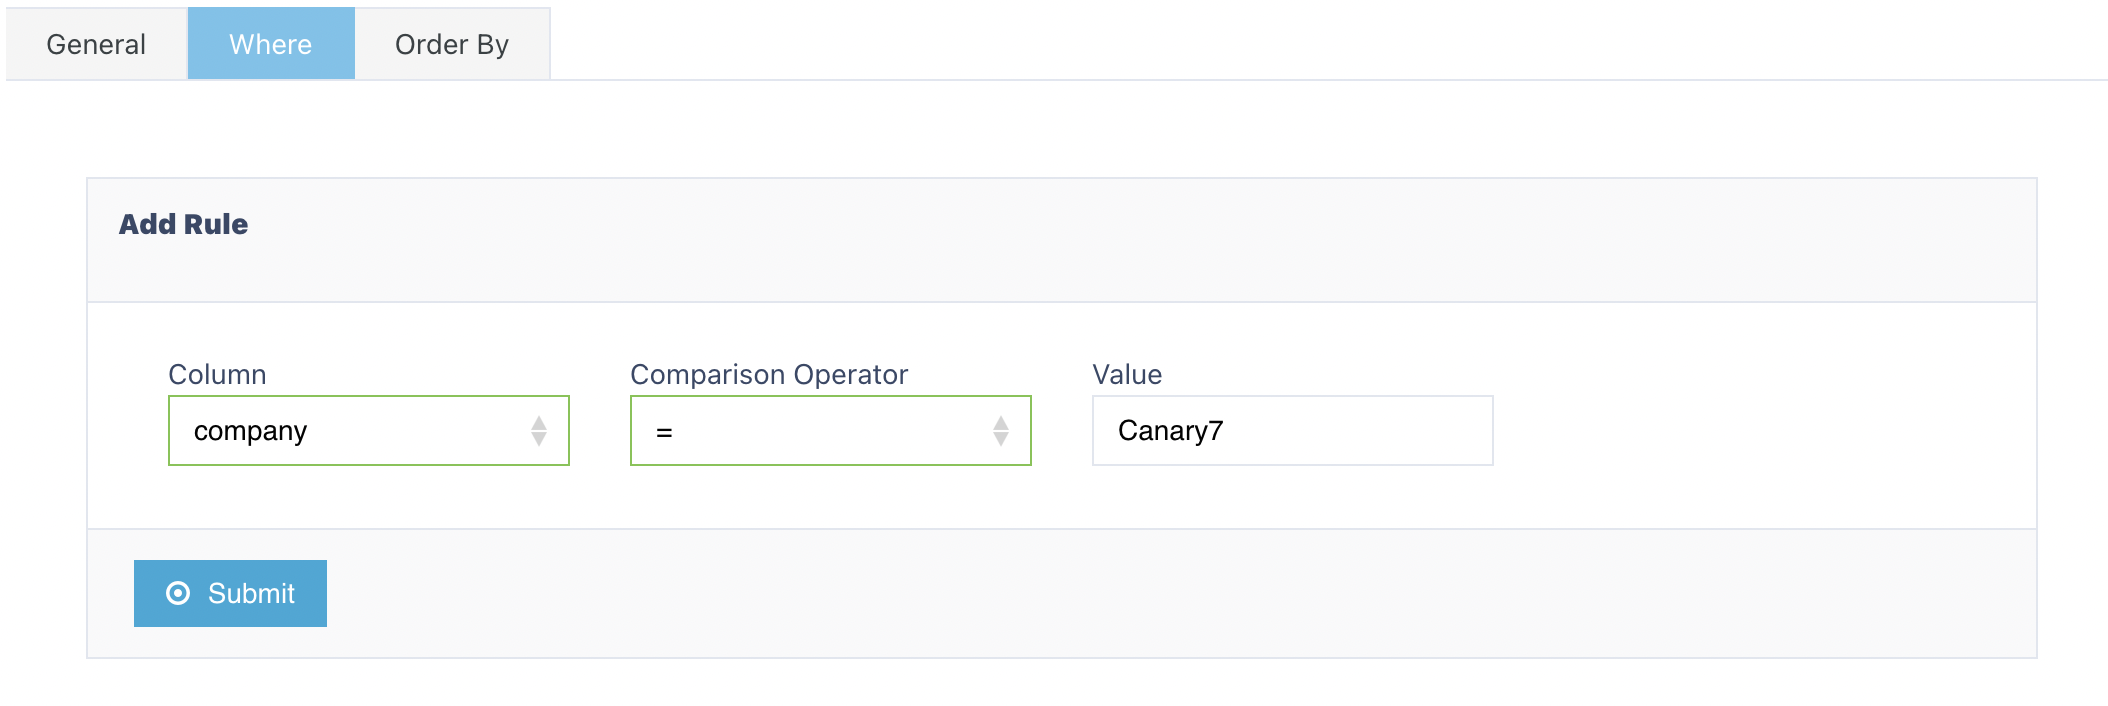
🧩 Example 1: Simple Logic
To filter items supplied by Company Canary7:
| Field | Operator | Value |
|---|---|---|
| Item.Company ID | = | Canary7 |
.png)
🧩 Example 2: Multiple Conditions (AND)
To include only Item - GU1D3-123 from Company - Canary7:
| Field | Operator | Value |
|---|---|---|
| Item.Company ID | = | 123 |
| Item.Status | = | Available |
AND to ensure both rules must be true.Complete the Order Tab
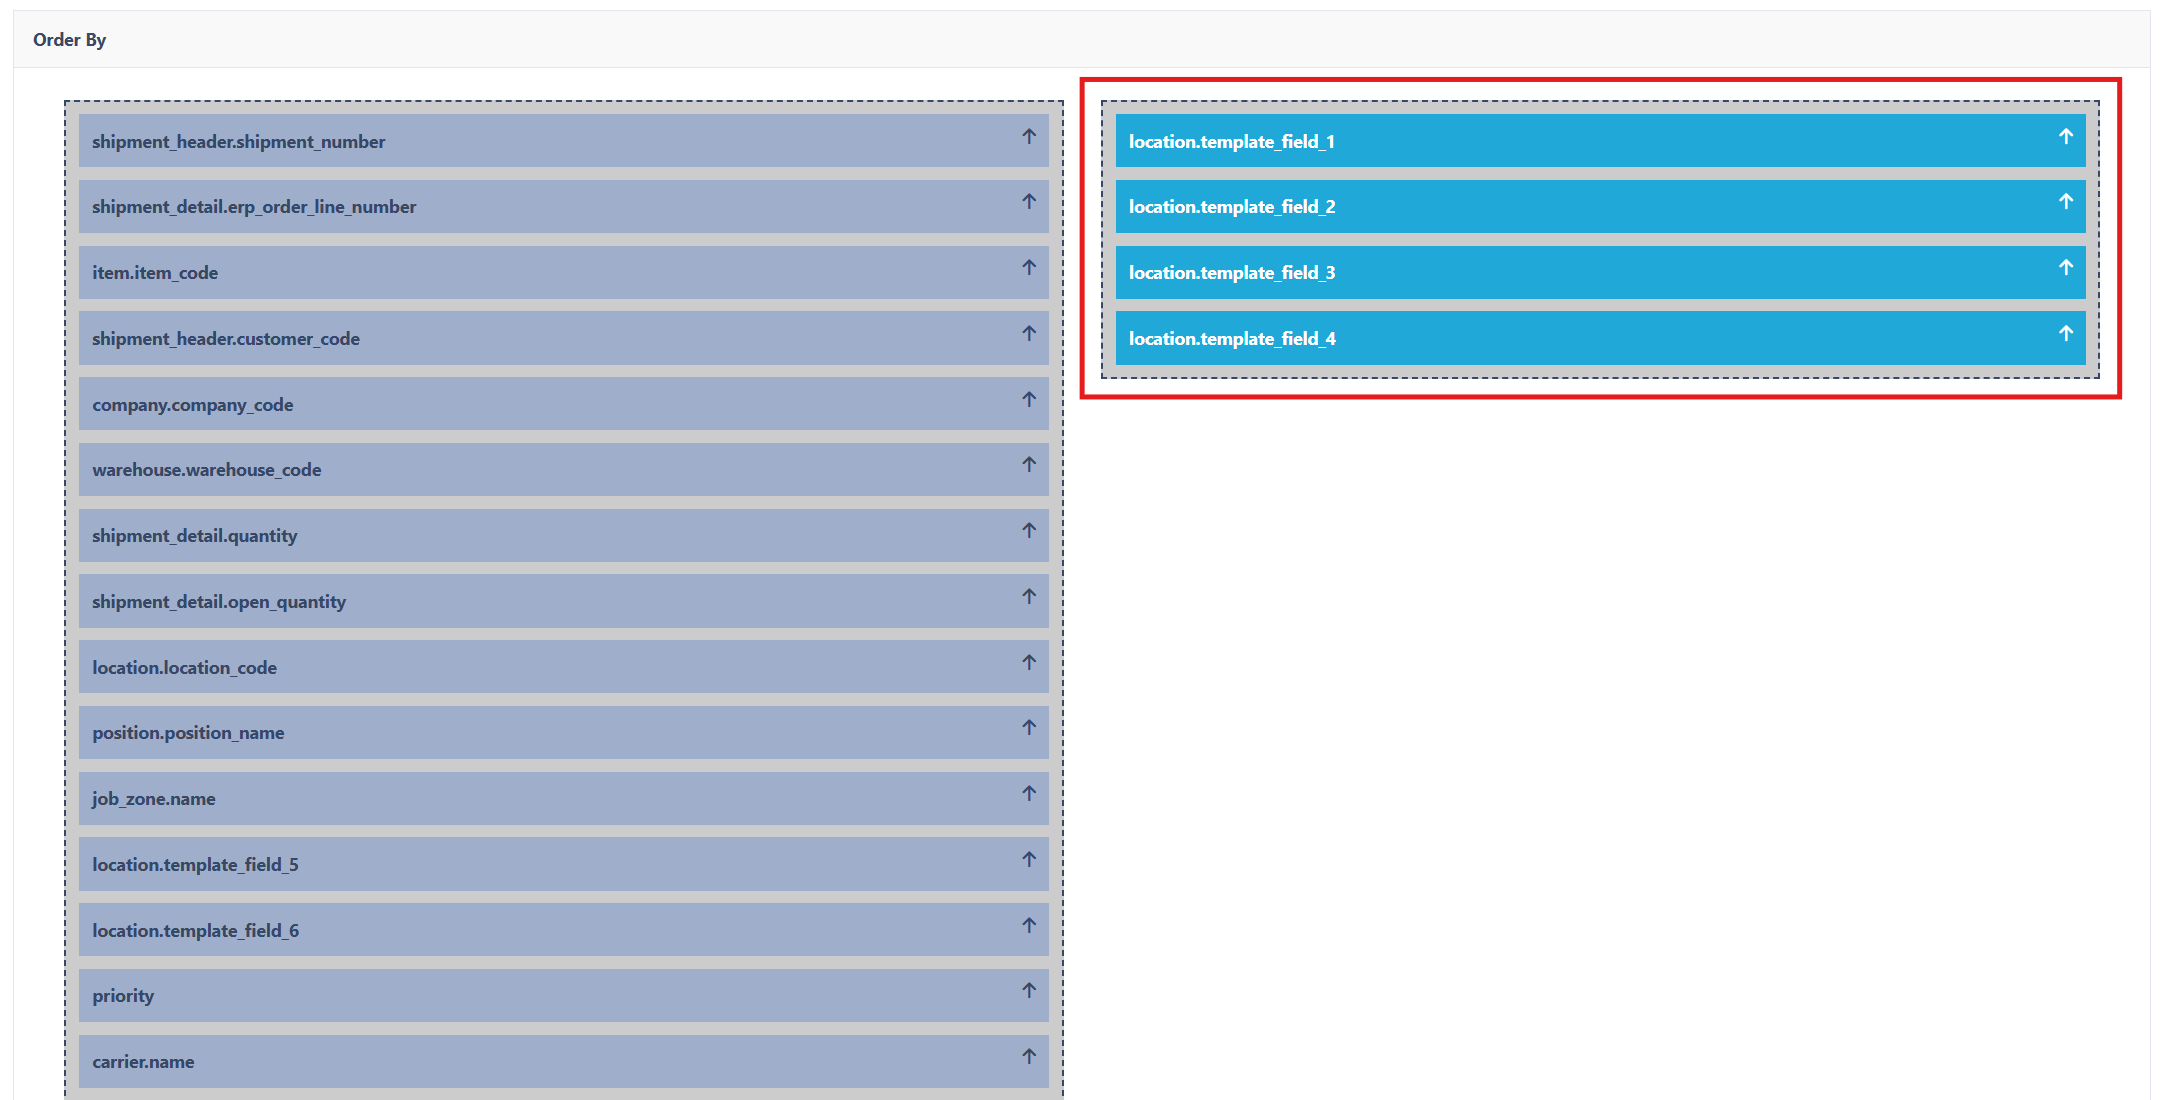
🧲 Example Order By Configuration: Template Fields (Ascending)
In some warehouses, custom location template fields are used to define structured picking logic—such as Zone, Aisle, Bay, and Level. To reflect this, your Order By configuration might look like:
| Field | Order |
|---|---|
| Location.Template_Field_1 | Ascending |
| Location.Template_Field_2 | Ascending |
| Location.Template_Field_3 | Ascending |
| Location.Template_Field_4 | Ascending |
📝 Note:
Other commonly used ordering fields include:
Location.Code→ to sort items alphanumerically by storage location.Location.Pick_Walk_Sequence→ to guide the user through a predefined optimal pick path.
You can mix and match these depending on how your warehouse is structured and what picking behaviour you want to encourage.
Once you have selected and entered the required fields, click on the submit button.png) to add.
to add.