📦 Understanding Consigning Profile
❓ What is a Consigning Profile?
A Consigning Profile is a predetermined set of configurations that defines how the system executes a Consigning Job. It controls how pieces are created, how consignments are initiated, and whether containers are linked or validated.
🔍 Accessing a Consigning Profile
To access a Consigning Profile:
Open the 📂 Navigation menu.
In the 🔎 Search Bar, type "Consigning Profile" and select it from the list.
Alternatively, navigate to:⚙️ Configuration > Shipment Profile Setup > Consigning Profile
➕ Add a Consigning Profile
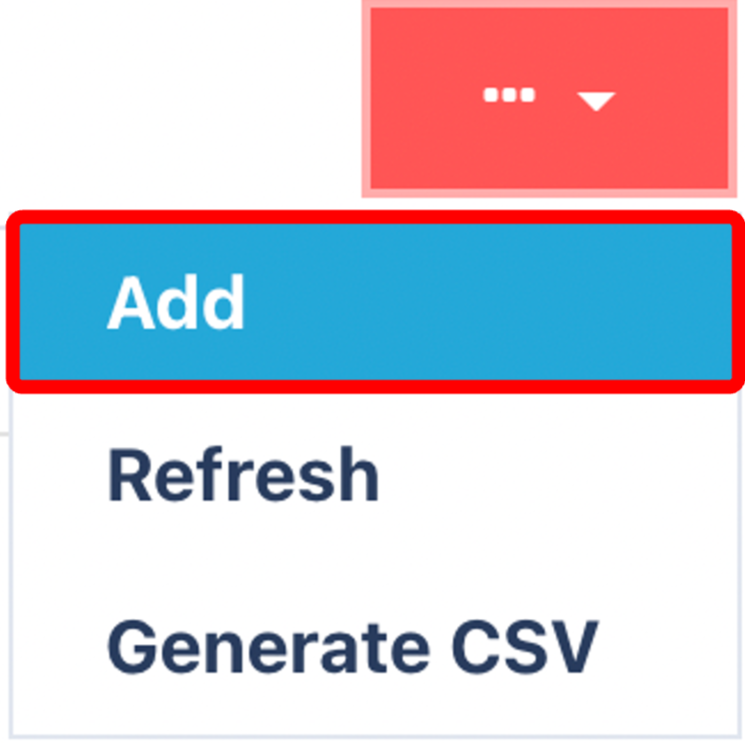
Click on the Red Action Button , this will bring up a drop-down menu, and select "Add"
📝 Complete Required & Optional Fields

✅ Required Fields
🆔 Name
A unique name for the profile.🚀 Initiation Method
Determines how the consignment process begins:📦 Shipment Container – Starts based on each container.
🧾 Shipment Number – Starts at the shipment level.
🧩 Piece Creation Method
Controls how pieces are created:⚙️ Auto – Automatically creates one piece per "Pack From" container.
✋ Manual – User manually creates and confirms pieces during execution.
Used for Manual Consigning Profiles.
⚙️ Optional Settings
🔗 Do Not Associate Pieces & Container Together (toggle)
Enable this to prevent pieces from being linked to specific containers during execution.🔍 Do Not Verify the Piece Number (toggle)
If selected, the system skips tracking number validation.
Disable this if users need to scan the tracking number after label printing to confirm the correct piece.
📁 Profile Types
You will typically configure two main types of Consigning Profiles:
✋ Manual Consignment Profile
For users to define and confirm the number of pieces manually during consignment.⚙️ Standard (Auto) Consignment Profile
Automatically calculates the number of pieces based on Pack From containers.
Once you have selected and entered the required fields, click on the submit button.png) to add.
to add.