📦 Understanding Shipping Enquiry
What is Shipping Enquiry
Shipping Enquiry is a central menu used by warehouse operatives to view, add, edit, split and manage information relating to outbound shipments, including shipment headers, loads, and containers within Canary7.
Accessing Shipping Enquiry
You can access the Shipping Enquiry screen in two ways:
Use the navigation bar: Type "Shipping Enquiry" into the search bar.
Navigate via the menu: Shipping > Shipping Enquiry
🚛 Load Tab – Finding Load Information
Use the Load tab to search for loads—groups of shipments typically linked by carrier their respective carriers.
New Shipments be assigned loads by 3 methods:
- Assigned to the Oldest Load
- Assigned to the Oldest Load of the Same Day
- Each Shipment is assigned it's own Load.
This is determined in the Detail of the Load Assignment Waveflow Step.

Searchable Fields:
Carrier
Load Number
Trailer Number
Load Status
Warehouse
Last Updated From / To
💡 Tip: Leaving all fields blank will return all load records. Unchecking “Don't Show Closed” ensures visibility of previously closed Loads also.
Once you have entered all the information, you need to find your results click on the search button to continue.
Load Tab Results:
After searching, only a subset of columns will be visible. Use the horizontal scroll bar to view additional fields:
Load Number
Carrier
Leading Status
Trailing Status
Trailer Number
Created At
Last Updated At
Load Status
If you want to go back and input more information, click on the search icon![]() and enter the data you require to refine your search. You can search Loads by multiple parameters.
and enter the data you require to refine your search. You can search Loads by multiple parameters.
📦 Shipment Tab – Finding Shipment Information
Use the Shipment tab to view and filter individual shipment records using a wide array of parameters
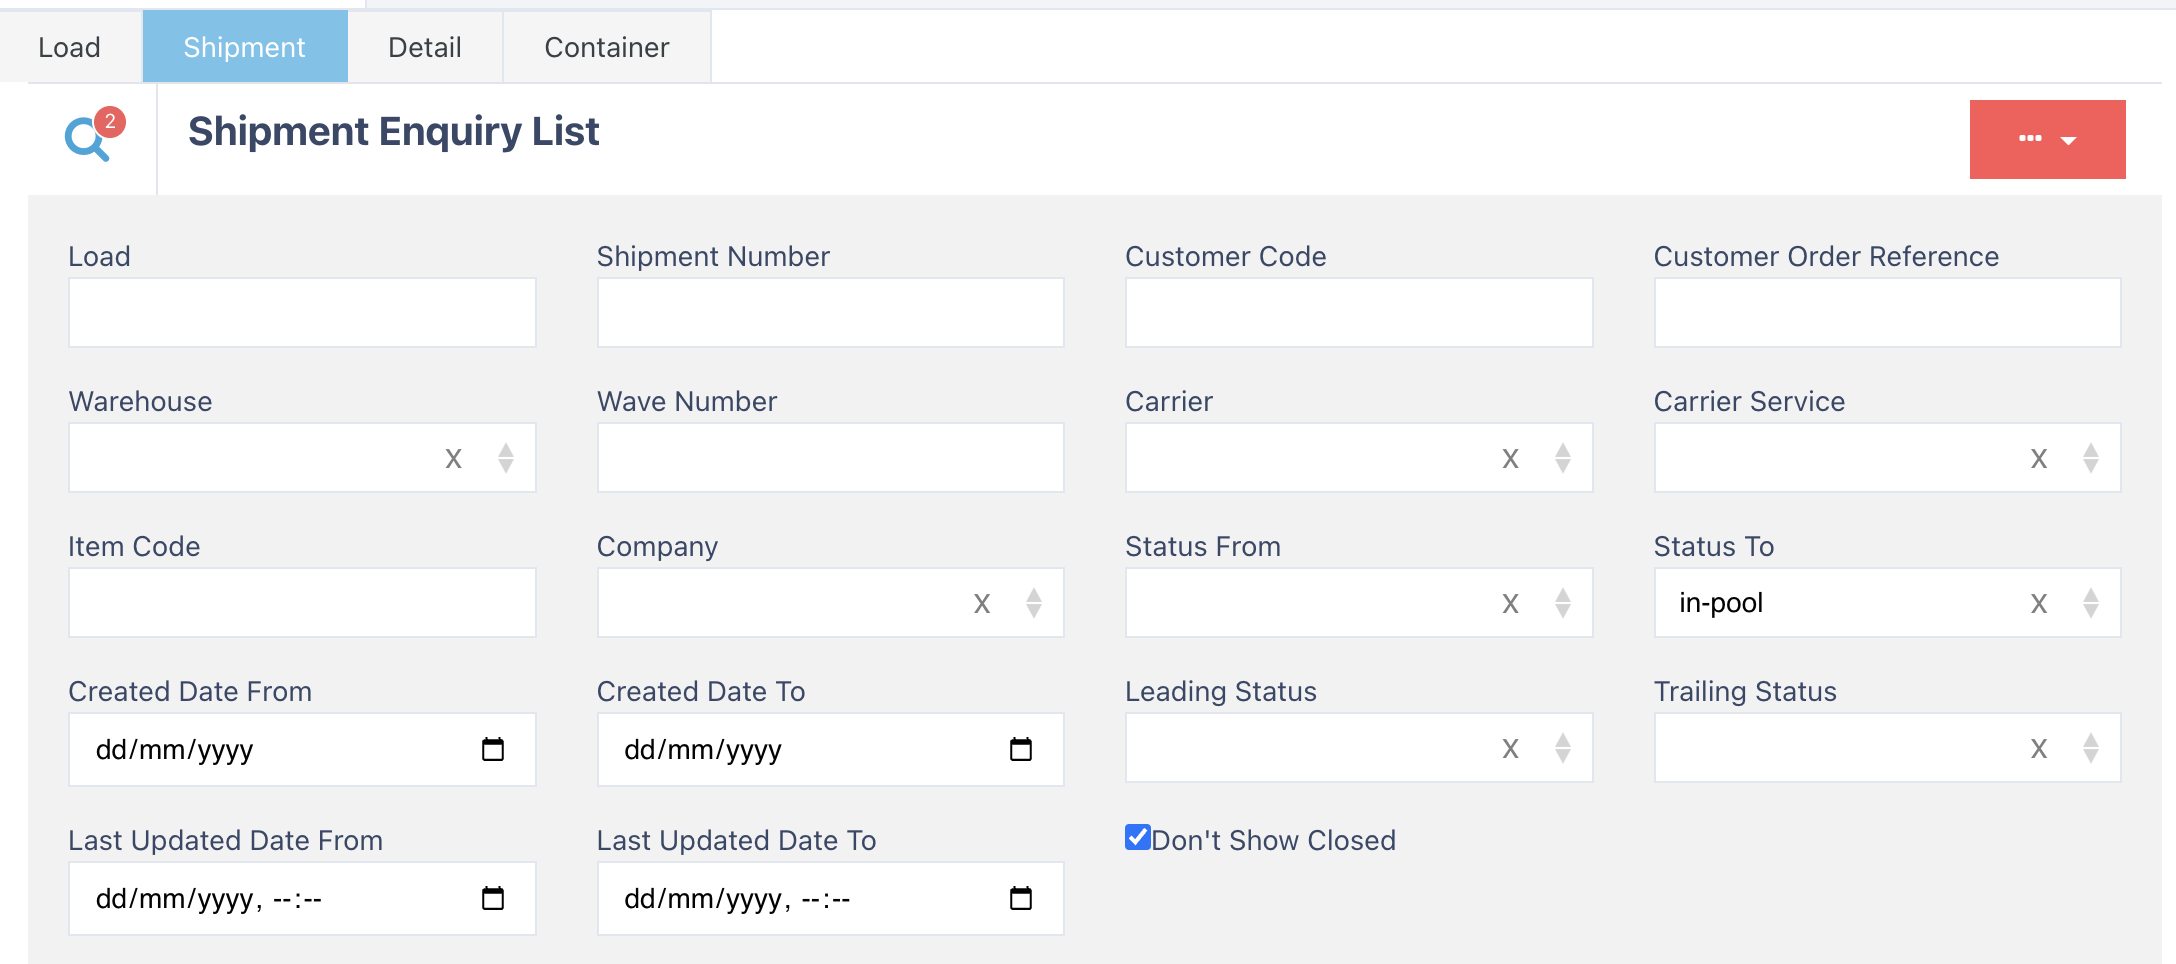
Searchable Fields:
Shipment Number
Load
Customer Code / Order Reference
Carrier / Carrier Service
Tracking Number
Item Code
Company
Status From / To
Created Date From / To
Last Updated Date From / To
Shipment Type / Sub-status / Soft Allocation Status
Wave Number
Ship To Country
On Hold
Leading / Trailing Status
💡 Tip: Leave all fields blank and uncheck “Don't Show Closed” to return all shipments in the system.
Once you have entered all the information, you need to find your results click on the search button to continue.

This will only have some columns in view to see the rest, simply drag the horizontal scroll bar. Note, if you wish to arrange the order of the columns in view, you can do this by simply dragging the column across to where you would like it to sit. Here is a list of what headers you scroll between to view the information:
- Item Thumbnail
- Shipment Number
- Hold
- Hold Comments
- Item Code
- Shipment Type - Used in Rulemaster
- Company Code
- Load Number
- Customer Order Reference
- Ship to Name
- Ship to City
- Ship to State
- Ship to Email
- Ship to Country
- Carrier
- Leading Status
- Trailing Status
- Created At
- Last update date
- Tracking Number
- Tracking Url
- Planned Dispatch Date
- Ship To Address1
- Ship To Address2
- Ship To Address3
- Ship To Phone Number
- Ship To PostCode
- Ship to Instructions
- Consolidation Dock
- Stagging Dock
- Wave Reject Reason
- Routing Code
- Total Net Weight
- Total Net Volume
- Event Status
- Total Quantity
- Total Details
- Total Cost
- Total Sale Value
- Longest Side
If you want to go back and input more information, click on the search icon![]() and enter whatever data you need to refine your search.
and enter whatever data you need to refine your search.
🧾 Detail Tab – Finding Shipment Line Details
The Detail tab provides line-level shipment information (i.e., item details within shipments).
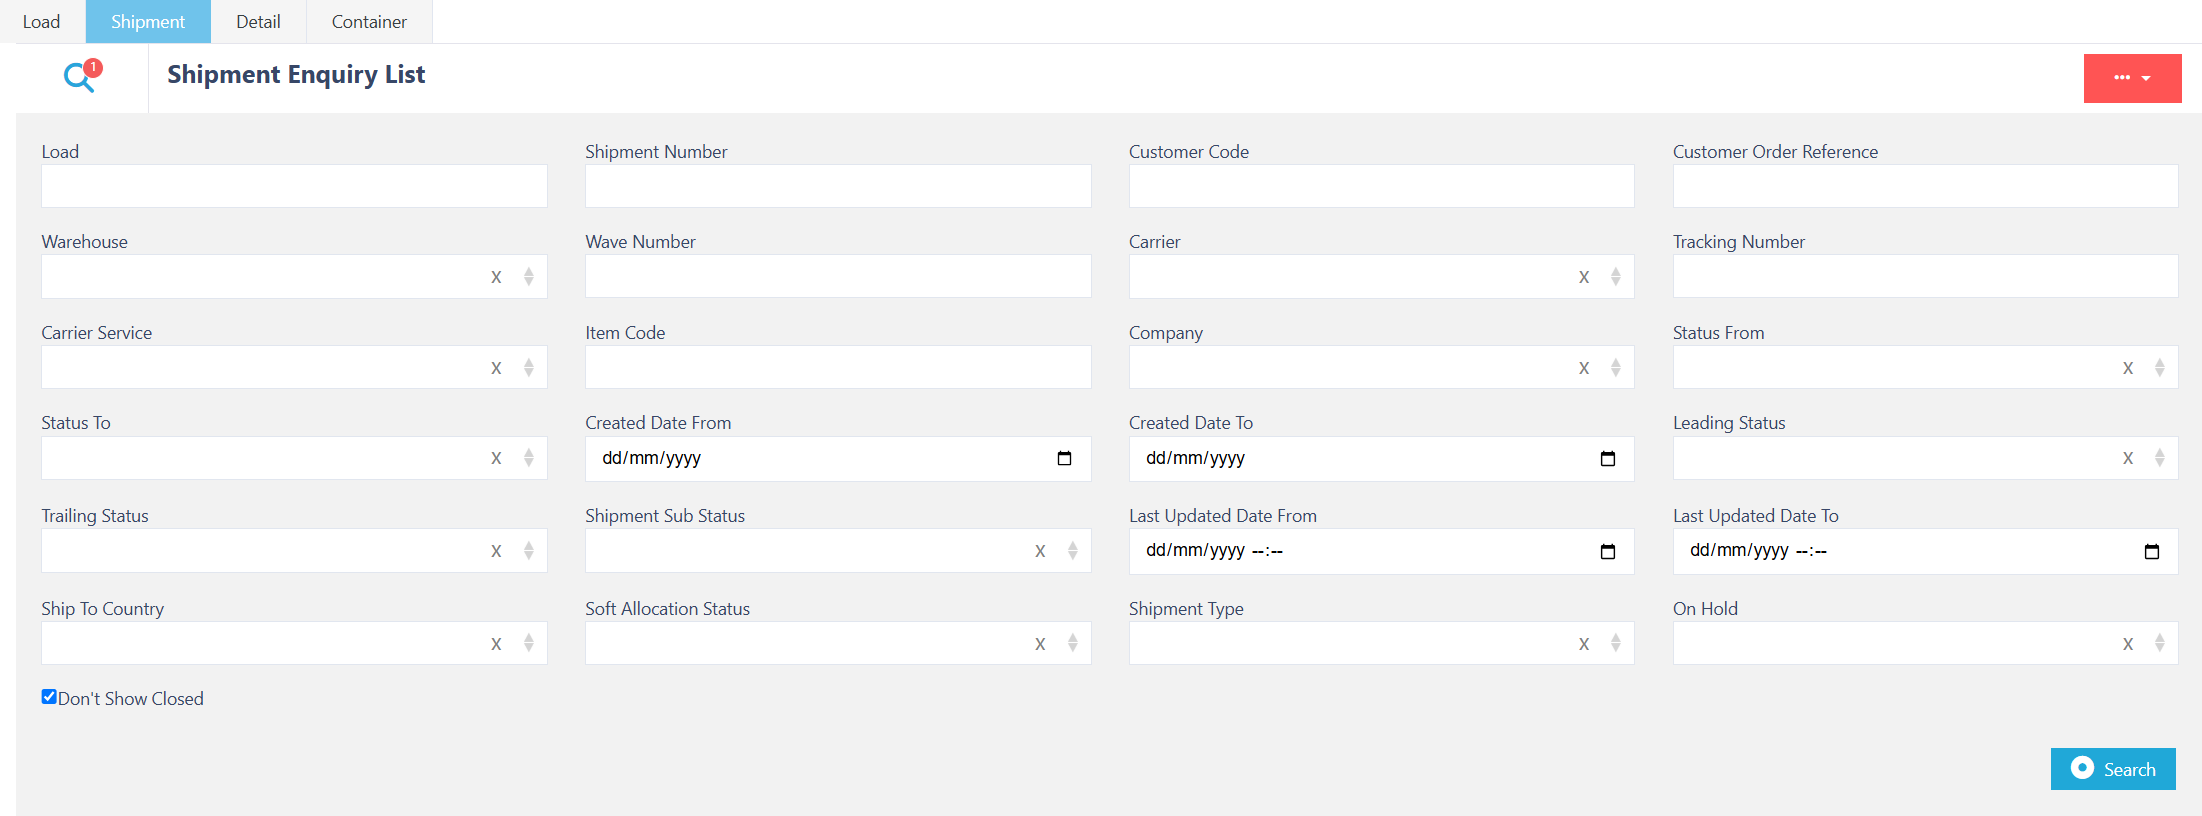
Searchable Fields:
Shipment Number
Item / Item Description
Company Code
Quantity
Status From / To
Batch / Serial Number
Carrier / Carrier Service
Allocation Fail
Created Date From / To
Last Updated Date From / To
Shipment Sub-status
Warehouse
💡 Tip: Uncheck "Don't Show Closed" to display all detail records in the system.
Once you have entered all the information, you need to find your results click on the search button to continue.

Detail Tab Results:
Use the scroll bar to access full results, including:
Shipment Number
ERP Order Line Number
Company Code
Carrier
Ship To Name / Address
Item / Description
Leading / Trailing Status
Quantity / Original Quantity
Batch Numbers
Allocation Rule
Created / Updated Timestamps
If you want to go back and input more information, click on the search icon![]() and enter whatever data you need to refine your search.
and enter whatever data you need to refine your search.
Finding Container Information
The Container tab allows users to find data relating to shipment containers - such as pallets, totes, or cartons.

Searchable Fields:
Shipment Number
Company
Container Number
Warehouse
Status From / To
Created At From / To
To access all data, uncheck  as this will have all containers that have ever been in the system.
Once you have entered all the information, you need to find your results click on the search button to continue.

Container Tab Results:
Key fields you can view by scrolling include:
Container Number
Shipment Number
Company Code
Location Code
Status
Dimensions (Length, Width, Height)
Weight
Packing Effort
Container Type
Created At
Assigned User
If you want to go back and input more information, click on the search icon![]() and enter whatever data you need to refine your search.
and enter whatever data you need to refine your search.
Splitting Shipments
In Canary7, shipments can be split into multiple parts under specific conditions. This is useful for adapting to changing operational requirements and ensuring that shipment fulfilment can continue even when certain details are delayed, incomplete, or need to be handled separately.
There are two primary scenarios where shipment splitting is supported:
1. Split from In-Pool Status
A shipment can be split when the following status conditions are met:
Leading Status:
In-Waveor further (Pick Pending, Pack Pending, Consigning Pending etc.).Trailing Status:
In-Pool
In this scenario, any shipment details that are still In-Pool will be moved to a new shipment. The original shipment number is preserved, and the new shipment is created with a suffix - ##1.
Example:
ShipmentSH12345is in progress. Some details are already Pack Pending, while others remain In-Pool.
Splitting results in:
SH12345→ retains the Pack Pending (or further) details
SH12345##1→ contains all details that were still In-Pool
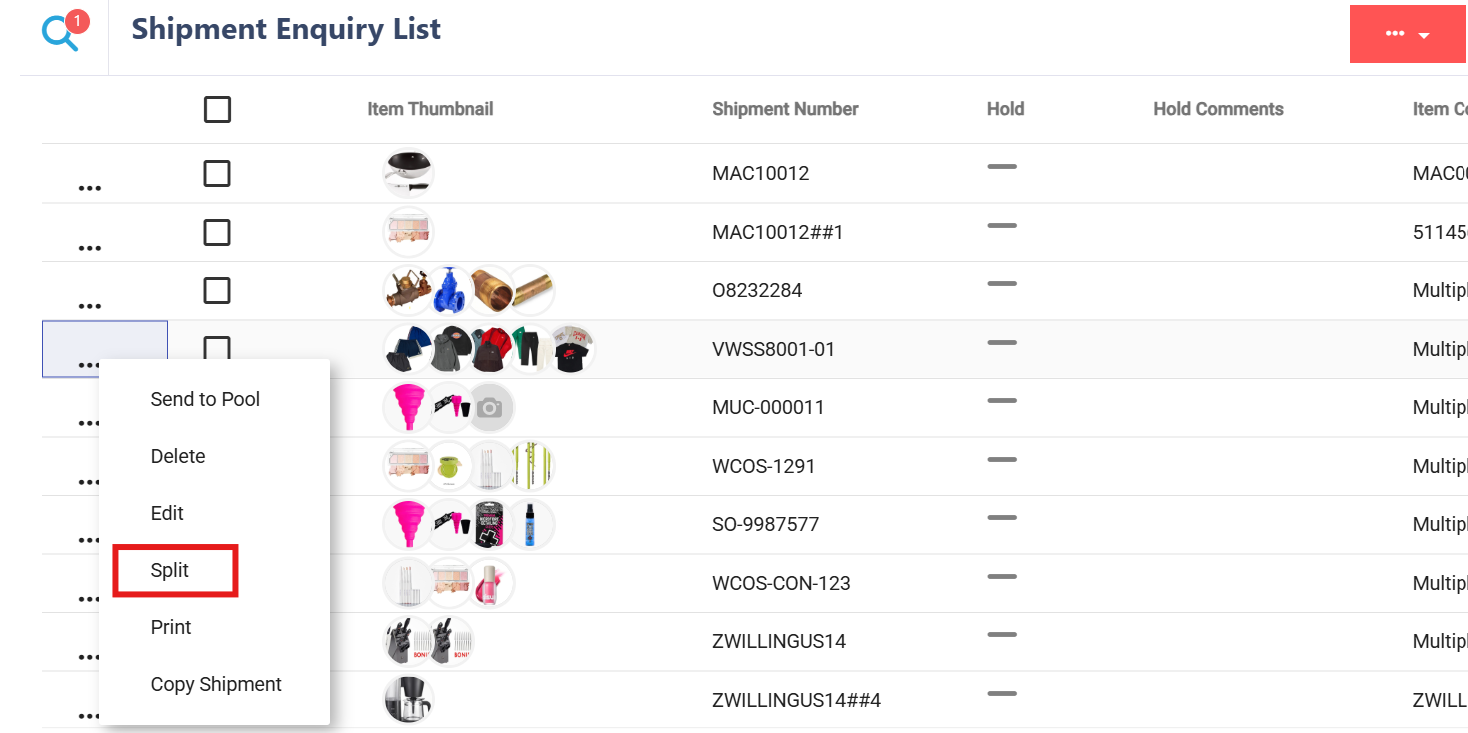
This split can be initiated from the Shipment Enquiry using the ellipsis menu, as shown below:
2. Split at Loading Pending
If both the Leading and Trailing statuses are Loading Pending, a shipment can also be split using a dedicated screen designed for manual splitting.
This screen allows users to:
Select specific shipment details to be moved into a new shipment.
Control exactly how the original and split shipments are formed.
This method provides more flexibility, as it doesn’t rely on the system auto-selecting details based on status.

Additional Notes
Splitting does not affect the original shipment number structure beyond suffixing (e.g.,
##1,##2, etc.).Both types of splits are also accessible via the Shipping Enquiry screen.
Adding a Load
Within Shipping Enquiry, click on ''Load''.

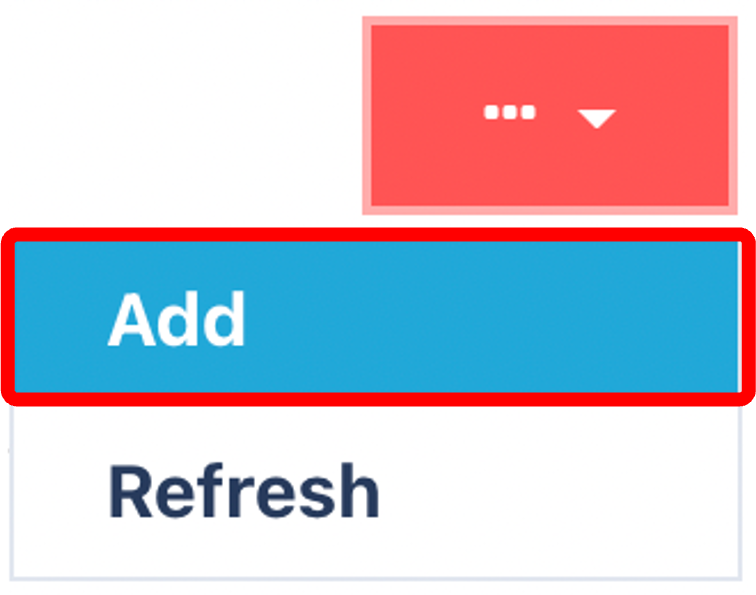
Click on the Red Action Button , this will bring up a drop-down menu, and select "Add"
Enter Mandatory Fields

Navigate to the Load tab in Shipping Enquiry.
Click the Add button.
Enter the mandatory fields:
Load Number
Carrier
(Optional) Trailer Number
Click Apply to create the Load.
Adding Shipments via User Input
Within Shipping Enquiry, click on "Shipment".
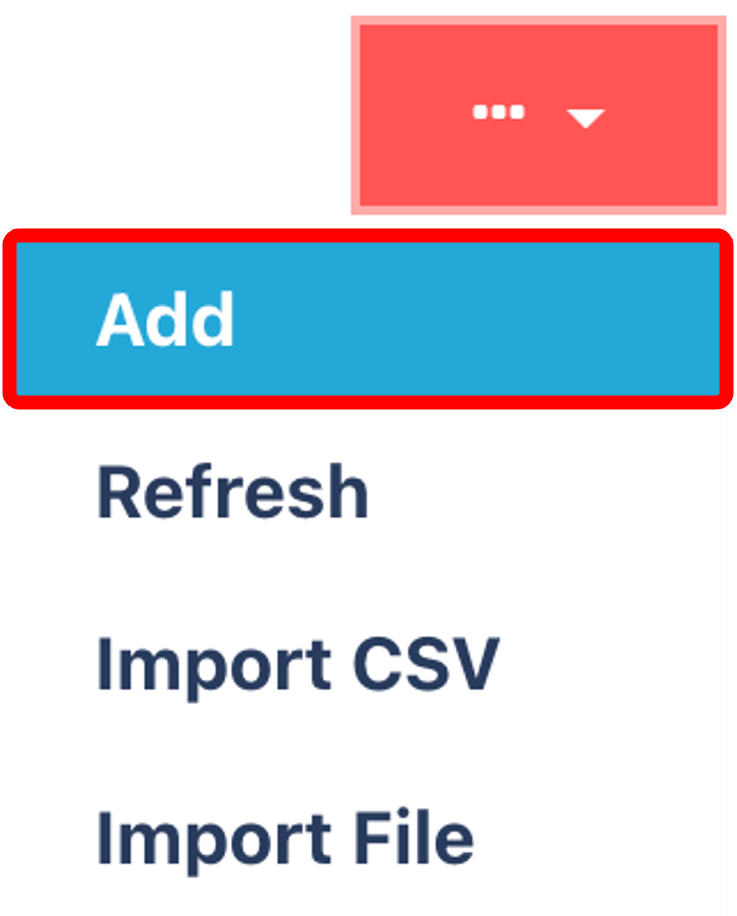
Within this Shipment Tab, click on the Red Action Button , this will bring up a drop-down menu, and select "Add".
Enter in Mandatory Fields
General tab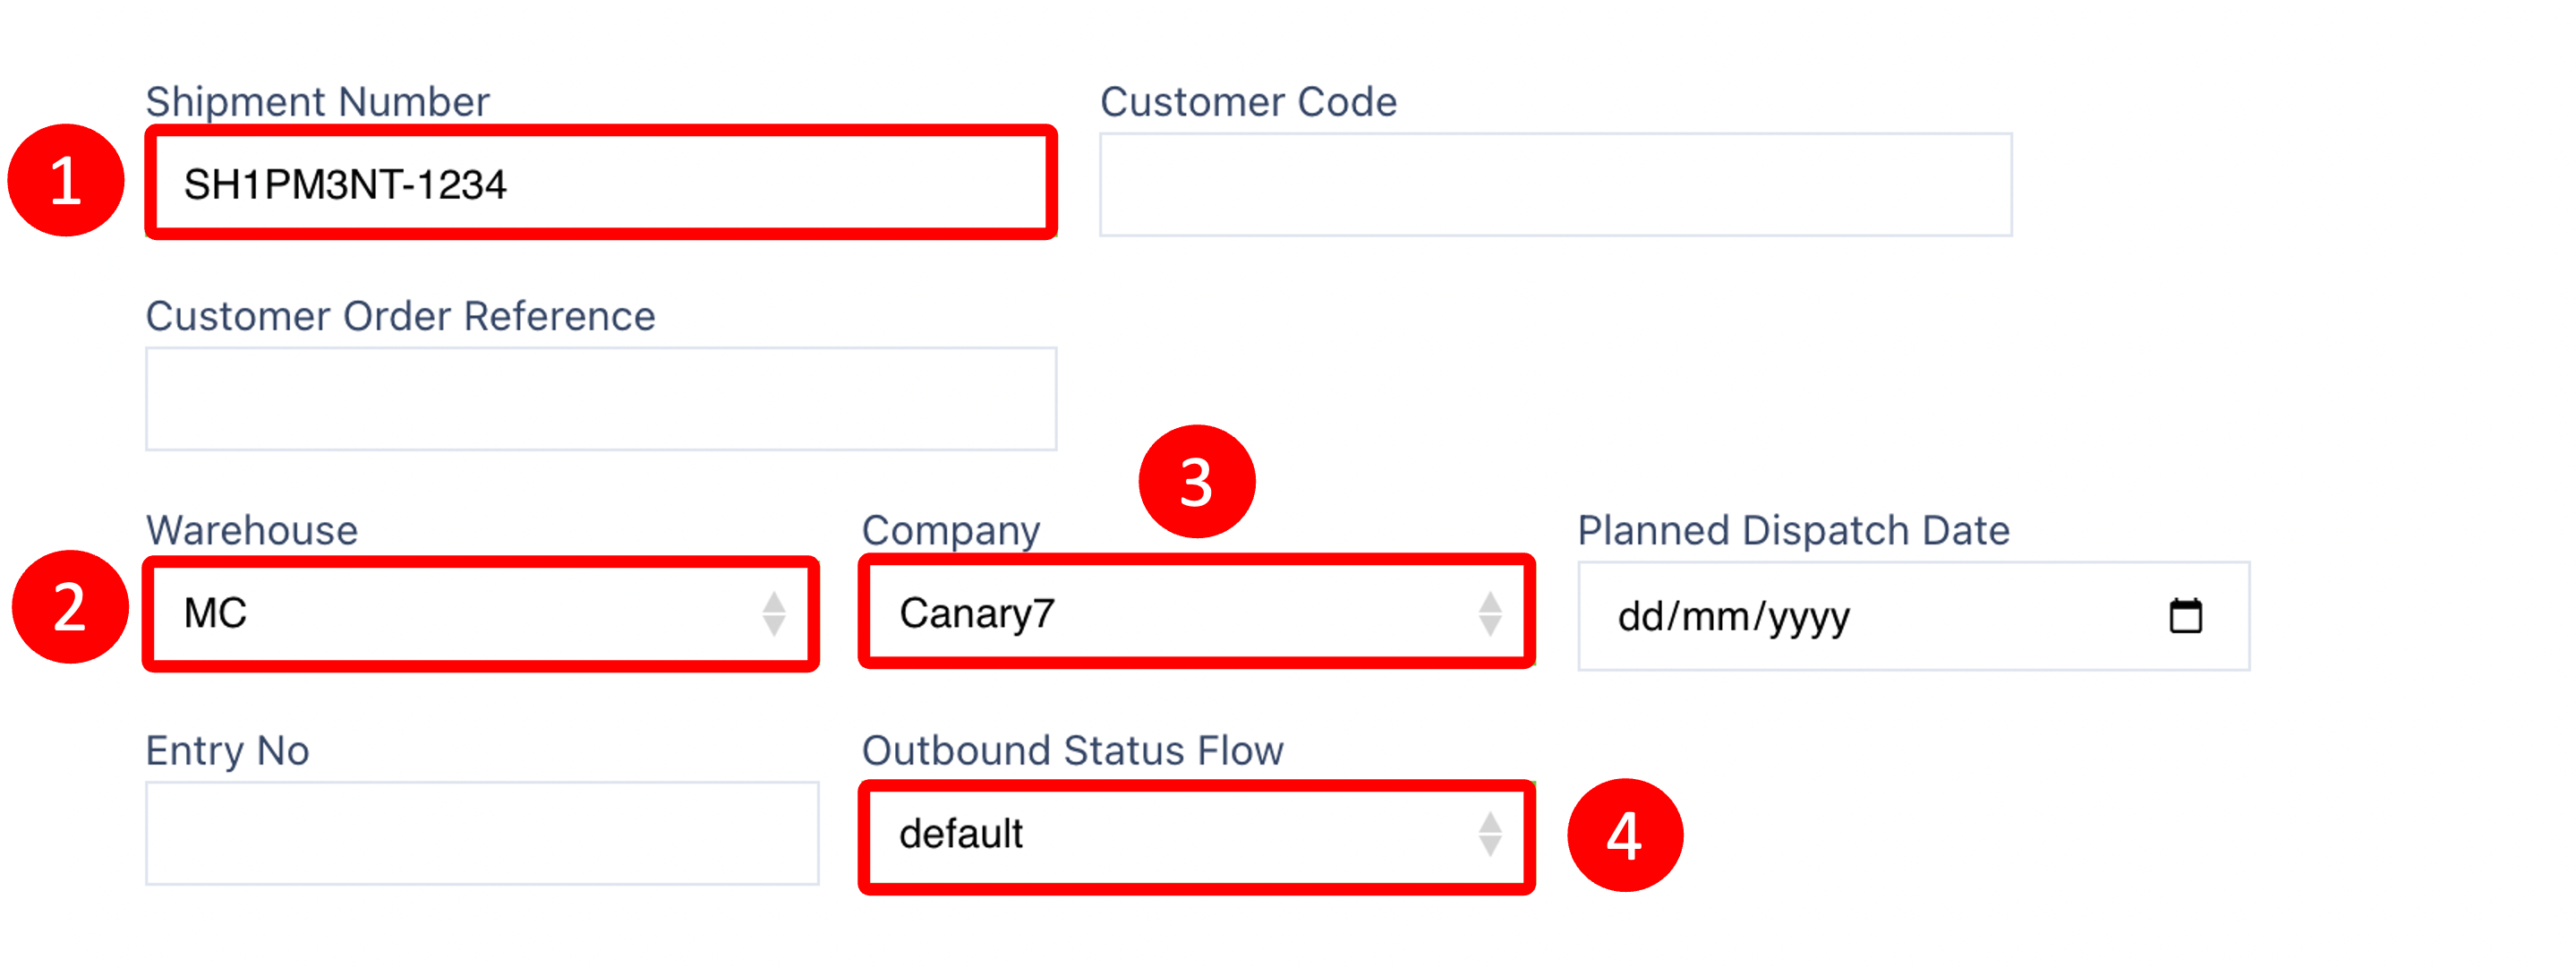
Enter or Select the following:
- The Shipment Number
- The Warehouse
- Company
- Outbound Status flow
Click on the Next button  to continue to the next page.
Ship to Tab
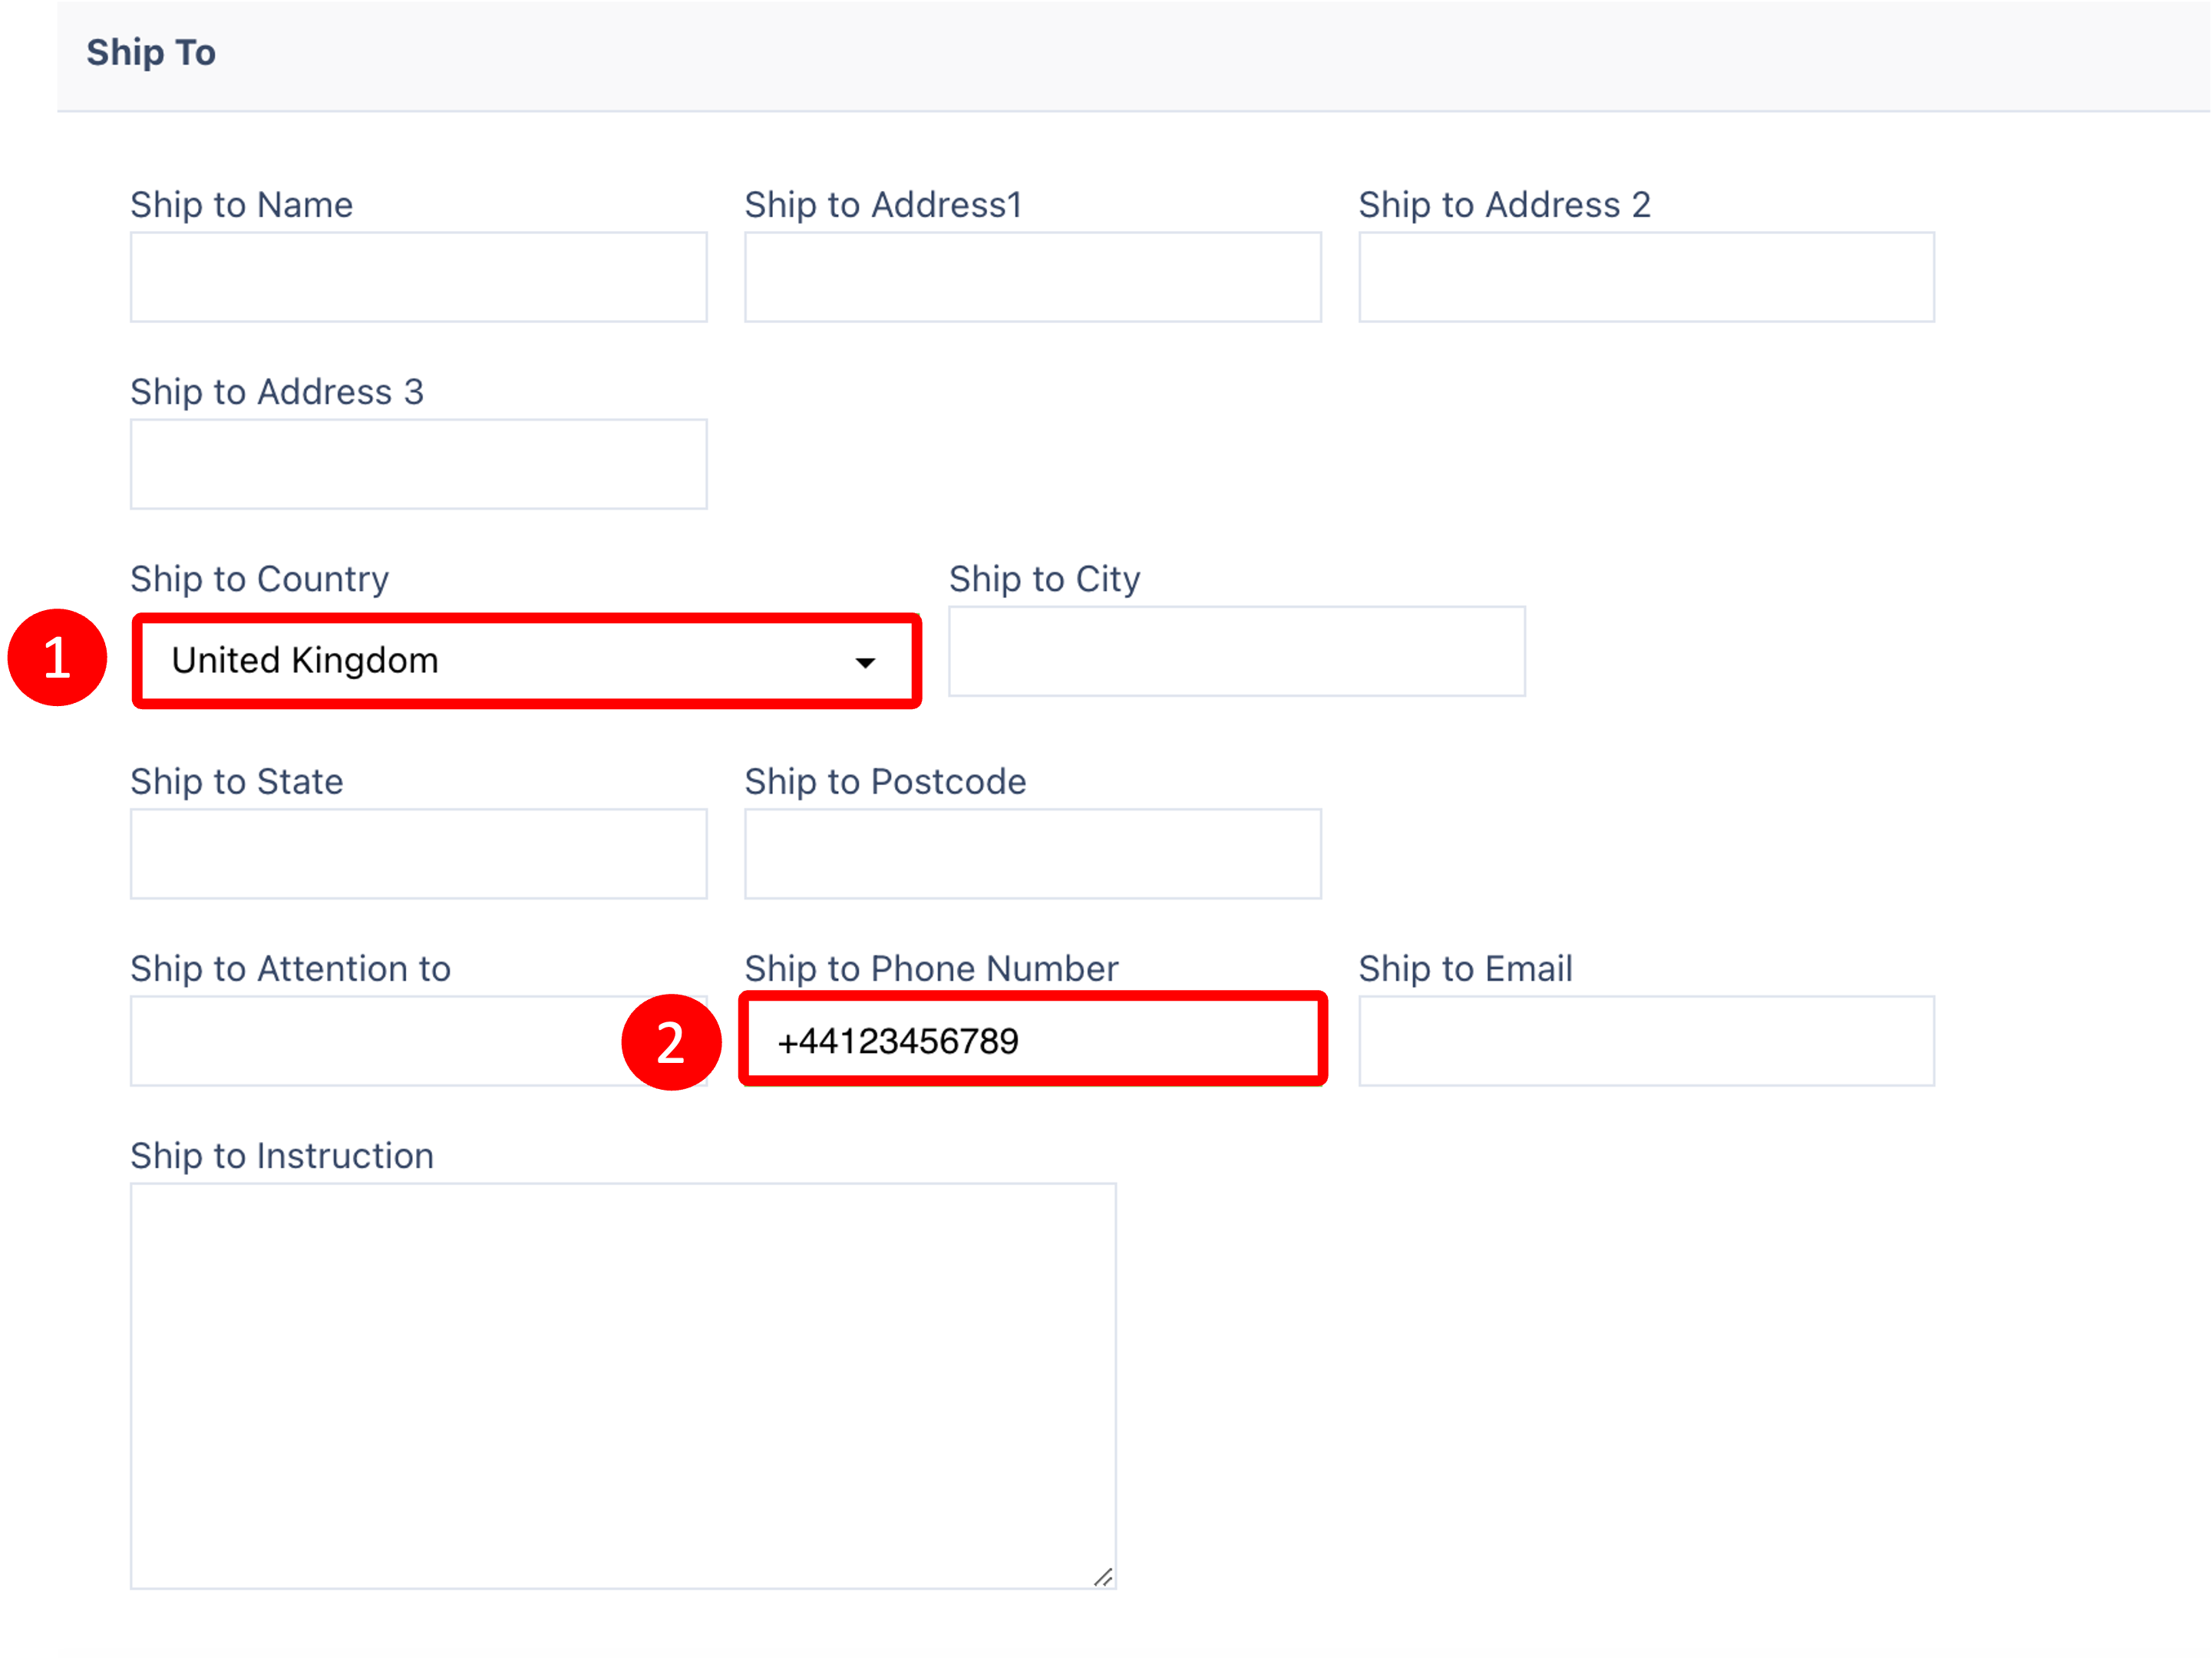
Enter or Select the following:
- Ship to Country
- Ship to Phone Number
Click on the Next button  to continue to the next page.
Carrier Tab
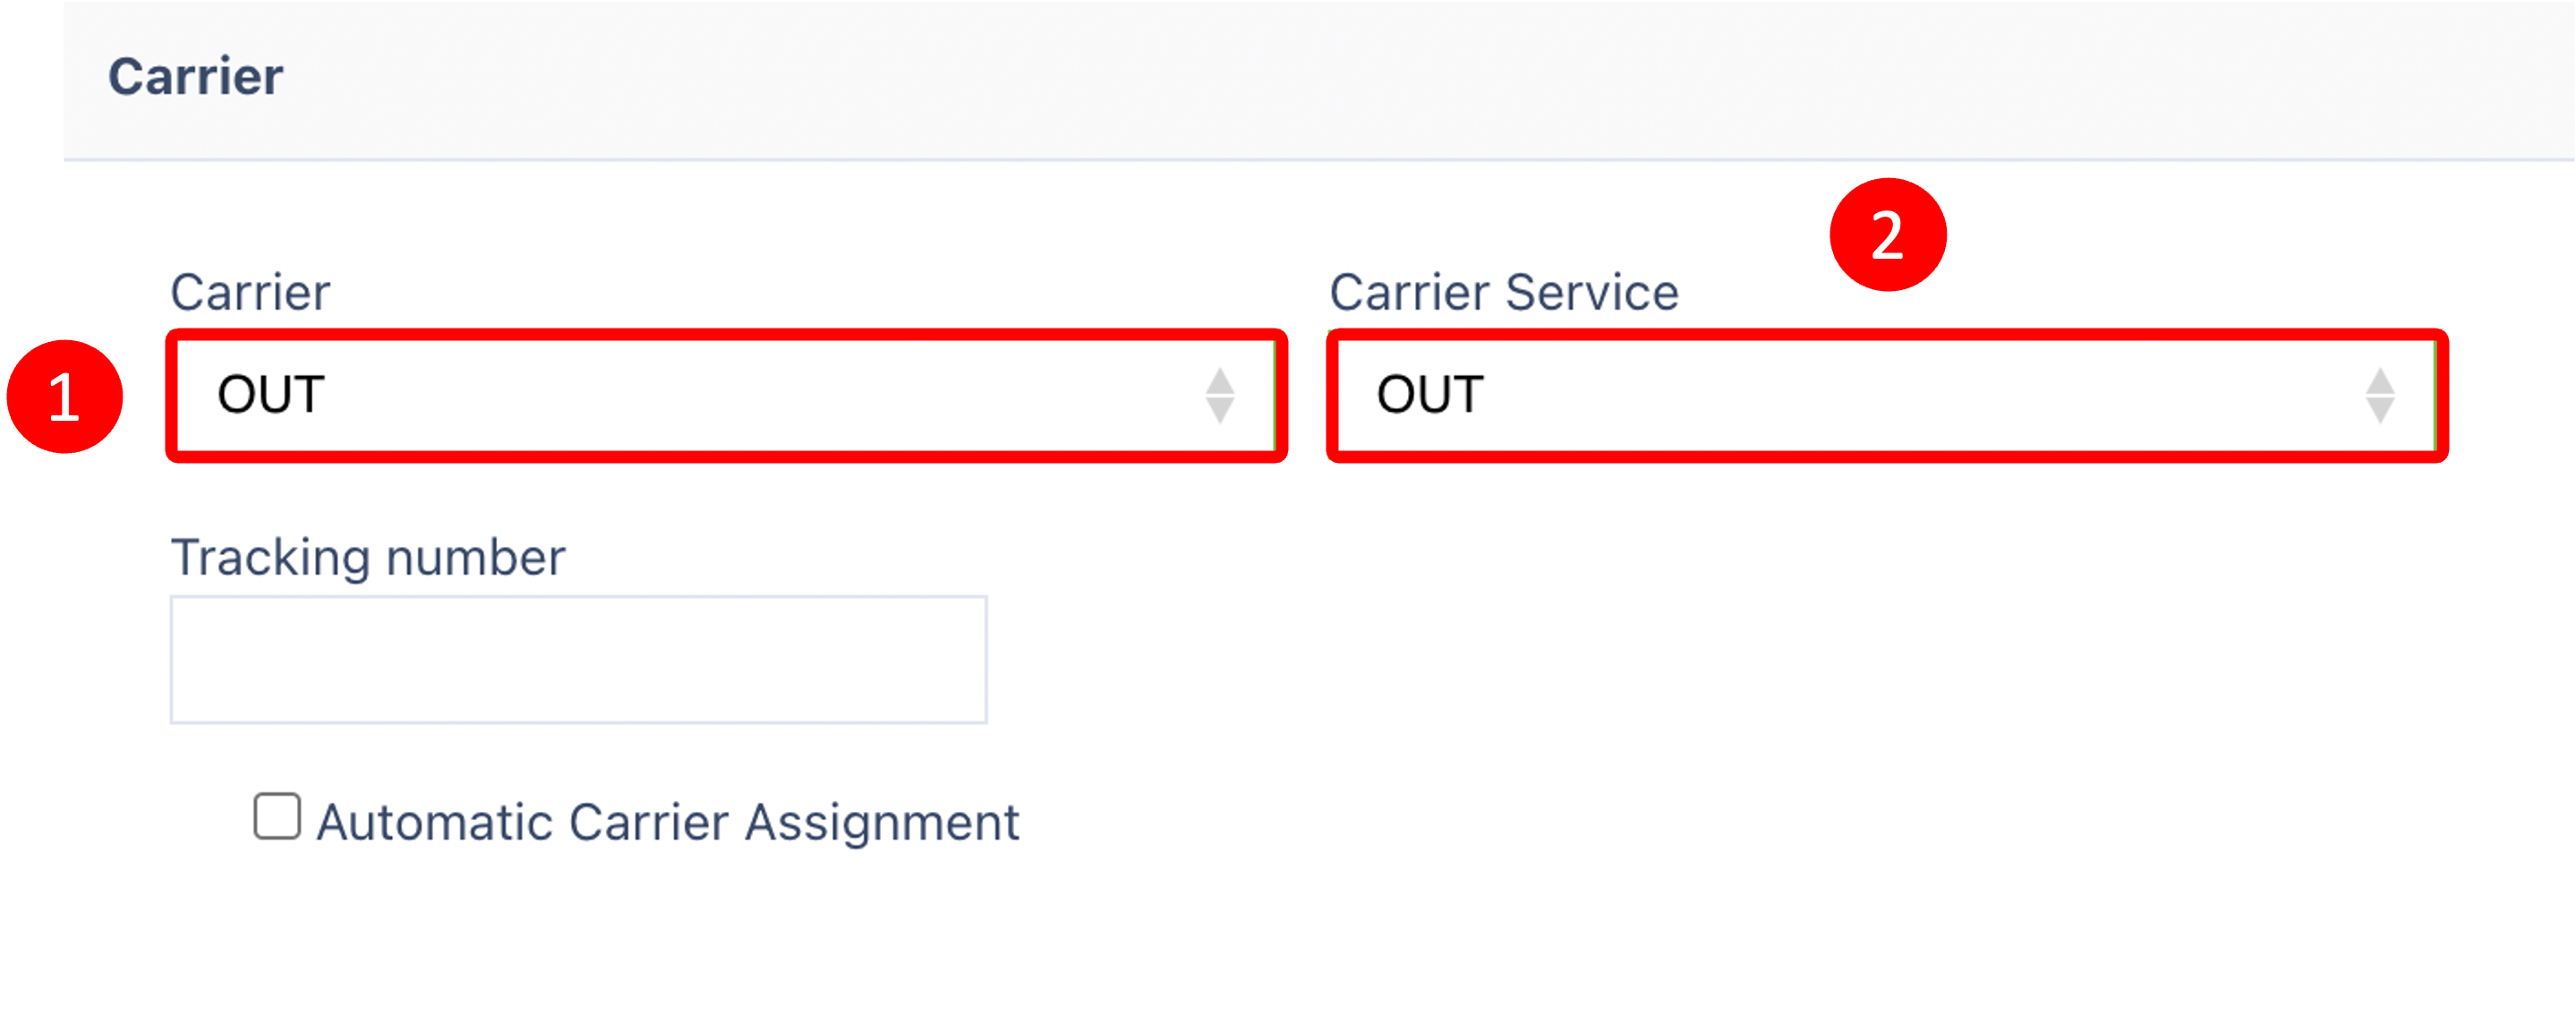
Select the following:
- Carrier
- Carrier Service
Click on the Add Items button  to continue to the next page.
Items Tab
Within this Items Tab click on the Red Action Button , this will bring up a drop-down menu, and select "Add".
This will bring up a new tab, all fields in this tab are mandatory.

When all fields are entered, click on the Apply button  to add the item, and your shipment will now be fully added.
Video Tutorial -
Adding Shipments via Import CSV
Step 1: Download Template
Use the provided shipment import template.csv.
Importing the CSV
Within Shipping Enquiry, click on "Shipment".
Within this Shipment Tab, click on the Red Action Button , this will bring up a drop-down menu, and select "Add"
Choosing File
The next step is to click on "Choose File".

Locate and choose your file by clicking on "Open".
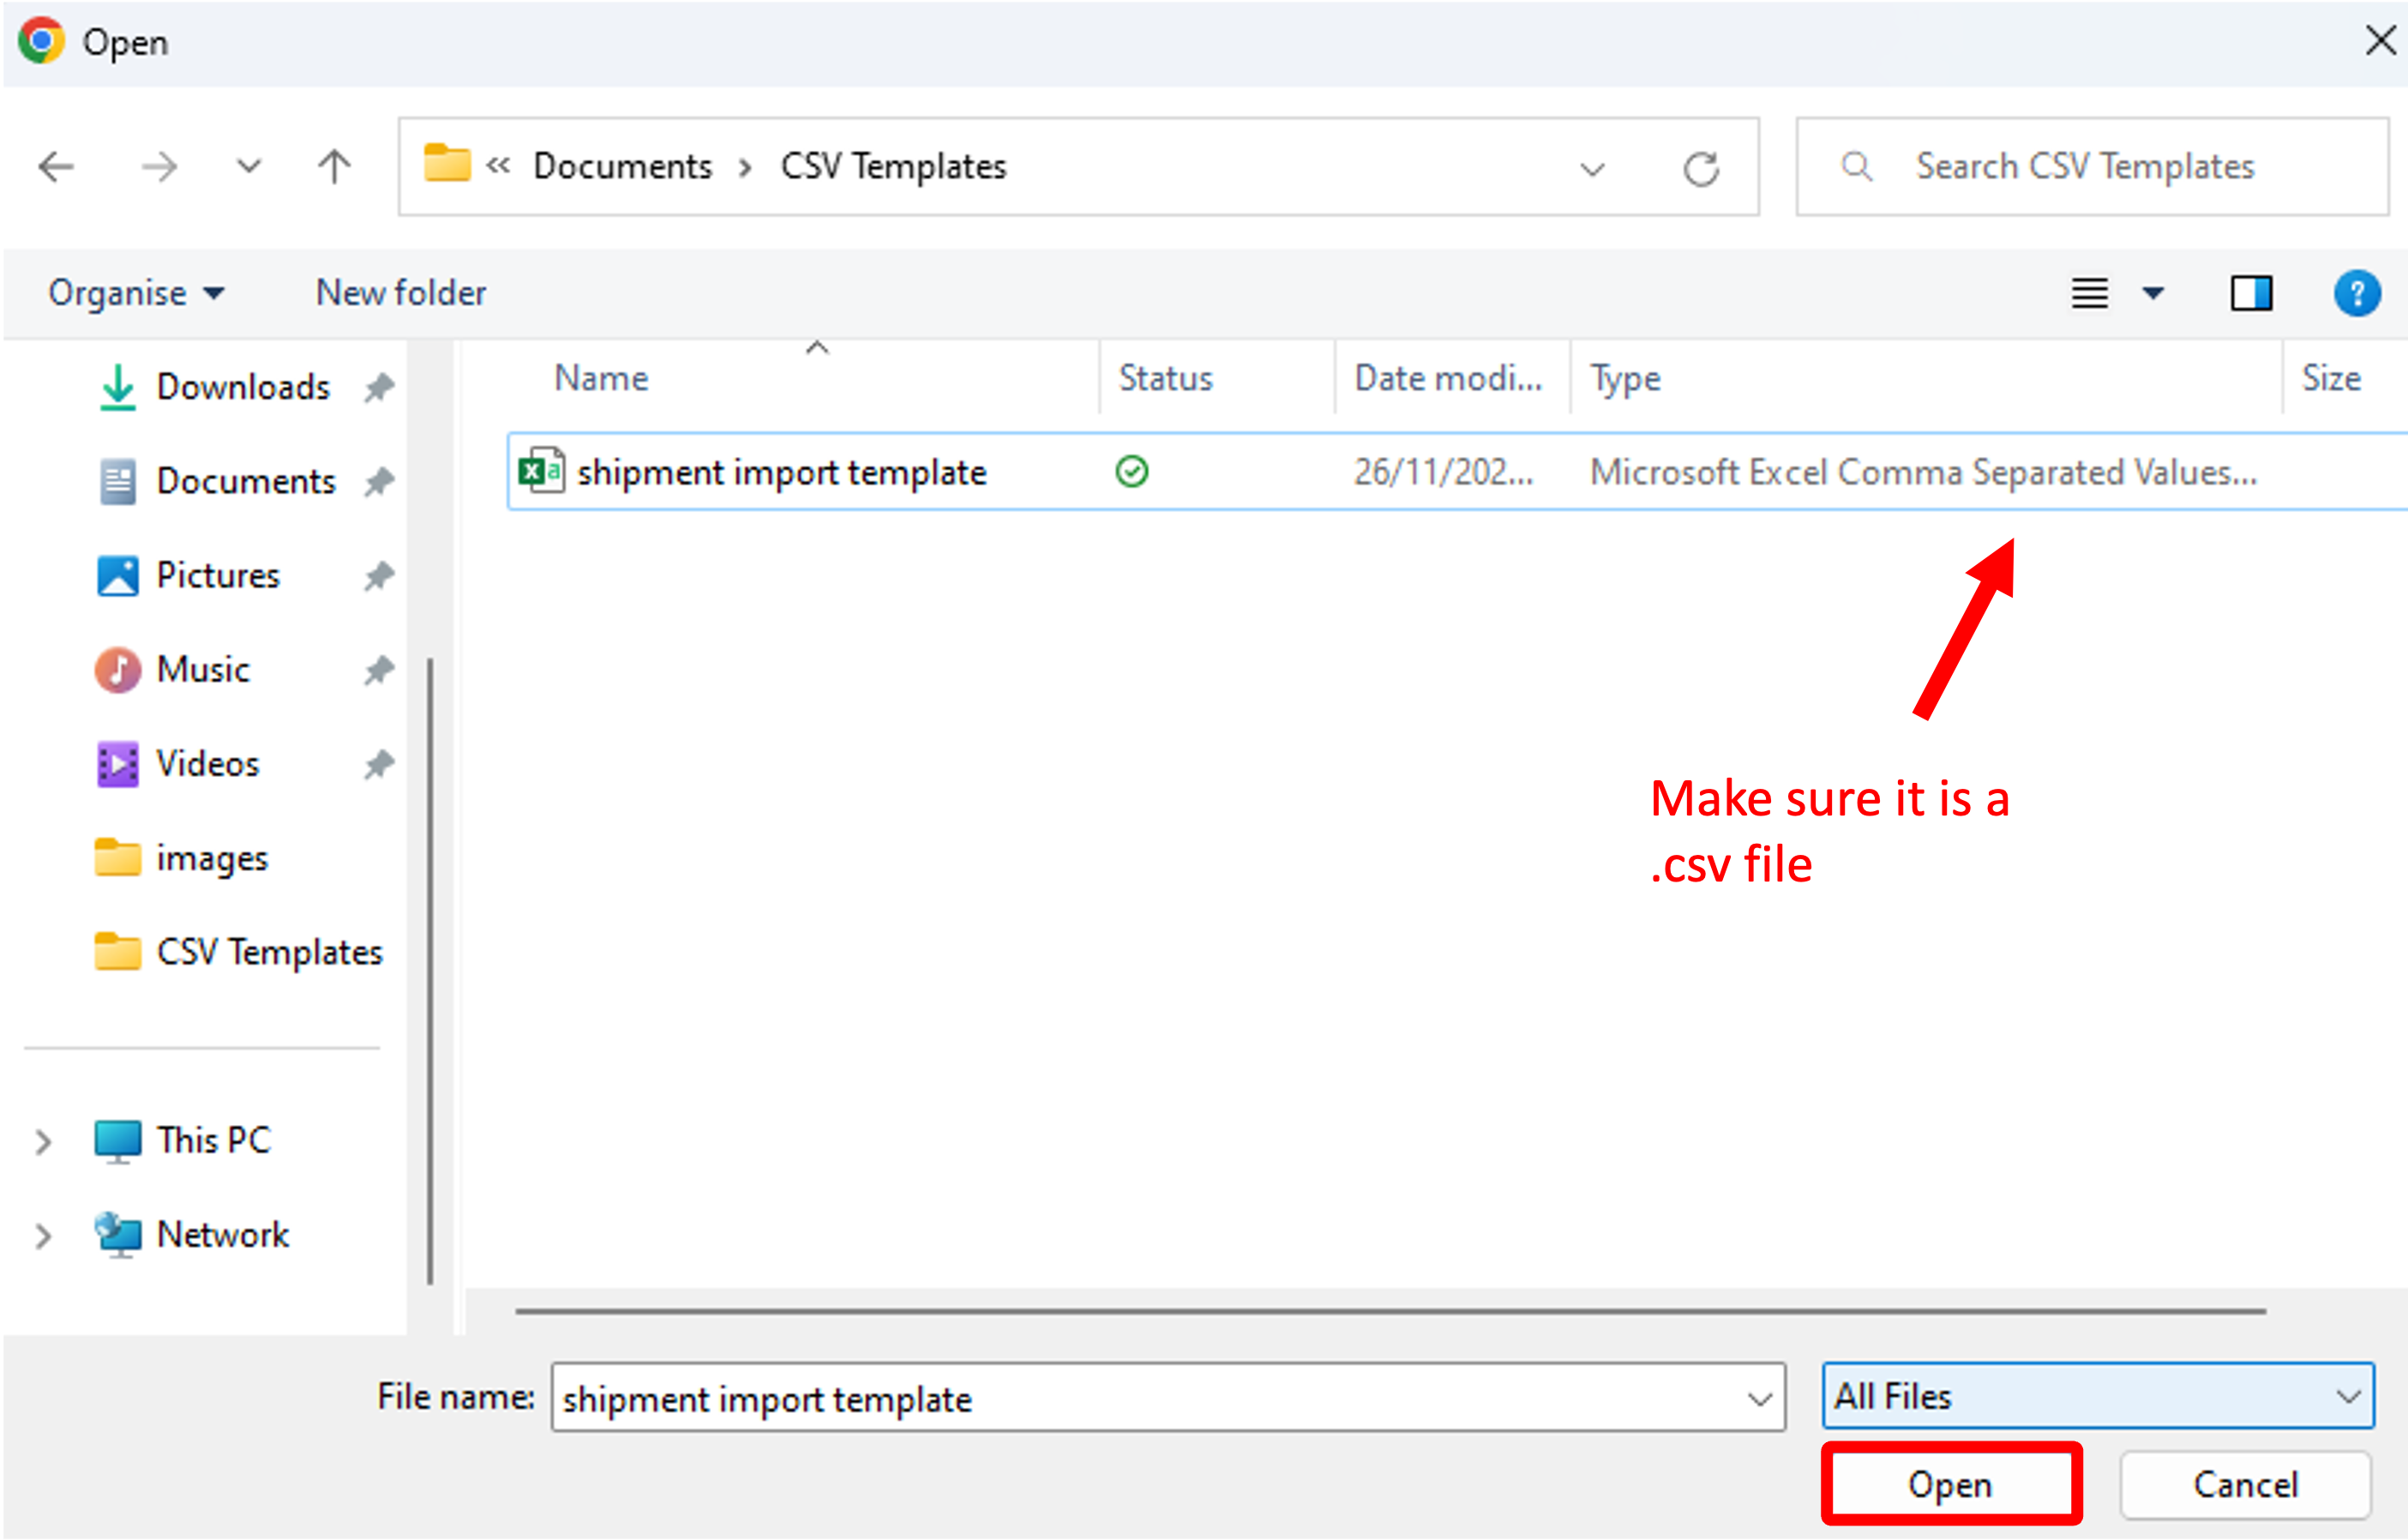
Select the following:
- Warehouse
- Company
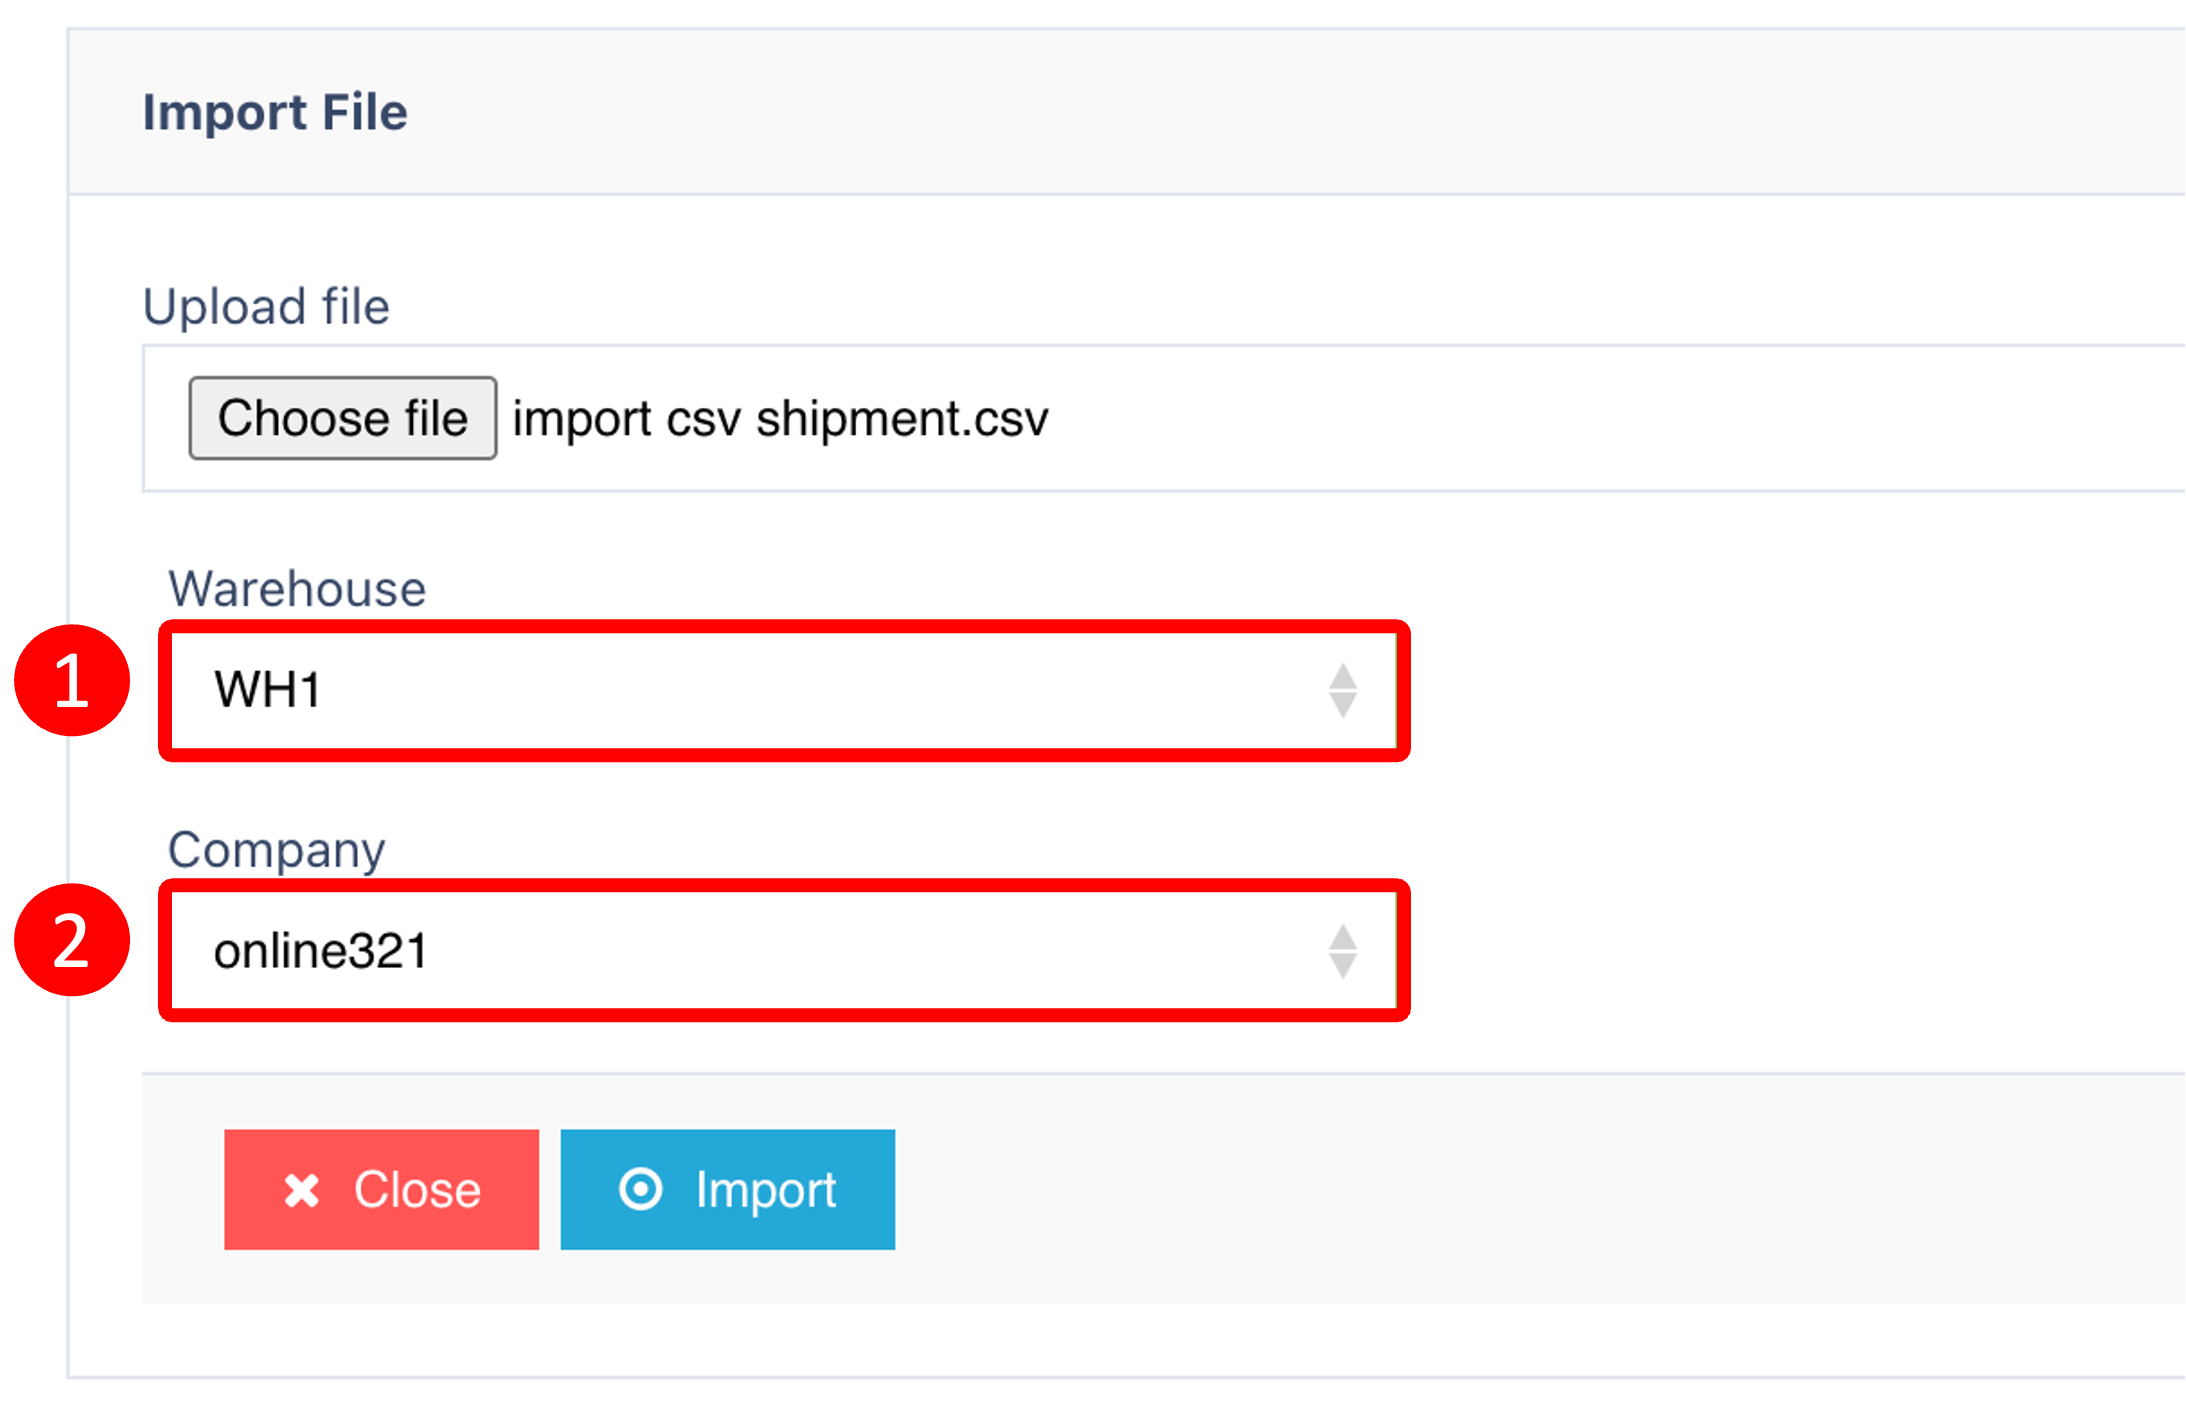
Once you have selected and entered the required fields, click on the Import button to upload your file.
Manually Closing a Shipment
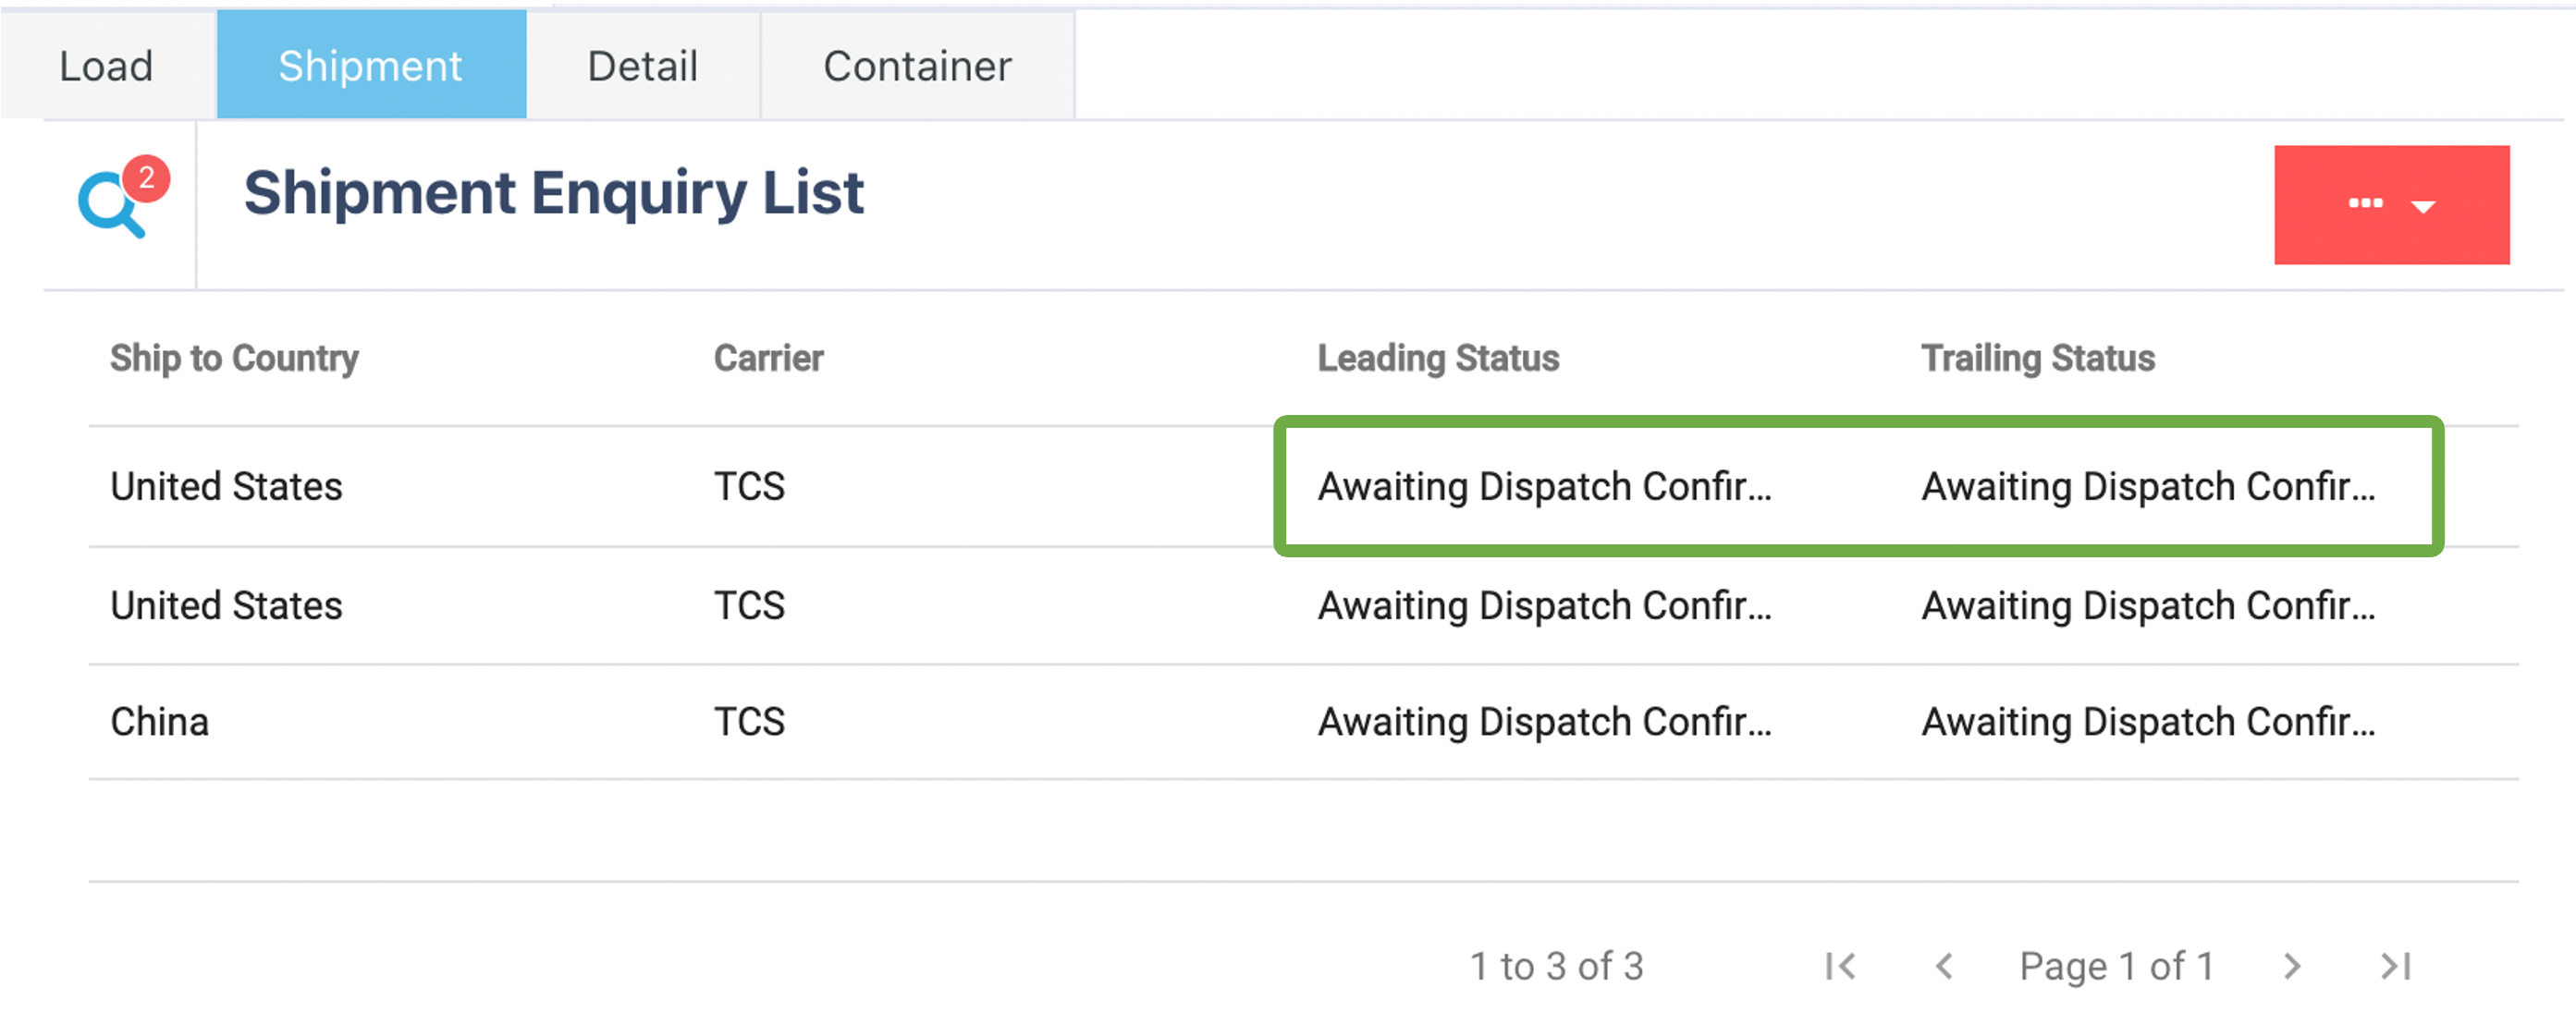
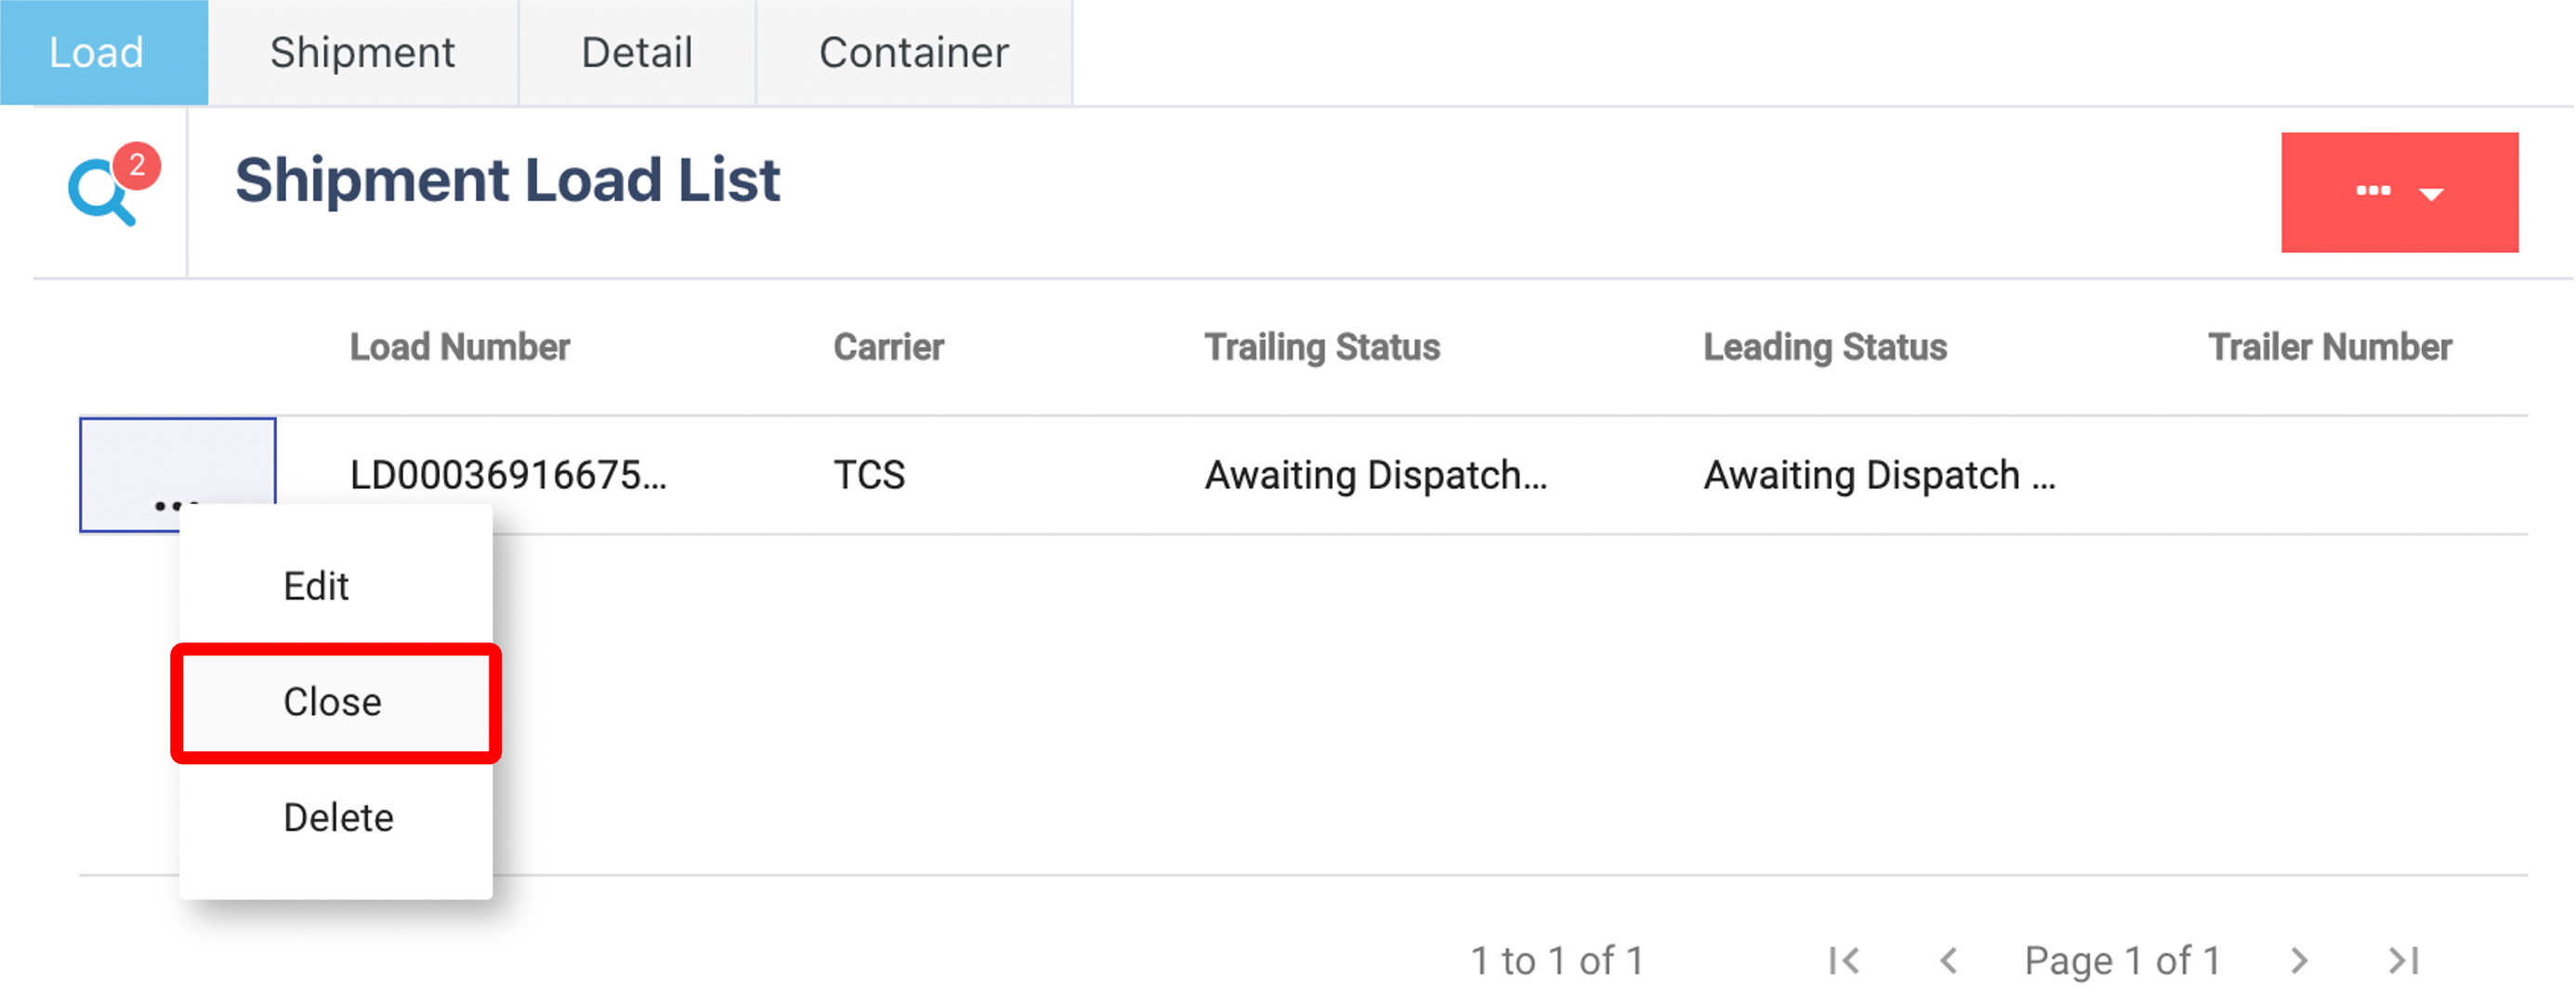
You will know your shipment is ready to be closed if the Leading and Trailing Status are "Awaiting Dispatch Confirmation", as shown above.
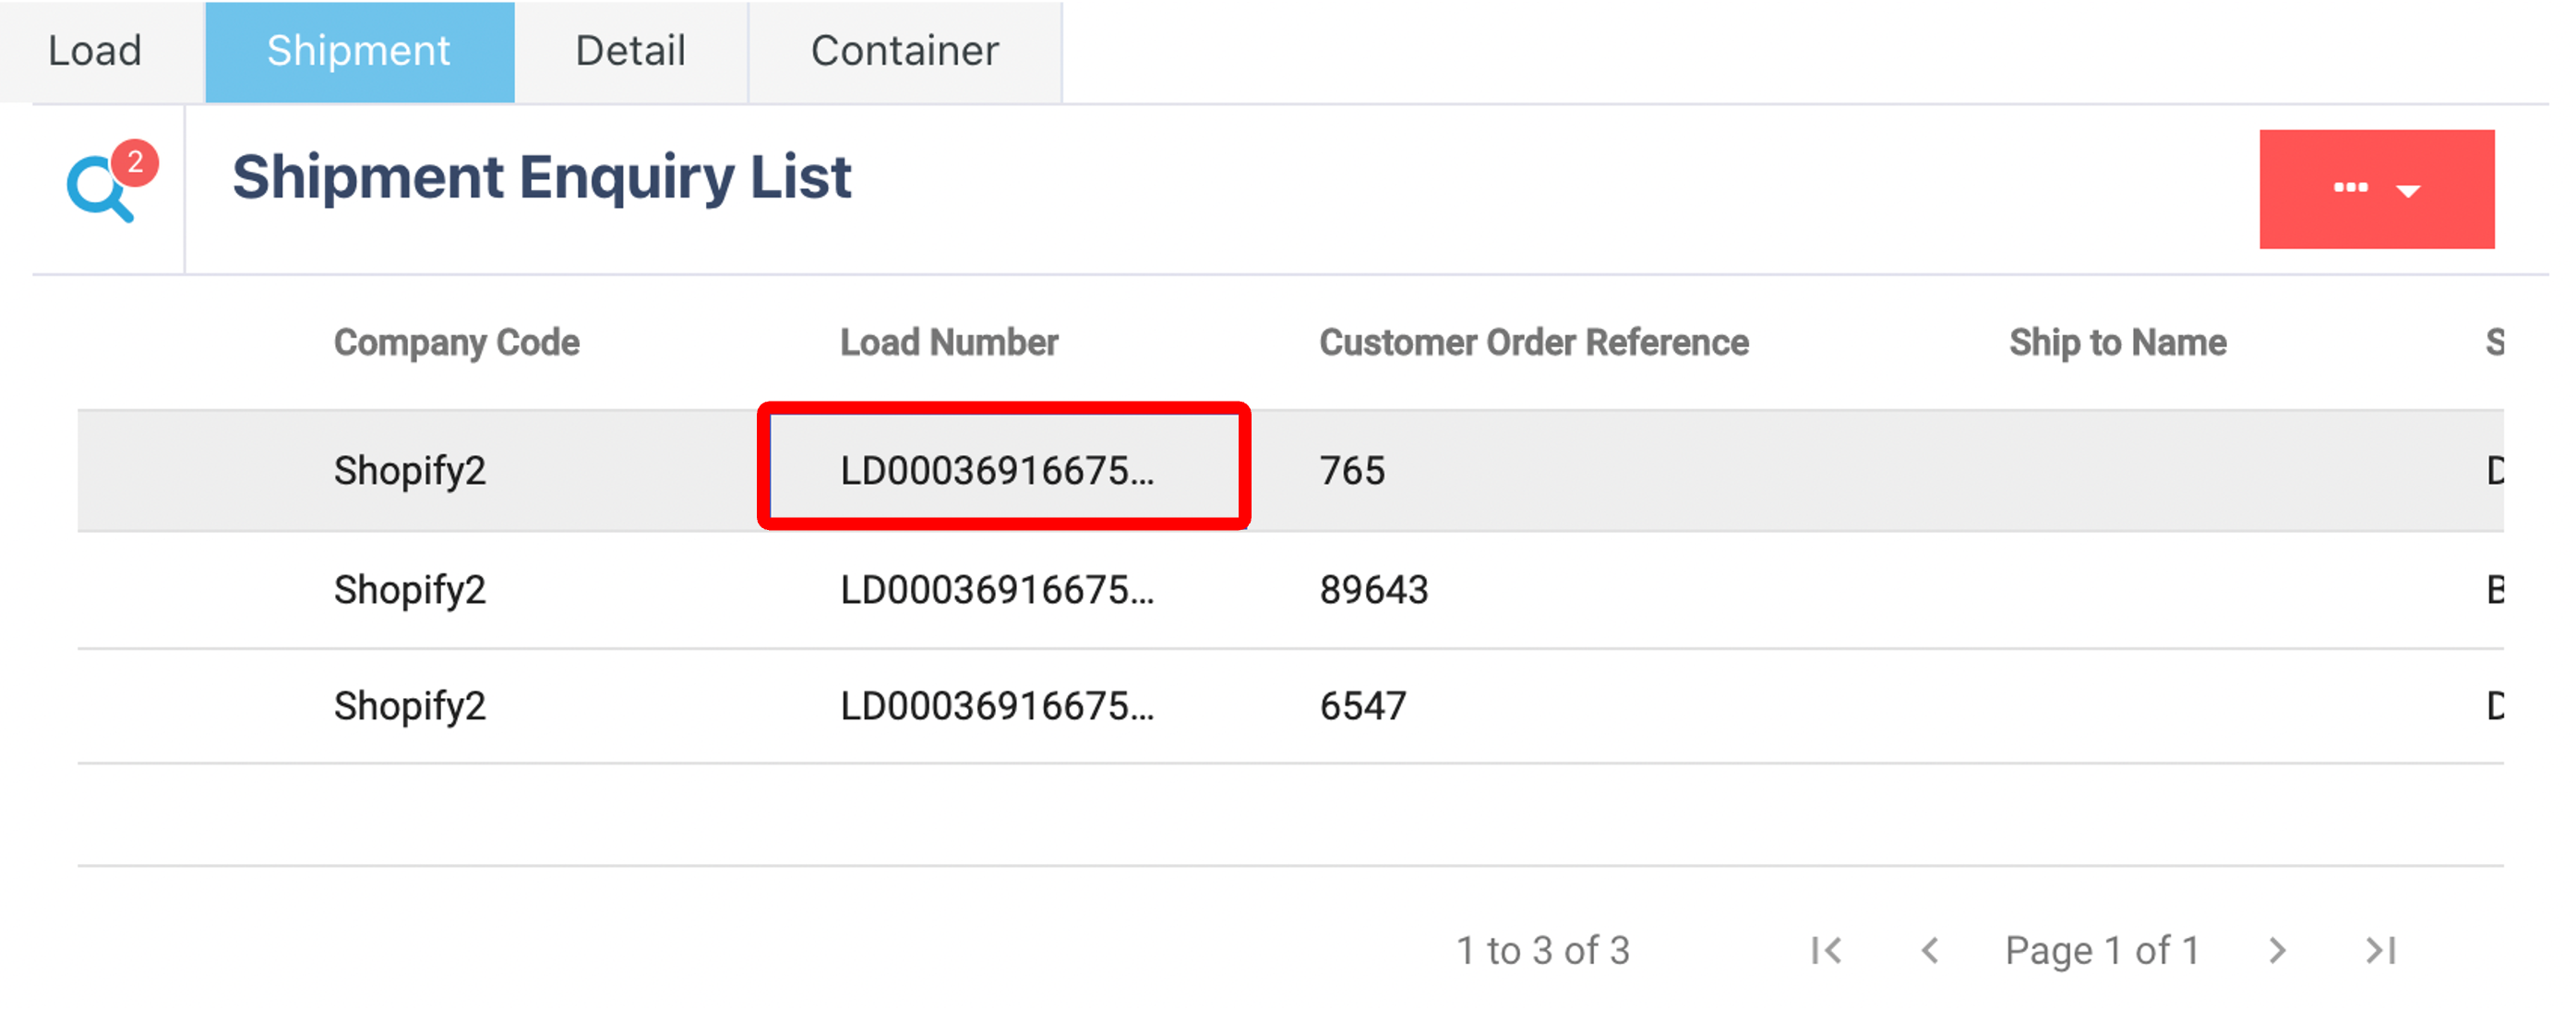
.
How to Close:
Ensure the Leading and Trailing Status = "Awaiting Dispatch Confirmation".
Copy the Load Number from the shipment record.
Go to the Load tab and search by Load Number.
Once found, click the Ellipsis (•••) menu and select Close.