Understanding Carrier
What is a Carrier?
A Carrier is a company responsible for transporting goods from one location to another, ensuring deliveries reach their correct destination. Carriers can be integrated directly into Canary7 or manually managed depending on your setup.
🔍 Accessing Carrier
You can access the Carrier setup in two ways:
Use the Navigation menu and type
"Carrier"into the search bar.Or go to: Configuration > Shipment Profile Setup > Carrier
➕ Adding a New Carrier
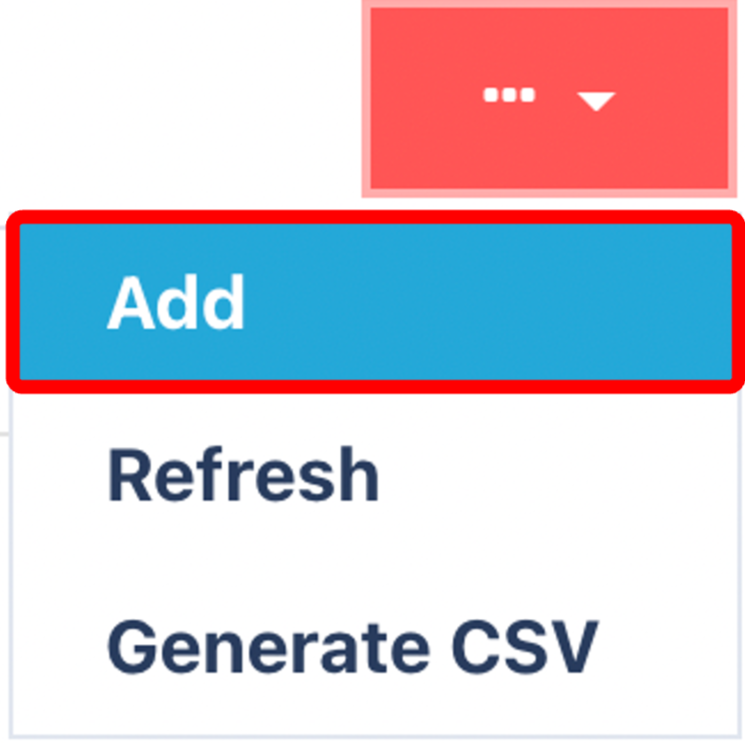
Click on the Red Action Button , this will bring up a drop-down menu, and select "Add"

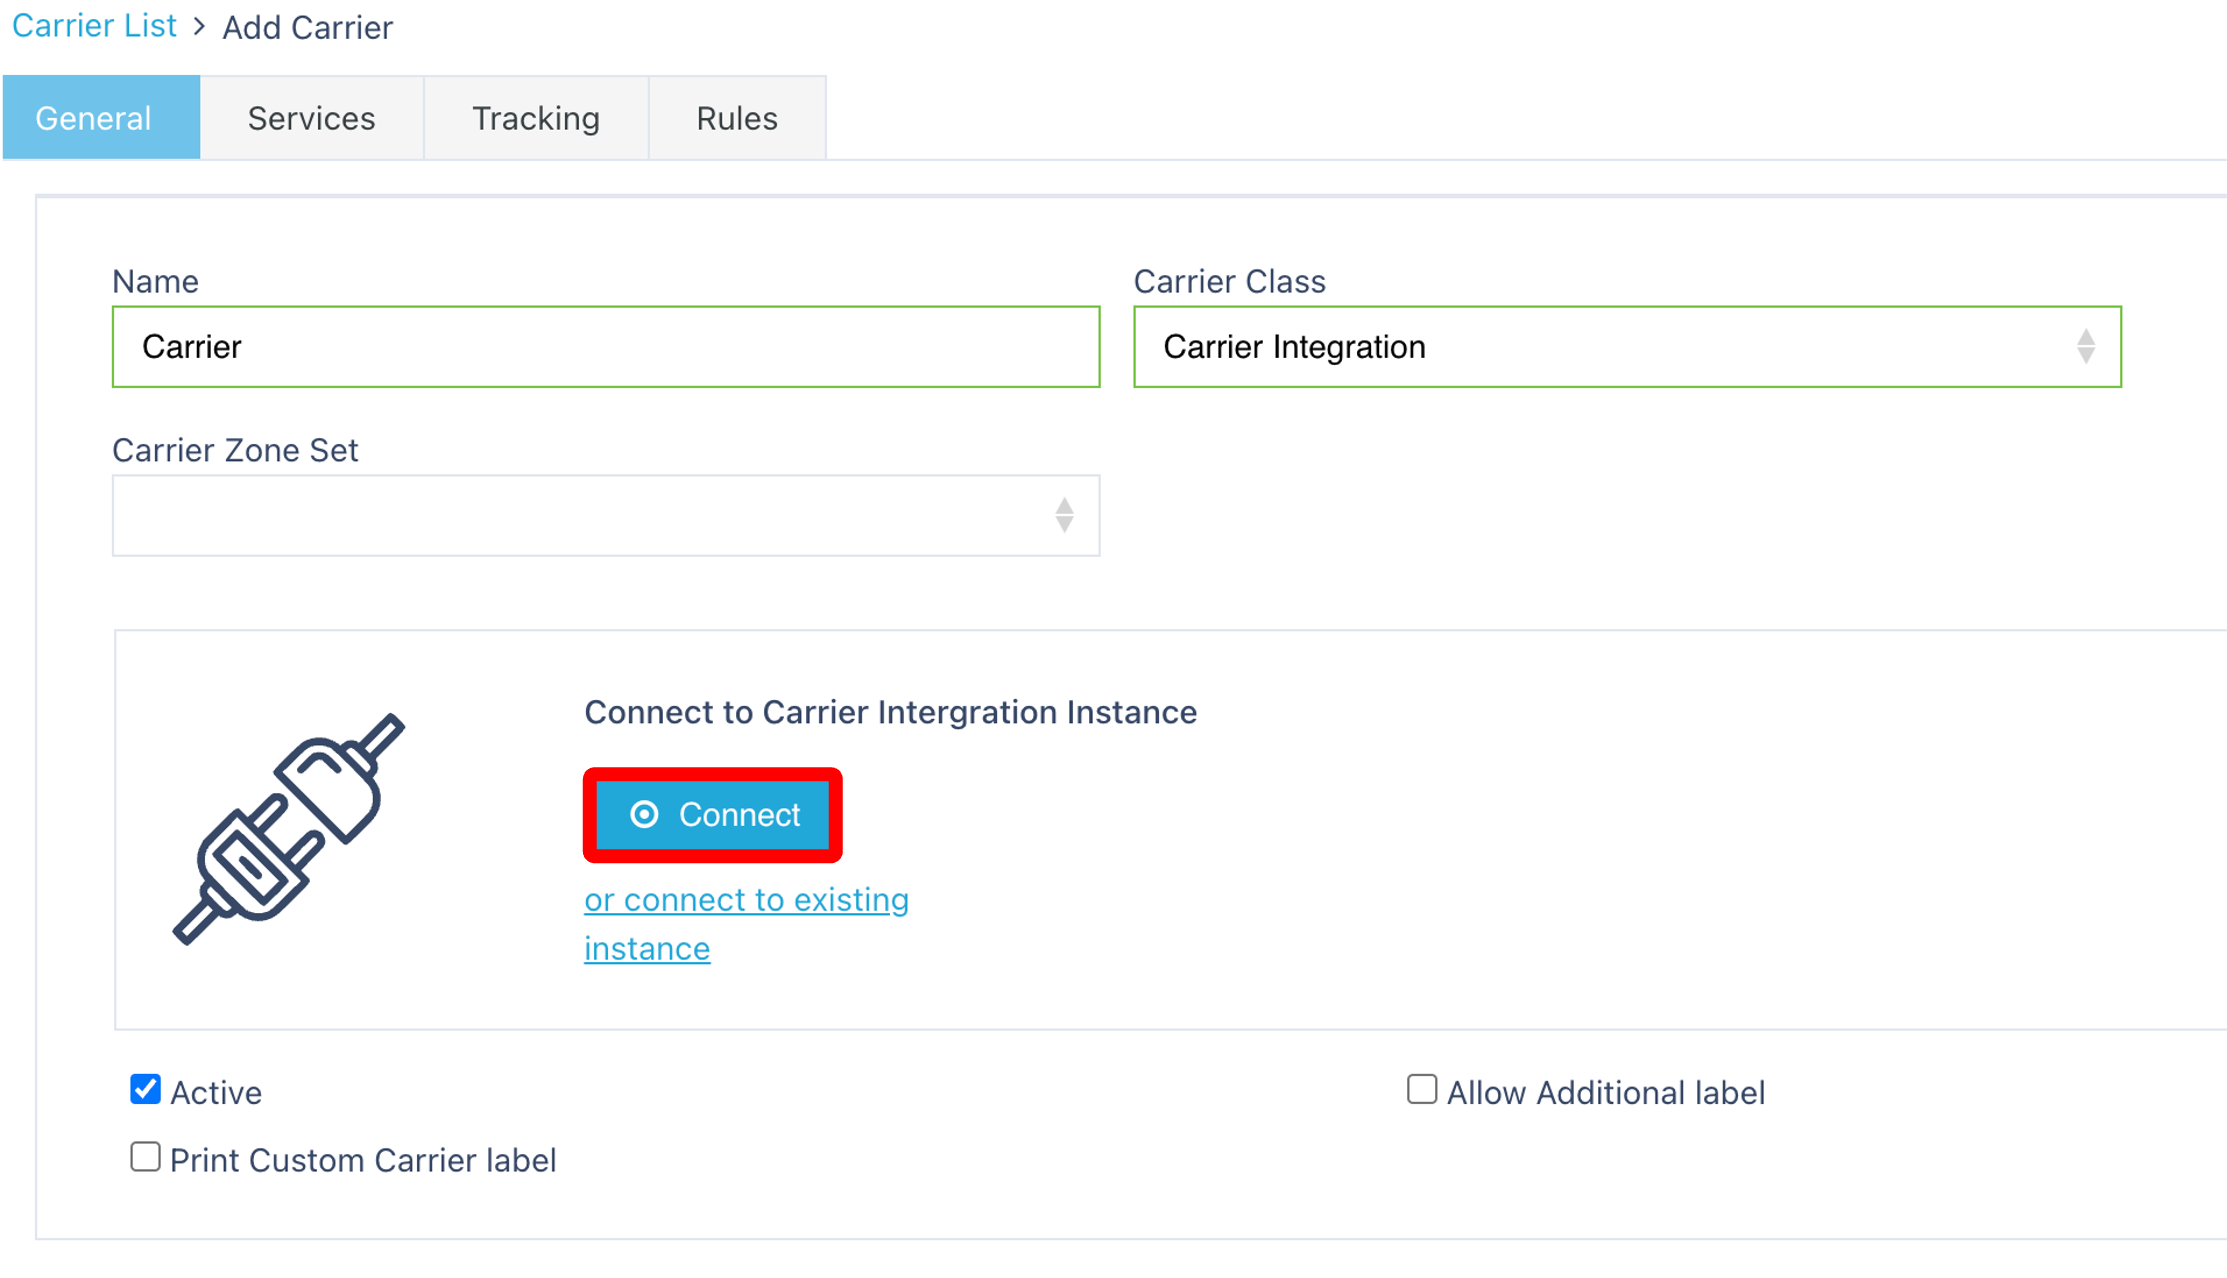
Complete the General Tab

Complete the General Tab
Enter the Name of the Carrier.
Select the Carrier Class (e.g., Manual, Integration).
- If you choose an Integration-based Carrier Class, a Connect button will appear.

🔗 Supported Integrations (as of 2025)
When integrating with a carrier, click Connect and choose from one of the following:
Royal Mail (Pro Shipper Account)
Royal Mail Click & Drop
Parcel Force
GLS
Yodel
DPD UK
DPD Local
GFS
DHL
Evri
APC
FedEx
Palletways
Pallex
USPS
UPS
An Post
Browns
Amazon Buy Shipping
TikTok Shop Shipping
Landmark
RollsFreight
💡 Ensure Active is checked to make this carrier visible in Canary7.
Optional toggles include:
✅ Allow Additional Label
✅ Print Custom Carrier
Then click Add Services to continue.
📦 Adding Carrier Services
Once your Carrier is created:
In the Carrier list, locate the Carrier.
Click the three dots (⋮) next to it and choose Edit.
Then click Add under the Services tab.

Click on the Red Action Button , this will bring up a drop-down menu, and select "Add"

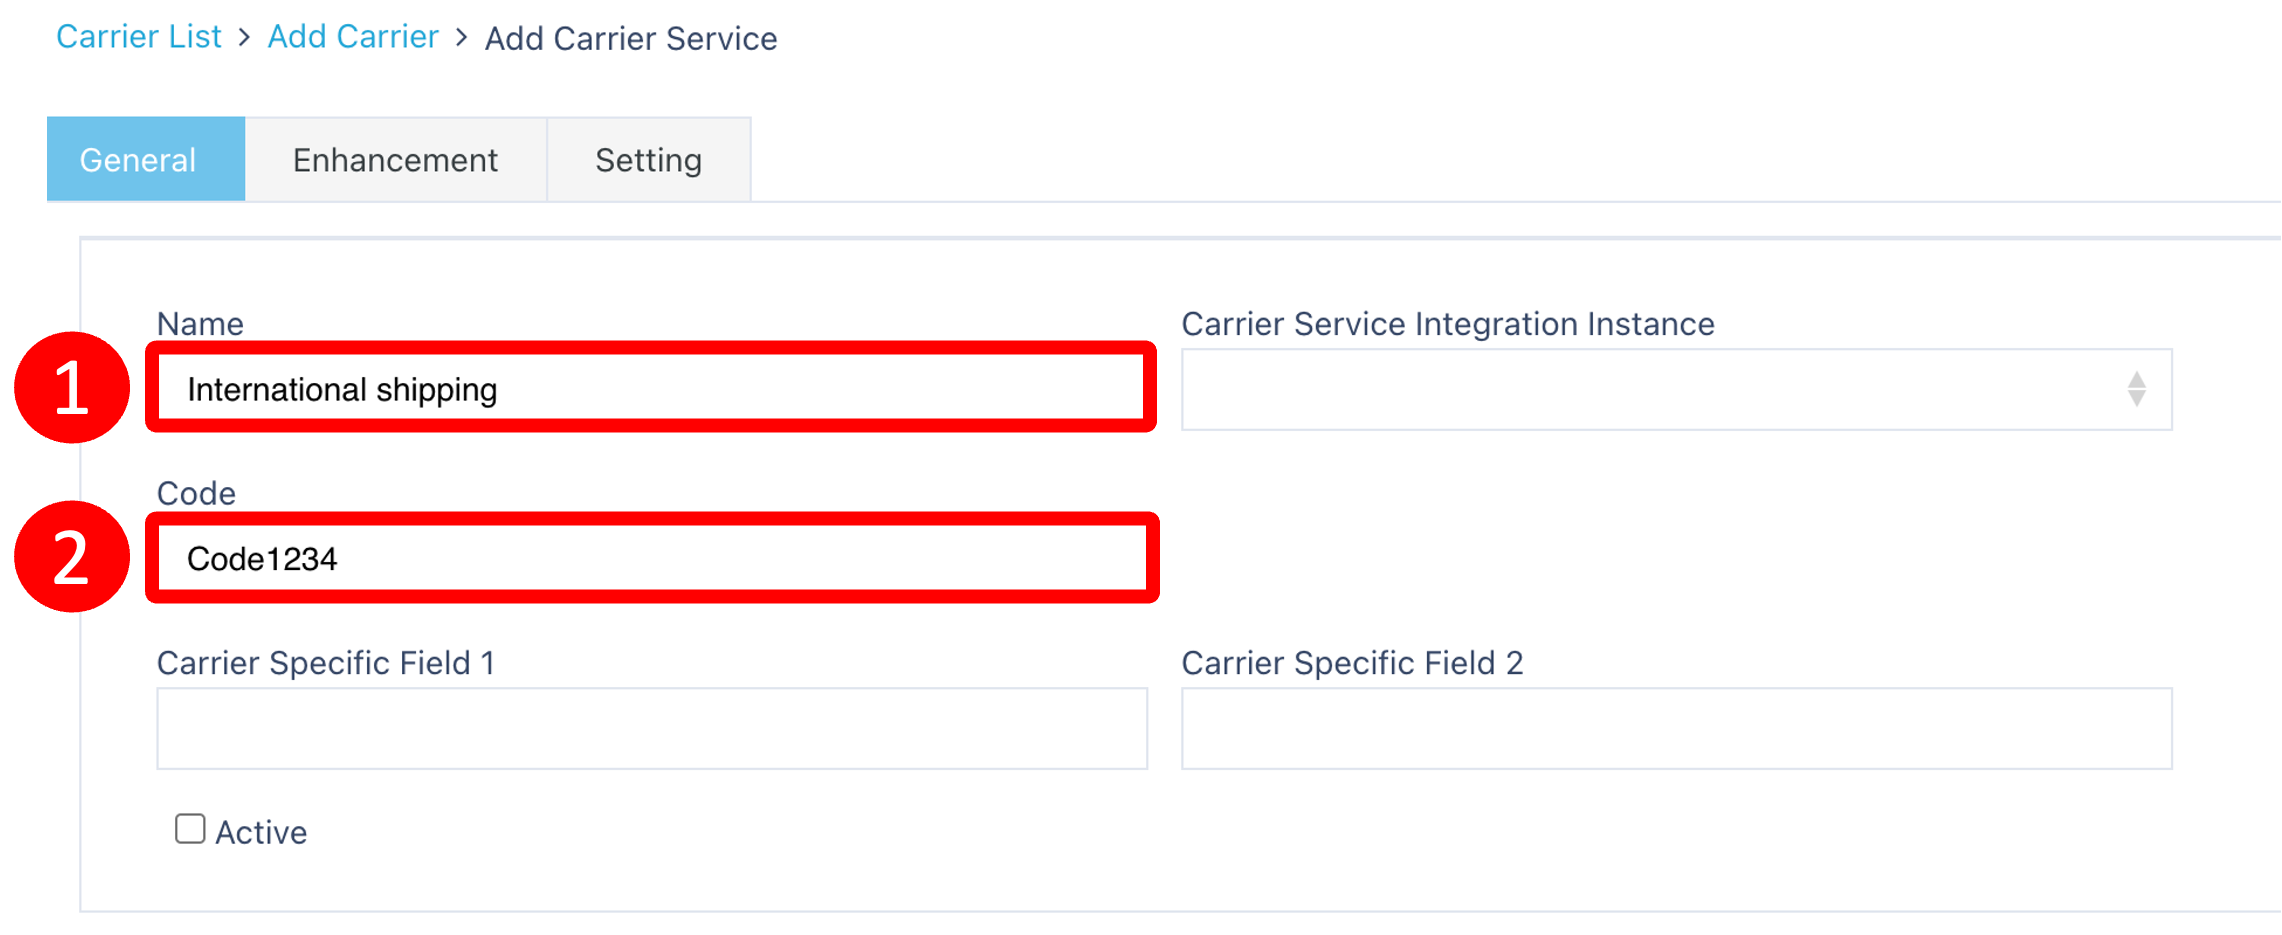
Mandatory Fields:
Name
Code (used for API connections)
📌 Ensure Active is checked if you want the service available for selection.
Click Apply when done.
🔗 Adding Tracking URL
Enter the Carrier tracking URL, which usually will contain the tracking number or postcode.
🔗 Adding Tracking URL
You can assign a tracking URL to each Carrier to support tracking links on shipments.
This usually includes a placeholder such as a tracking number or postcode, e.g.:
⚙️ Adding Rules to Carrier
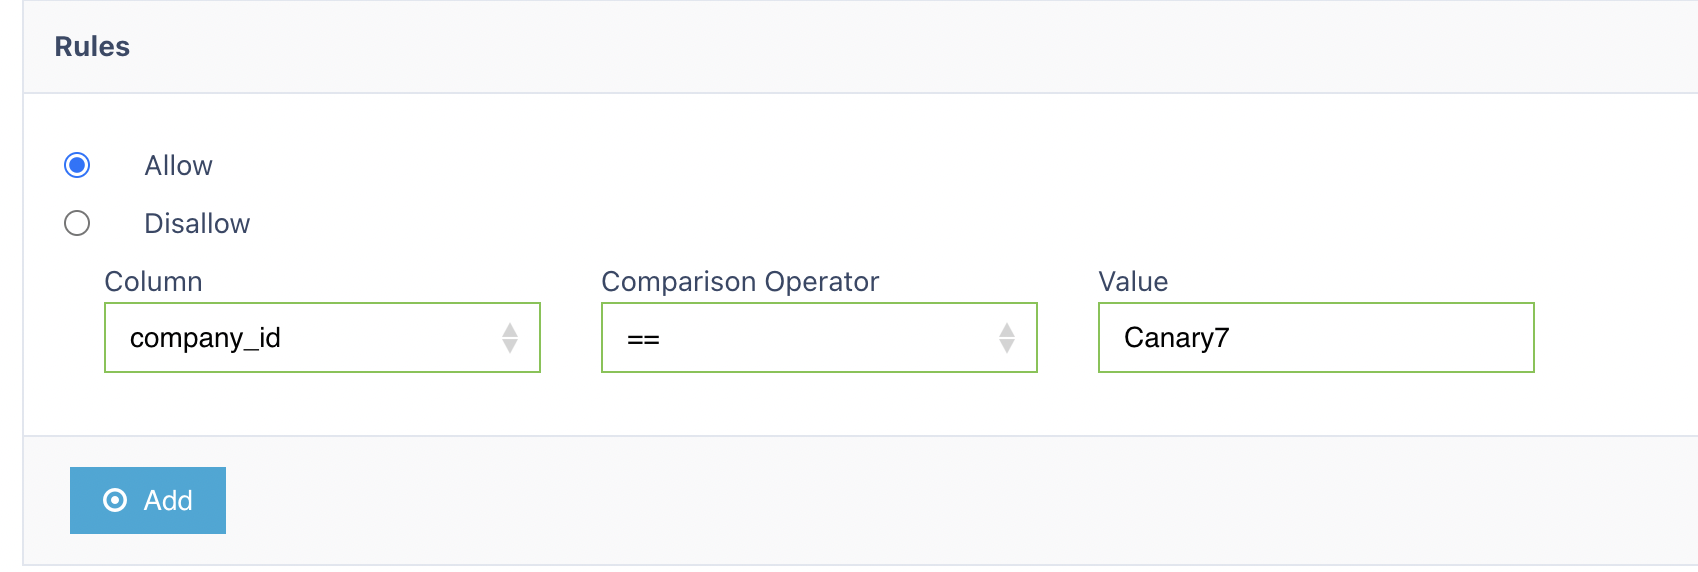
You can configure specific Rules for the Carrier, such as filtering by:
Company
Shipment Type
Priority
Destination

Company
Shipment Type
Priority
Destination
To do so:
Open the Carrier.
Navigate to the Rules section.
Enter your condition.
Click Add to insert it.
Repeat for additional rules as needed.
Once you have selected and entered the required fields, click on the submit button.png) to add.
to add.